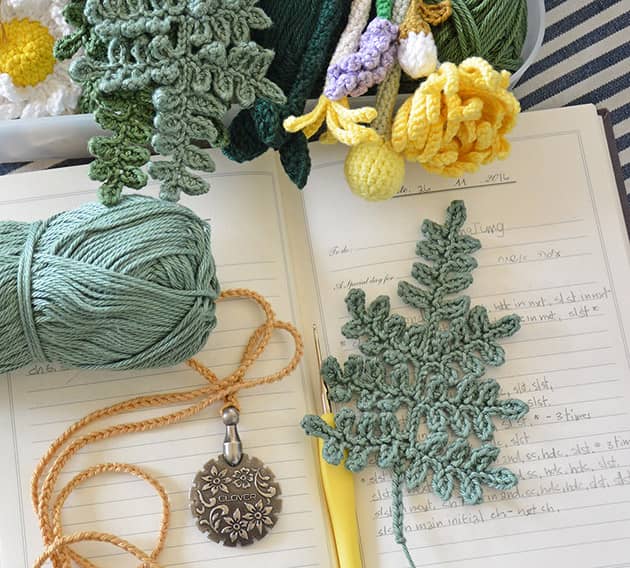
 These fern leaves are a tiny little version of my Fern Greenery Pattern – which made inspired by the outstanding fern leaves of the Japanese textile artist Jung Jung. I remember hours by hours staring at her breath taking crochet vegetables and leaves. I designed a few botanical patterns inspired by her: The Chamomile bouquet, The Chrysanthemum and a few more patterns that we made here during my workshops and aren’t yet available in English. Please comment if find them interesting.
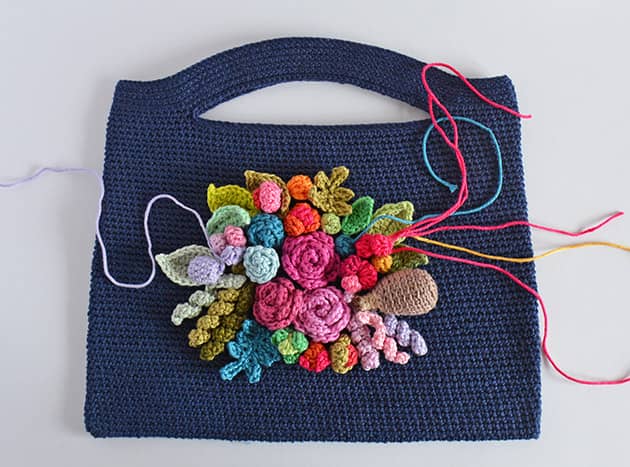 I designed this tiny fern version to be a part of my Joyful Bouquet that was planed to placed on the front centre of my Skinny purse. It’s a simple and quick little leaf and I think it can be a super chic addition to any flower-y project you are in to. Today I am going to share with you this pattern followed by pictures along the tutorial, to help you make it just as I did. You can find a ‘just words’ pattern at the end of this post which you can copy paste and print, in case you don’t need the step-by-step pattern.
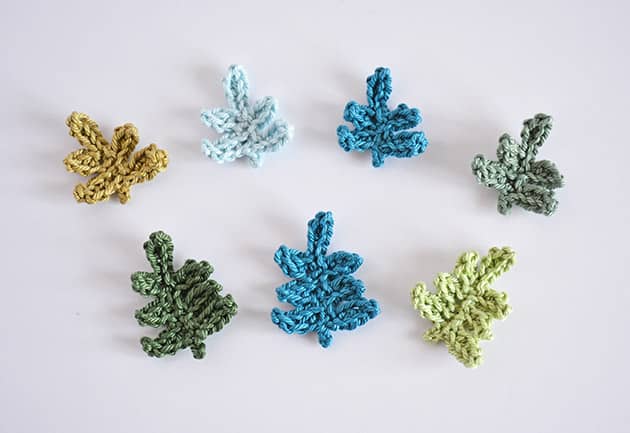 I’m gonna teach you here today, two sizes of this leaf but they both work on the exact same principle.
WHAT DO YOU NEED
I used some scrappy yarns of my Granny kit cotton in a few different colours or any other scrappy yarn you have.
Crochet Hook: 2 – 2.5 mm
A pair of crafty scissors
Tapestry needle ABREVIATIONS AND STITCHES (US crochet terms)
ch = chain stitch
st(s) = stitch(s)
yo = yarn over
lp(s) = loop(s)
rep = repeat
*…* = repeat instructions between ** x times
sl st = slip stitch = insert hook, yo, pull the lp back through the st and through the lp on your hook.
sc = single crochet = insert hook, yo, pull the lp back through the st (2 lps on hook), yo and pull through both lps on hook.
hdc = half double crochet = yo, insert hook, yo, pull the lp back through the st (3 lps on hook), yo and pull through all 3 lps on hook.
If you are a beginner you can always go to YouTube and write ‘how to’ on any stitch you wish to learn.
We will work this leaf from bottom up to creating the little leaves on the first side and than we will go down again to create the leaves on the other side.
Small Leaf – about 3.5 cm’ long.
I’m using colour Pine Forest and a 2.25mm hook for this tutorial.
To Start ch 7, sc in 2nd ch from hook, insert your hook under one lp only of the ch st, as I show in next picture.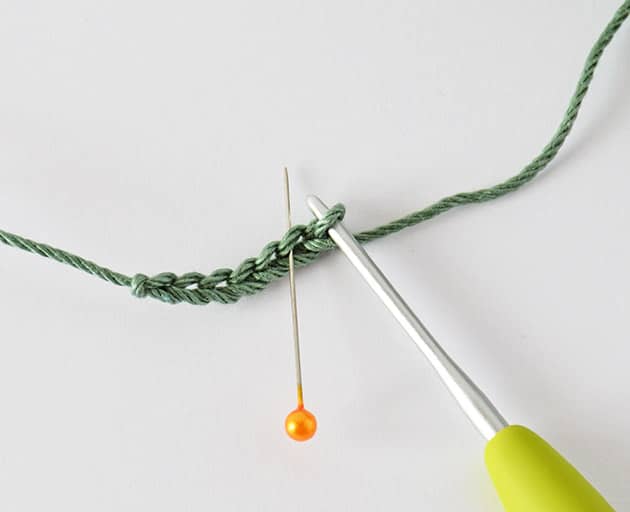 Now sc in next st , hdc in next st, sl st in next. make your sts using one lp only of each ch st. Your first leaf made and it looks like the next picture now.
 We will make the next leaf as follow: ch 5, sc in 2nd ch from hook, insert your hook like I show with my sewing pin in the next picture.
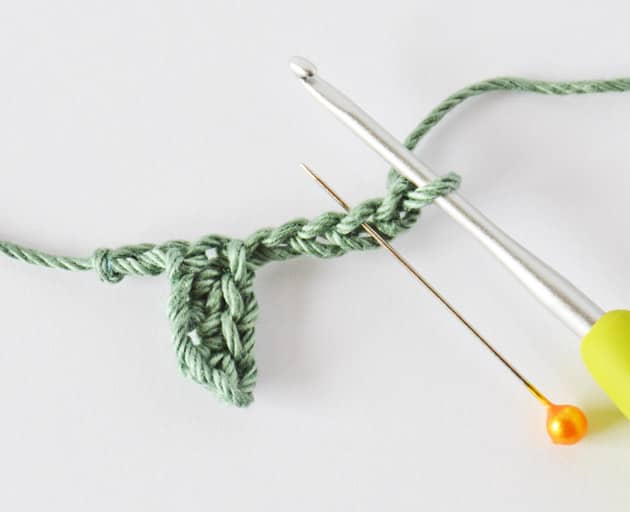 Now hdc in the next st, sl st in next – second leaf made.
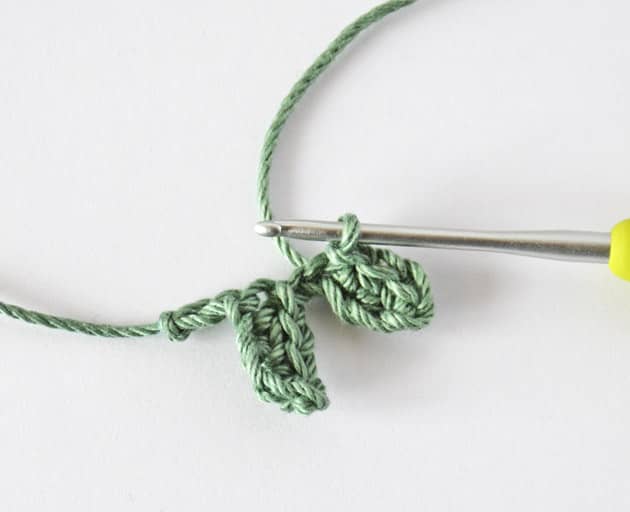 We will now make the centre up side leaf. Ch 5, sc in 2nd ch from hook, hdc in next, sl st in next 2 sts – centre leaf made. We are going to work the leaves on the other side now. Start with a sl st in the base of the leaf next to you, where I show in the next picture.
 Now ch 4, sc in 2nd st from hook, hdc in next st, sl st in next.
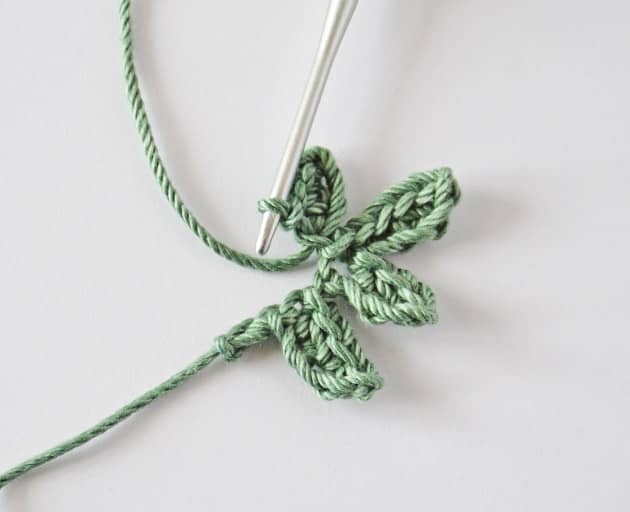 Now make a sl st in next 2 ch sts, the first one is shown by the Yellow sewing pin, it is the st between the 2 leaves. The second st is at the base of the next leaf, shown by the Fuchsia sewing pin.
 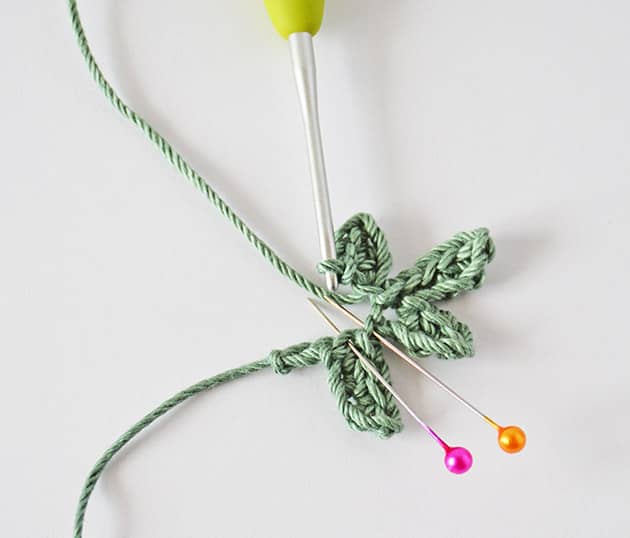 To create the last leaf ch 5, sc in 2nd ch from hook, sc in next st, hdc in next st, sl st in next.
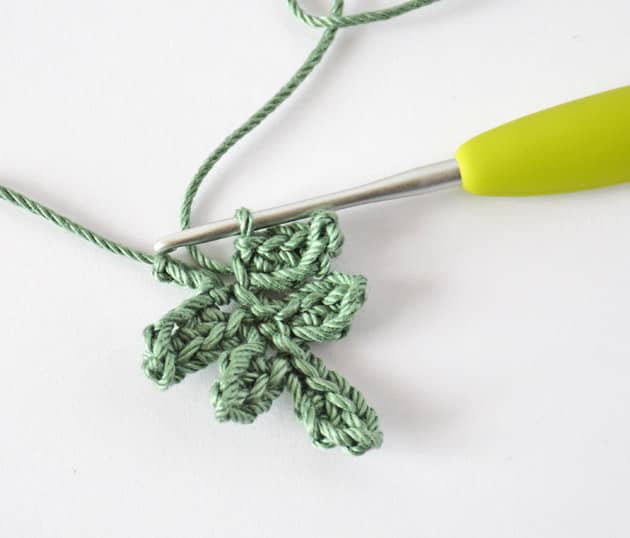 Sl st in the next foundation ch, the one I show in the next picture – this is one of the first two sts on your foundation ch.
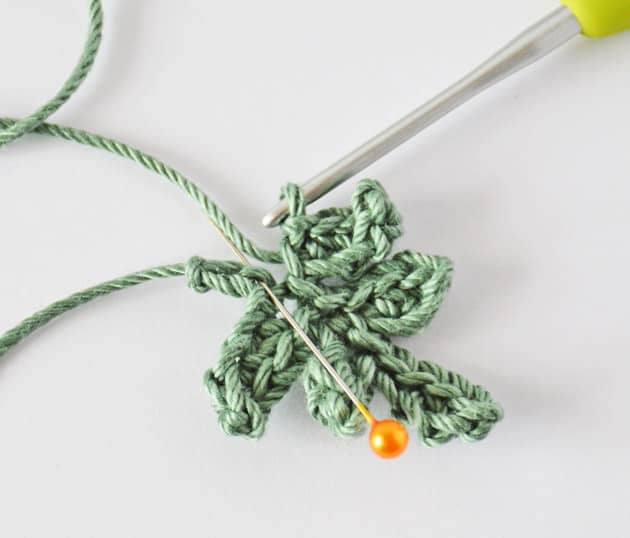 Fasten off and weave in tails. Try to weave the tails in so it will close the little holes left at the base of the leaves – hope it makes cense.
 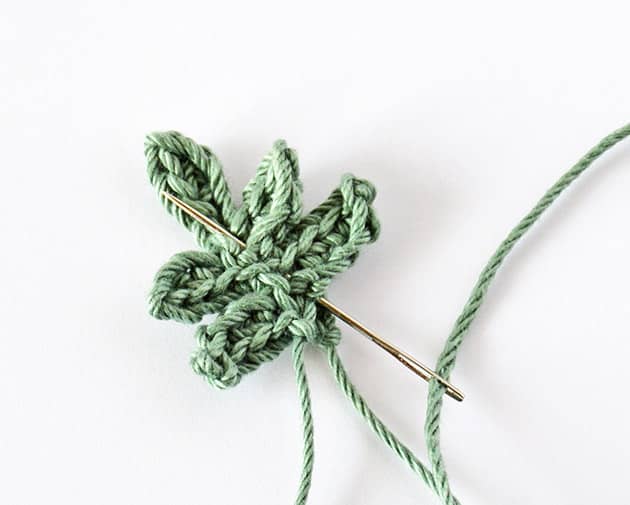 This is your Tiny Fern Leaf made.
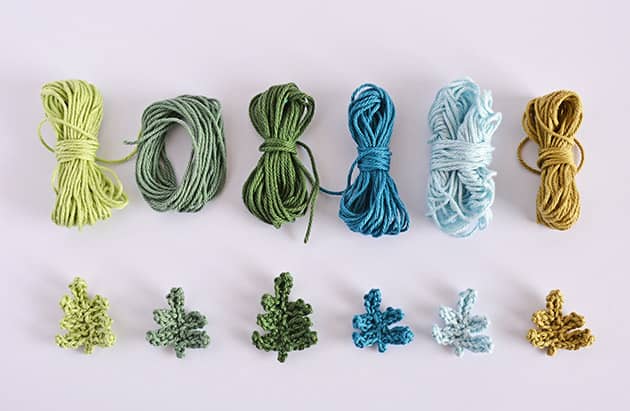
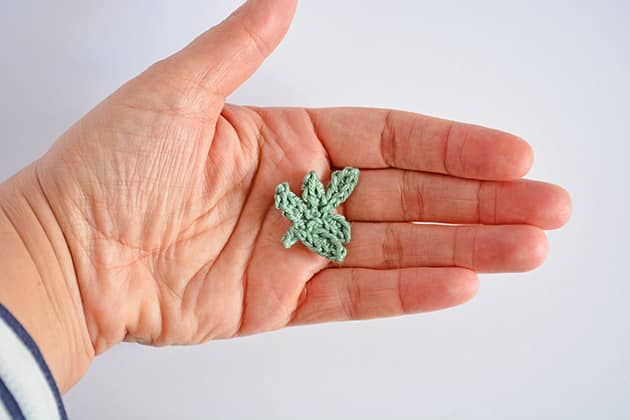 I made a few of them in the following Granny Kit cotton colours.
 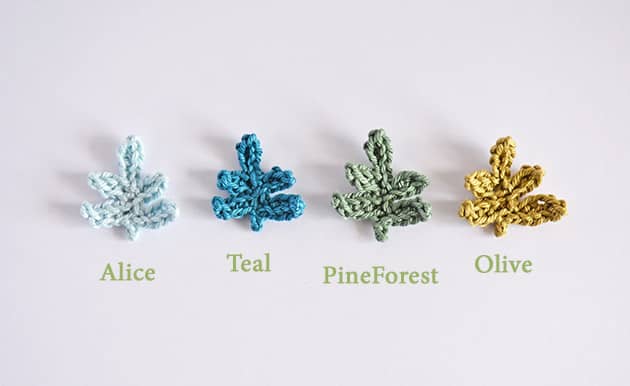 Lets make the tiny fern leaf a brother now, I will need two different fern leaf sizes in my Joyful bouquet.
Medium Leaf -about 4 cm’ long.
I’m using colour Teal and a 2.25mm hook for this tutorial.
To Start ch 7, sc in 2nd ch from hook, sc in next st, hdc in next st, sl st in next – first leaf made. Now work *ch 5, sc in 2nd ch from hook, hdc in next st, sl st in next st* rep twice. Your work will look like the next picture now.
 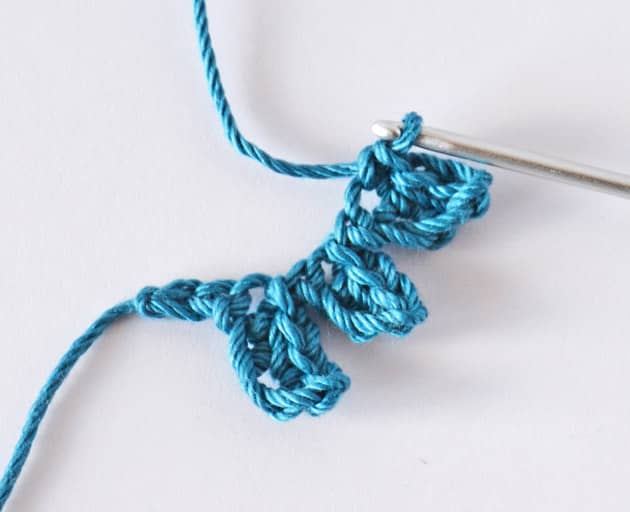 ch 5, sc in 2nd ch from hook, hdc in next st, sl st in next 2 sts – centre up leaf made.
Now sl st in the base of the leaf next to you and ch 4, sc in 2nd from hook, hdc in next st, sl st in next – your work will look like the next picture now.  We have two more little leave to go. Sl st in next ch st, sl st in the base of next leaf, ch 4, sc in 2nd ch from hook, hdc in next st, sl st in next. Your work will look like the next picture now.
 Now sl st in next ch st, sl st in the base of the last leaf. Ch 5, sc in 2nd ch from hook, sc in next, hdc in next, sl st in next.
To finish this leaf, just like we did in the small leaf, sl st in the next foundation ch, at the bottom of the fern leaf – this is one of the first two sts on your foundation ch. Fasten off and weave in tails. And that’s it, your medium fern leaf is ready.
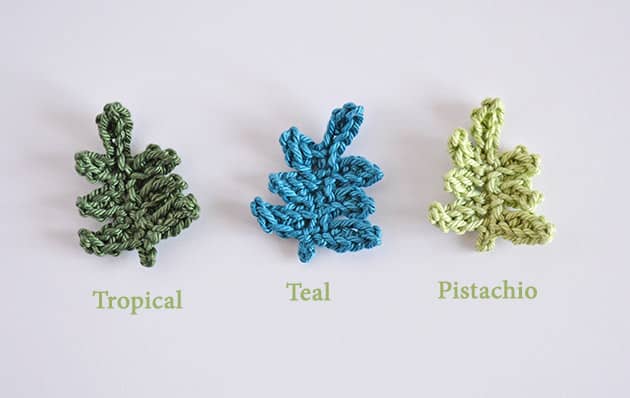 Tropical colour is just perfect for these Fern Leaves.
 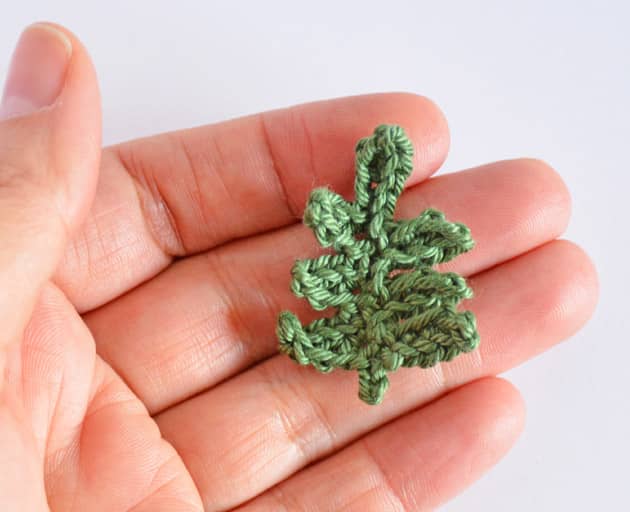 Here is a ‘just words’ pattern if you don’t need the step-by-step tutorial.
Small Leaf
ch 7, sc in 2nd ch from hook, sc in next, hdc in next st, sl st in next.
ch 5, sc in 2nd, hdc in next, sl st in next.
ch 5, sc in 2nd, hdc in next, sl st in next 2 sts.
sl st in the base of the leaf next to you.
ch 4, sc in 2nd, hdc in next, sl st in next.
sl st in next ch st, sl st in the base of next leaf.
ch 5, sc in 2nd, sc in next, hdc in next, sl st in next.
sl st in the next foundation ch. Fasten off.
Medium Leaf
ch 7, sc in 2nd ch from hook, sc in next st, hdc in next st, sl st in next.
*ch 5, sc in 2nd, hdc in next, sl st in next* rep twice.
ch 5, sc in 2nd ch from hook, hdc in next st, sl st in next 2 sts.
sl st in the base of the leaf next to you.
ch 4, sc in 2nd, hdc in next, sl st in next.
sl st in next ch st, sl st in the base of next leaf.
ch 4, sc in 2nd, hdc in next, sl st in next.
ch 5, sc in 2nd, sc in next, hdc in next, sl st in next. sl st in next ch st. Fasten off.
 That is all for today, hope you enjoy making these tiny Fern Leaves with me. Thank you for visiting me here, now I’m back to finish off my Joyful Bouquet, still have some work to complete this cheerful project. xoxMo
11 comments on Crochet Tiny Fern Leaf
Sandra
These fern leaves are just adorable, Mo. I’m going to make some as they will be perfect for a new front-door wreath that I want to make for the spring!
Mo Malron (author)
they can be perfect addition to a spring wreath, thank you Sandra.
Sandra
Mo, I’ve just made my first tiny fern leaf and it looks charming! I want to thank you for explaining how to do it so perfectly! The photos (and the inserted coloured pins) were a huge help! Thank you! Thank you too for making this a kind free pattern!
Mo Malron (author)
Makes me Soooooo happy Thank You
Inessa
This is super gorgeous. I love Jung Jung’s work too! Thanks so much for sharing your pattern.
Karen
Thank you so much for this pattern! Like you I have slavered over jungjung’s stunning works wondering how she does it, tried my hand at the fern leaf and came out with quite ugly results. I am very intrigued by the hdc-sl st at the end of the patterns, maybe thats what i’m missing.
Cheers
Karen.
Ronnie
Beautiful and easy to follow, thank you
netti
I too am so grateful for your way of explaining; so easy to follow and the fact that you include the number of loops to insert into, and the loop entry via the photos of pins….Brilliant!!! I would buy your How to Crochet book in a flash!
Angela
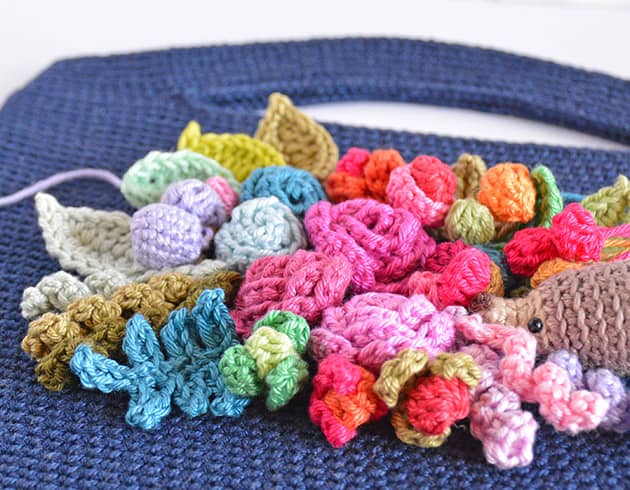
Thank you your explanations were very helpful, looking to embellish a bag I’ve just crocheted.
Mo Malron (author)
Thanks for watching and for taking the time to write me a comment!
Rebecca Ward
This is a great tutorial. I see the medium leaf looks like the base for the larger leaf in the picture at the top of your post, but how do you continue the pattern to make an even larger leaf?