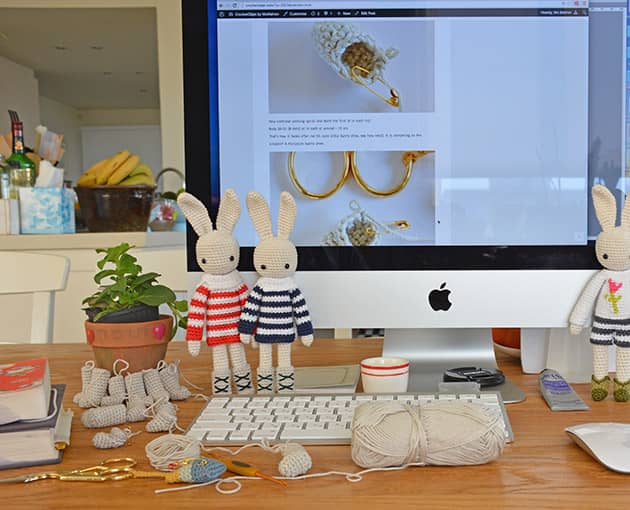
Hello bunny lovers, are you ready for a bunny shoes pattern? Does your Angie Bunny wear her Striped Turtleneck Dress by now? Ohhh, THANK YOU thank you so so SoooOOOooo so much for trying both Angie Bunny & Striped Turtleneck Dress patterns. You’re just great, my heart is fully pleased. I really hope you enjoy these patterns. I put a lot of efforts to create very detailed, clear and easy to follow crochet patterns. I put so much attention + a little of my soul within the aesthetics of each of the pages layout and in each photo taken. Thank you so much for your wonderful reactions and feedbacks! I think both you and your Angie deserve a FREE pattern now!!
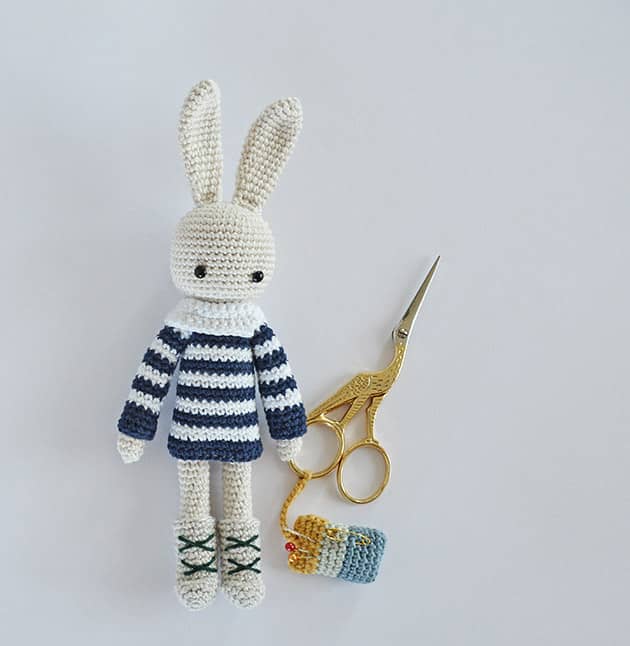
 I’ve spent the last few days, (super happily busy days) crocheting and writing down a step by step pattern for the Nordic Boots, which, as you can see, are going to be a perfect match for the Turtleneck Striped Dress. Actually this is a basic pattern for many shoes and boots for Angie Bunny. I made few different sizes/variations (OK, maybe more than few), looking for the exact one to fit Angie’s leg – as I thought that the one I originally made, came out a little too big for her.
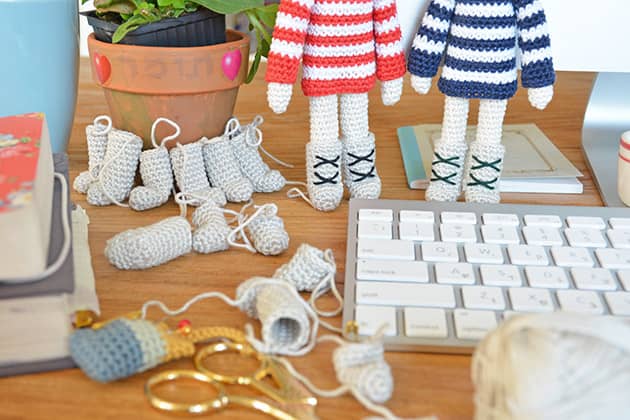
So, if you’re ready then scroll down to see where I spent my last few days – hope the joy of putting it together is clearly seen here in each written step and through each of the pictures. At the end of the step by step pattern you’ll find a “just words” pattern so you can print it out and work with it if that’s what you prefer.
WHAT DO YOU NEED
Yarn: GrannyKit cotton colour ShaleGrey + Ebony/Jet for shoelaces
Crochet hook: 2.5 mm (+1.5 mm)
A pair of crafty scissors
Tapestry needle & stitch markers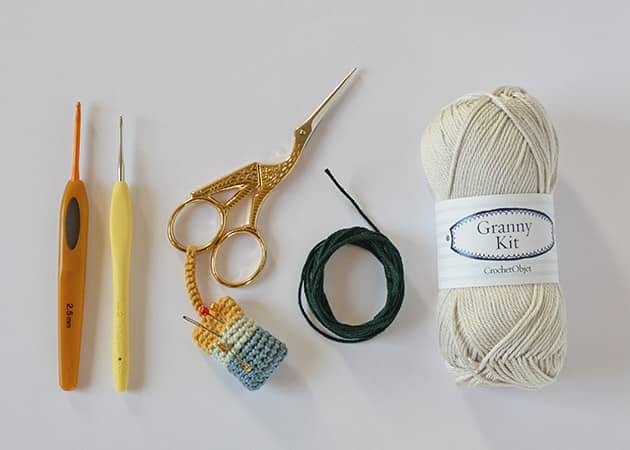
ABREVIATIONS AND STITCHES (US crochet terms)
ch = chain stitch
st(s) = stitch(s)
rnd(s) = round(s)
yo = yarn over
lp(s) = loop(s)
*…* = repeat instructions between ** x times
sc = single crochet = insert hook, yo, pull the lp back through the st (2 lps on hook), yo and pull through both lps on hook.
sc2tog = single crochet 2 next stitches together = insert hook to next stitch, yo and pull back (2 lps on hook), insert hook to next stitch, yo and pull back (3 lps on hook), yo and pull through 2 lps on hook, yo and pull through 2 remaining lps.
In this Nordic Boots pattern make the sc2tog as I just explained here, DO NOT sc2tog as explained on the Angie Bunny pattern. I’ll ask you to sc2tog as we did on the bunny pattern, in one place only here, I will mention when needed.
Tip: Work loosely otherwise it will be hard to put the legs into the shoes.
To Start: Make a magic loop, with colour ShaleGray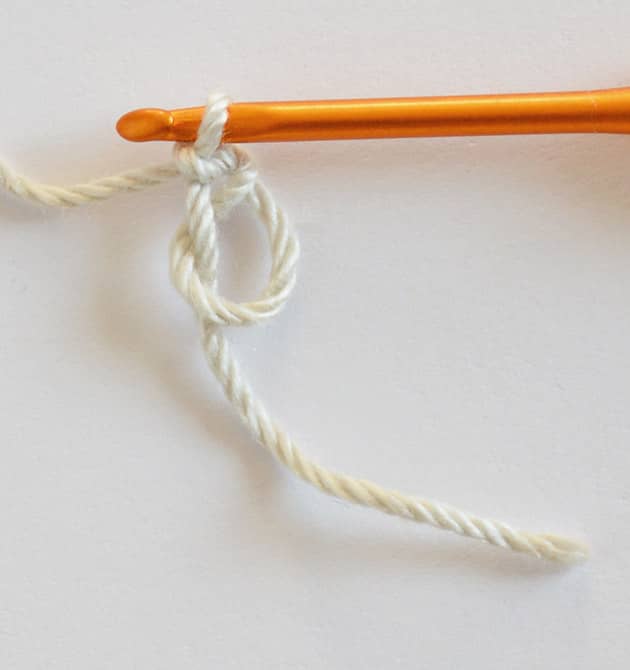 Rnd 1: sc 5 into the yarn lp and tighten the lp to close the hole – 5 sts
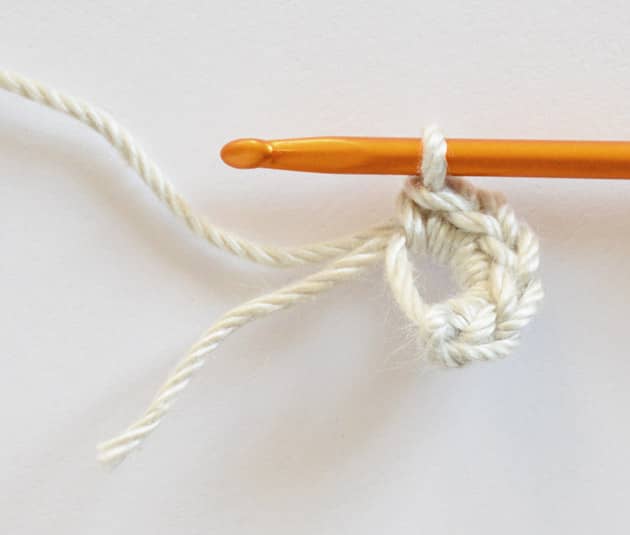
 Work spiral and mark your first st in each rnd from now. Try to work on the yarn tail.
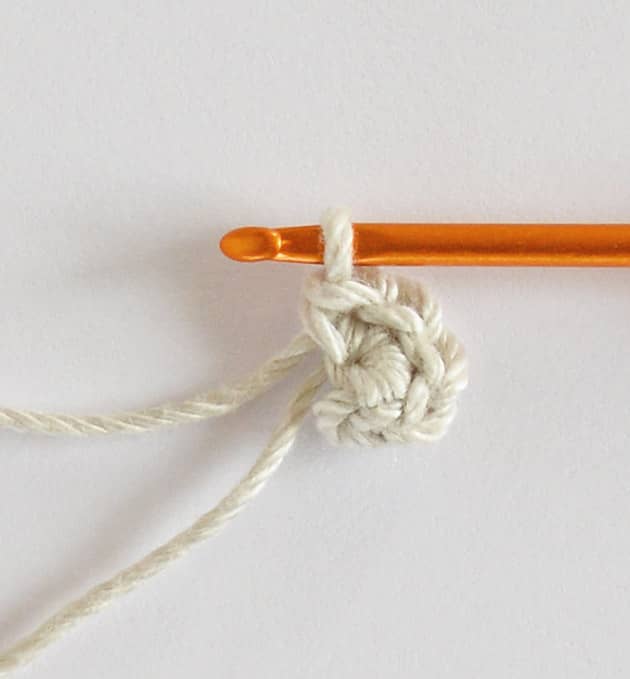
Rnd 2: sc 2 in each sts around – 10 sts
It is very hard to go inside the sts at this point, therefore I work this rnd with a finer hook size (1.5 mm). If you do the same, just make sure you work very loose.
 Now back to your 2.5 mm hook.
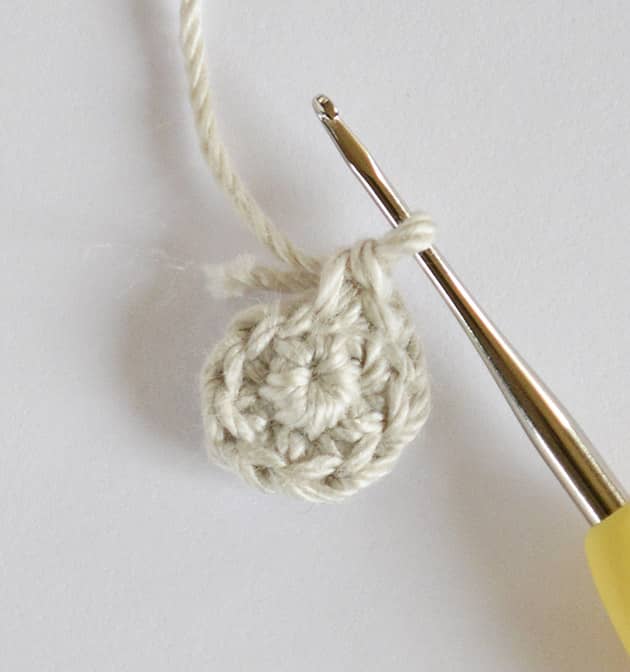
Rnd 3: *sc in next 4 sts, sc 2 in next* repeat between ** twice – 12 sts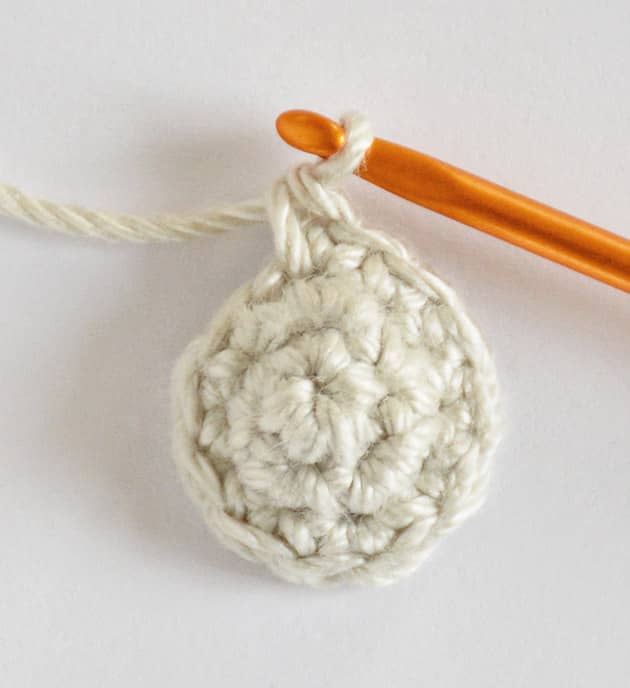 Rnd 4: sc in each st around – 12 sts
Make sure you fold your work so the right side face out. At the end of rnd 4 your work should look like the bellow 2 pictures.
 Rnd 5: sc in next 6 sts – 6 sts.
Actually we work rows now but I’ll continue to use rnds.
You don’t need the st marker now – take it out.
Rnd 6: ch 1 and turn, sc in each of these 6 sts you just made – 6 sts.
Make the first sc at the point where I show here in the bellow picture.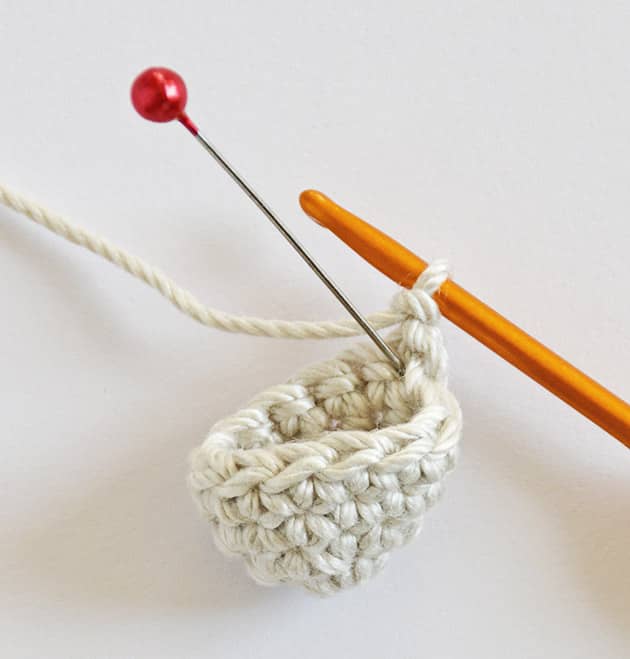
 Rnd 7: ch 1 and turn, sc2tog, sc in next 2 sts, sc2tog – 4 sts
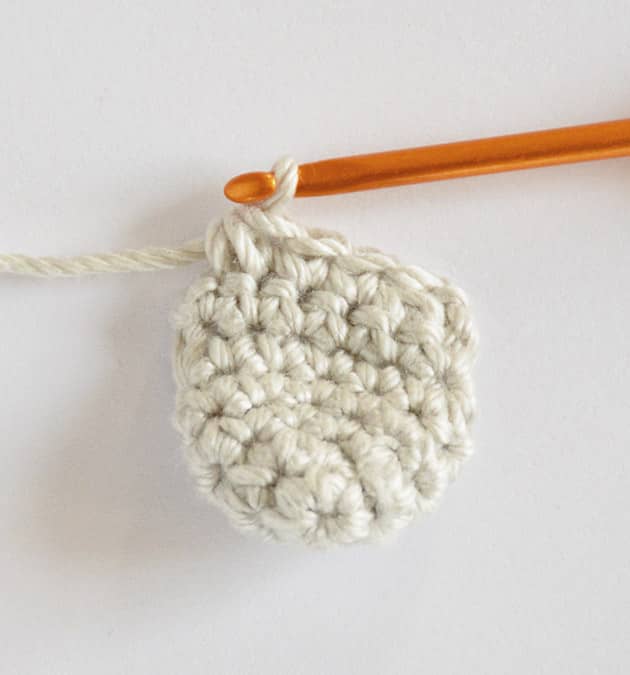 Rnd 8: ch 1 and turn, sc2tog, sc2tog – 2 sts
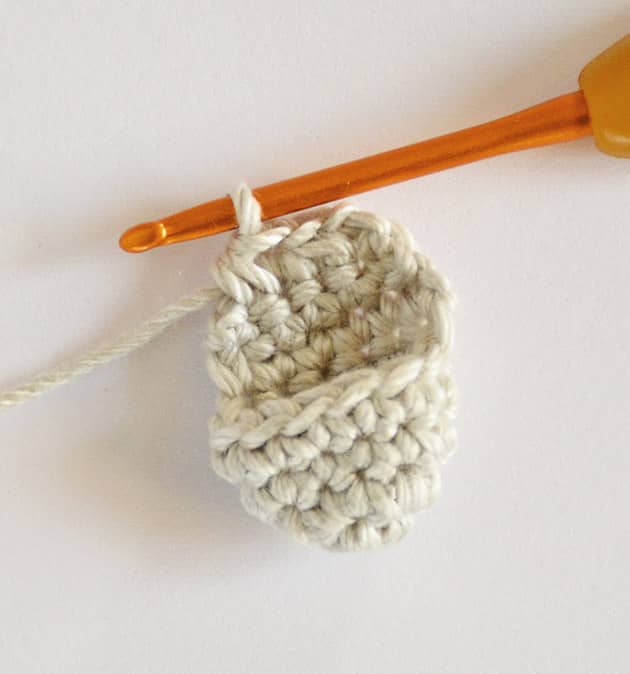 Rnd 9: ch 1 and turn, sc2tog, make this sc2tog the same way explained on Angie Bunny pattern.
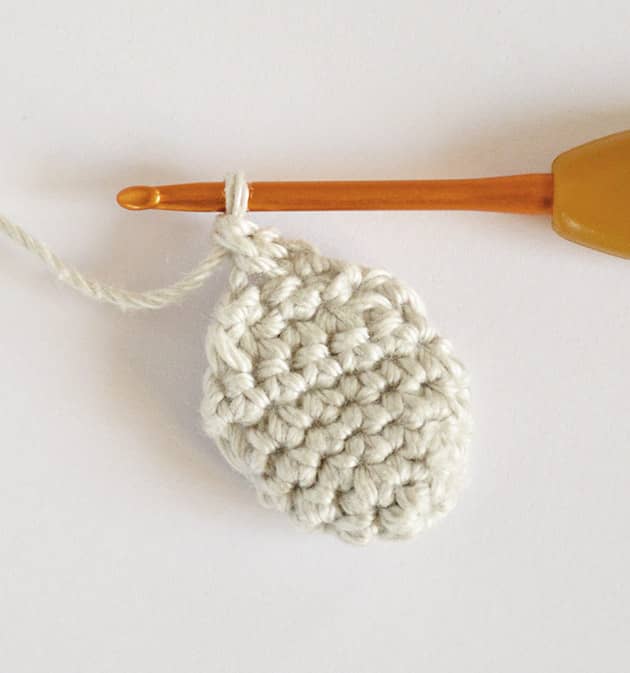 Now mark the first st (the sc2tog you just made) and continue crocheting as follow:
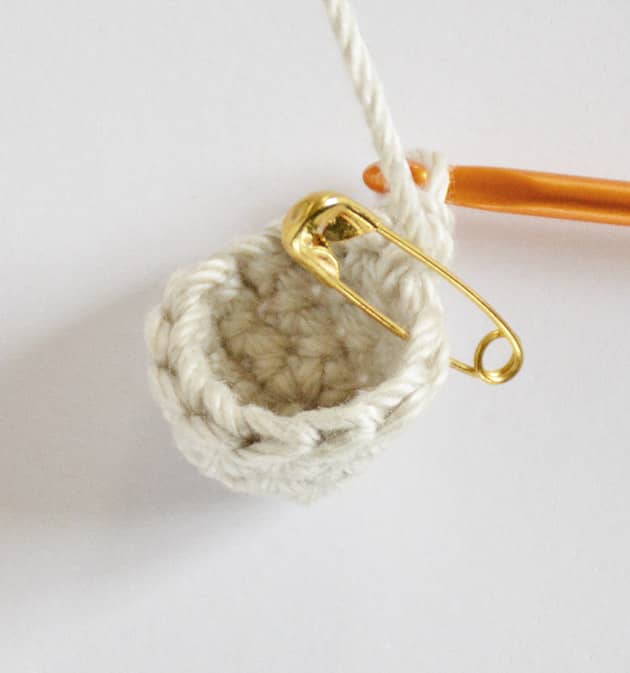
sc 3 in the side of the shoe.
Make the first sc of these 3, here, where I show in the next pic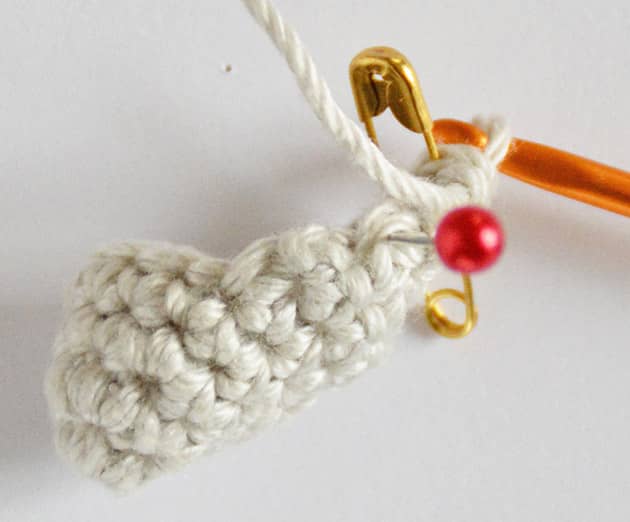 Make the second sc here, where I show with my 1.5 mm hook, you can use a finer hook if it’s too hard to insert your 2.5 mm hook.
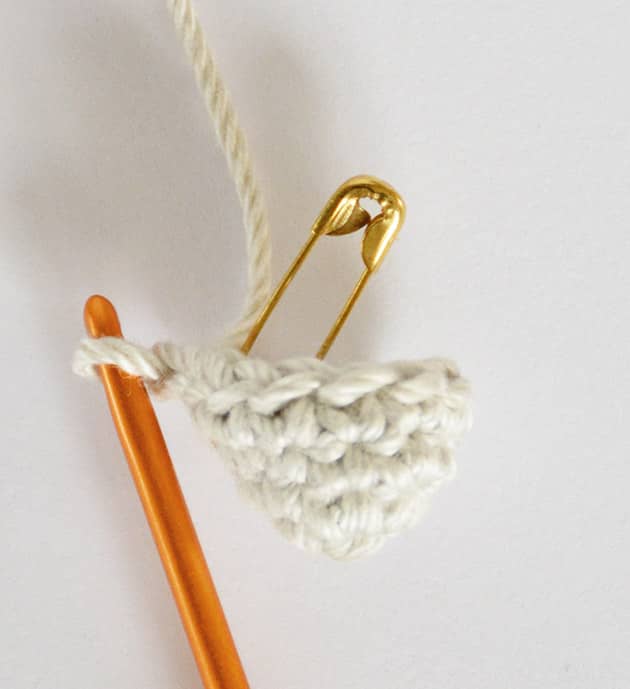
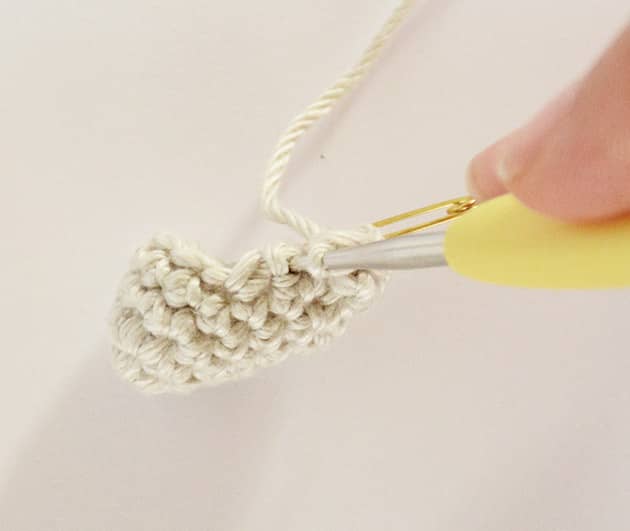 Make the 3rd sc where I show with the sewing pin
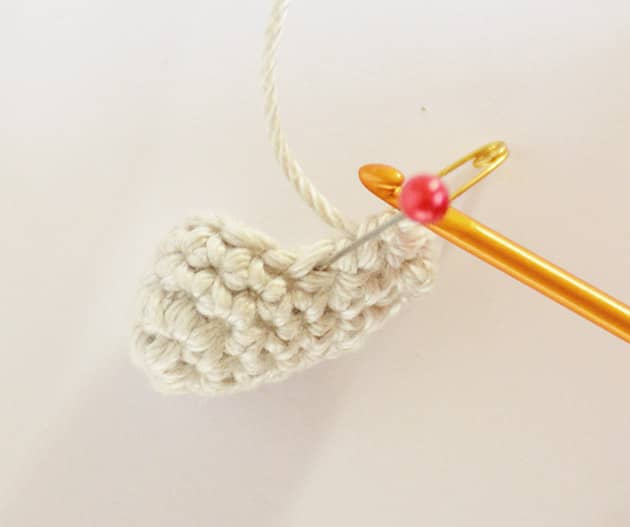 Now sc in each of the 6 front sts, make the first where I show in next 2 pictures.
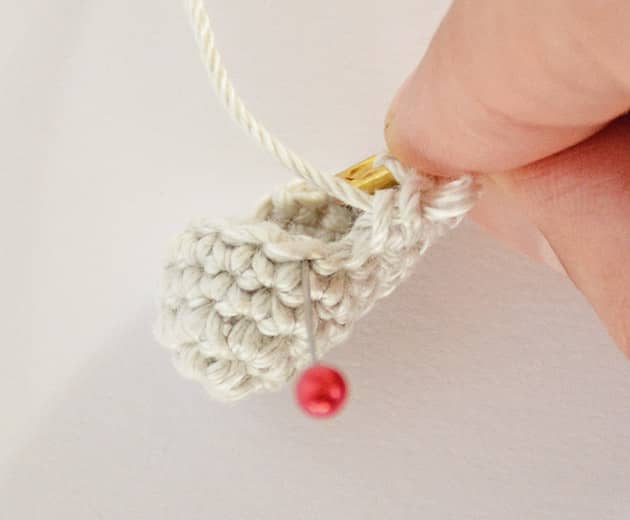
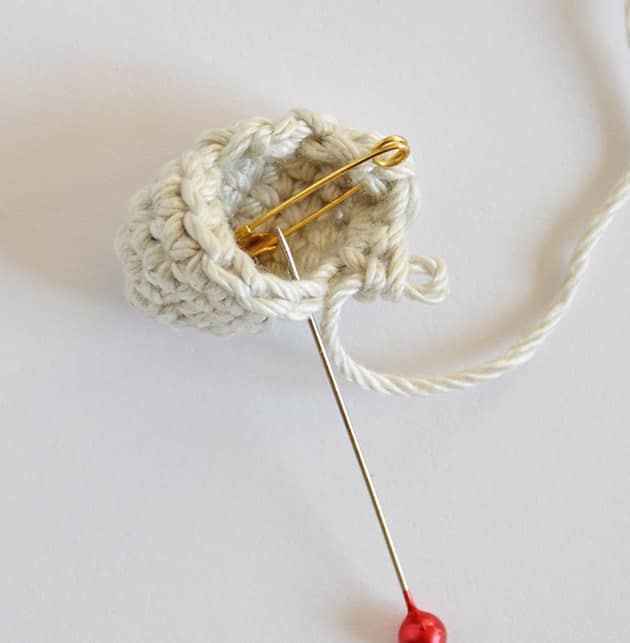 Now sc 3 on the other side. We just made 13 sts on this rnd
It should look like that now. Isn’t that cute? looks like slippers for Angie. Miniature slippers.
 Now continue working spiral and mark the first st in each rnd.
Rnds 10-17: (8 rnds) sc in each st around – 13 sts
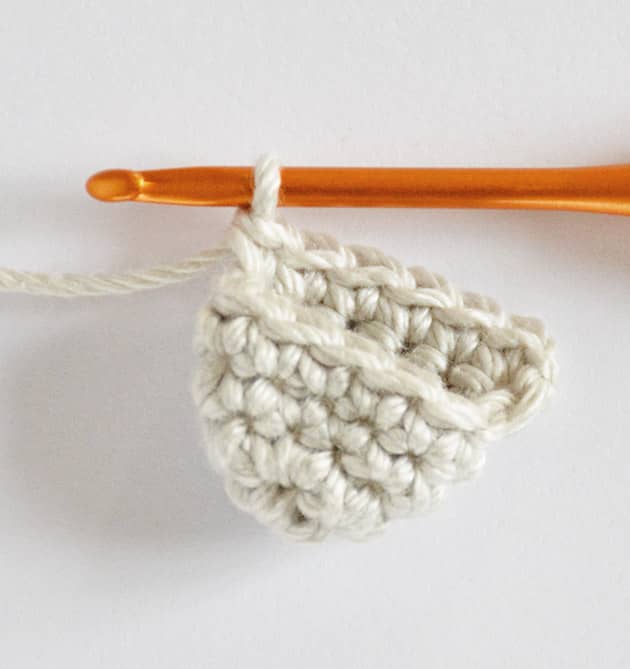
That’s how it looks after rnd 10, cute little bunny shoe, see how small it is compering to the scissors? A miniature bunny shoe.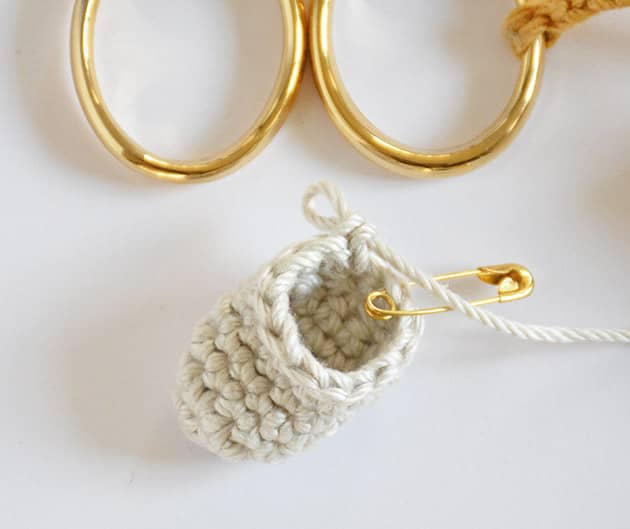 That how it looks like at the end of rnd 12.
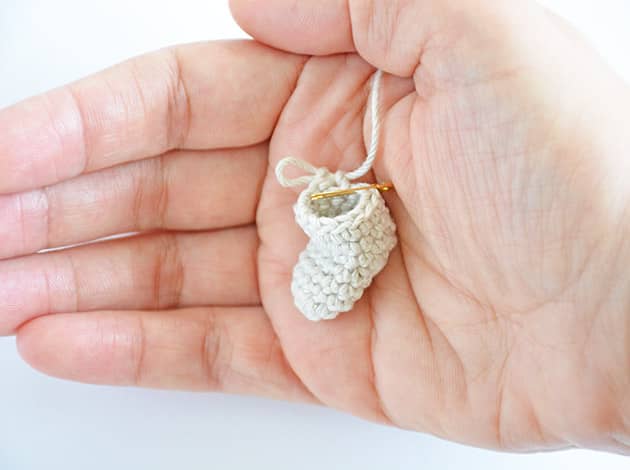 It’ll look like that at the end of rnd 17 – The last rnd.
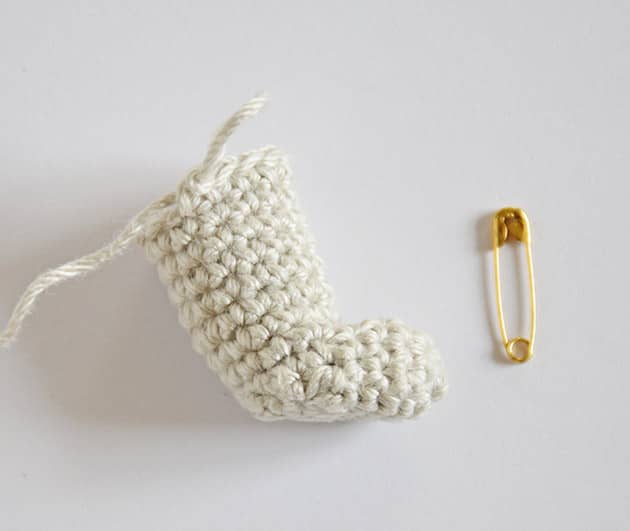 Now break the yarn and weave in the yarn tail, same way we did on the bunny first leg – as explained in Angie Bunny pattern
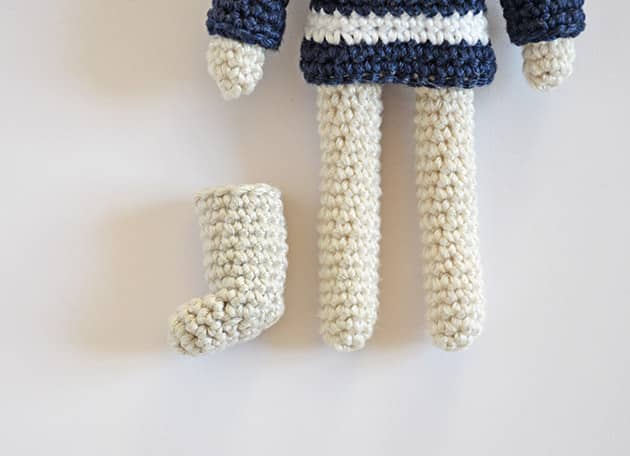 Put it on your bunny leg, push the leg into the miniature Nordic Boot, till you feel the bottom of the leg at the lowest part of the shoe. Push it in till it gets to the bottom of the shoe.
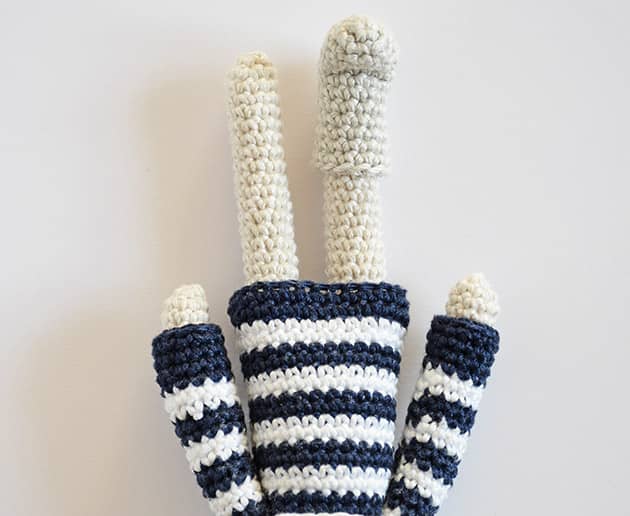 Isn’t that soooOOO very very cute??? Now lets make the same second one, she can’t wait to have them both on. Repeat rnds 1-17 and make the second one. When it’s ready put them both on Angie’s legs and take few minutes to hug your miniature creation, before we continue.
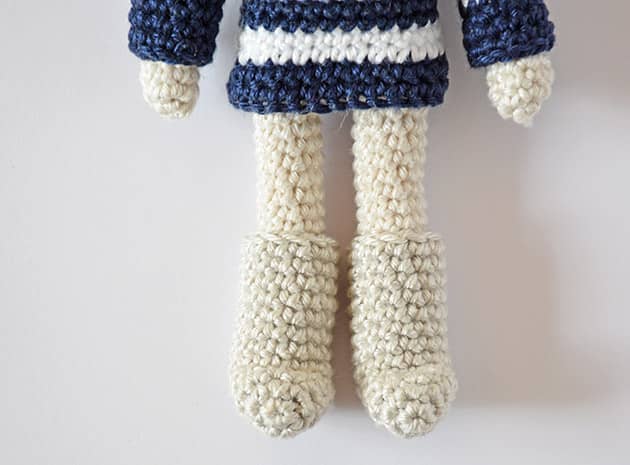
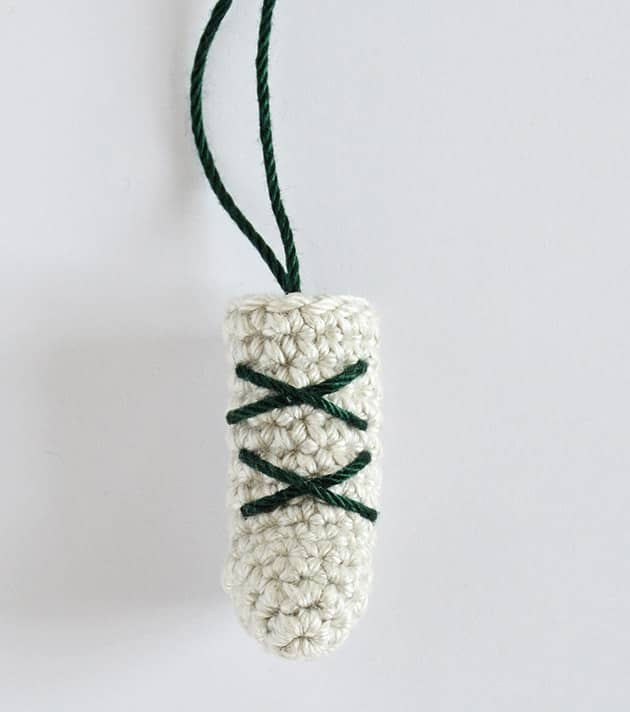
 Your Nordic Boots are almost done! Aren’t they so very very cute? I love them, they make Angie such a sweet chici bunny. I think these boots are a perfect match to the Turtleneck Striped Dress. We still have one more step to go before we finish. The best part of this pattern is coming now. Placing the shoelaces. We’re going to locate them at their exact right place to get this chici Nordic Boots look. Take them out of your bunny legs and let’s add the shoelaces.
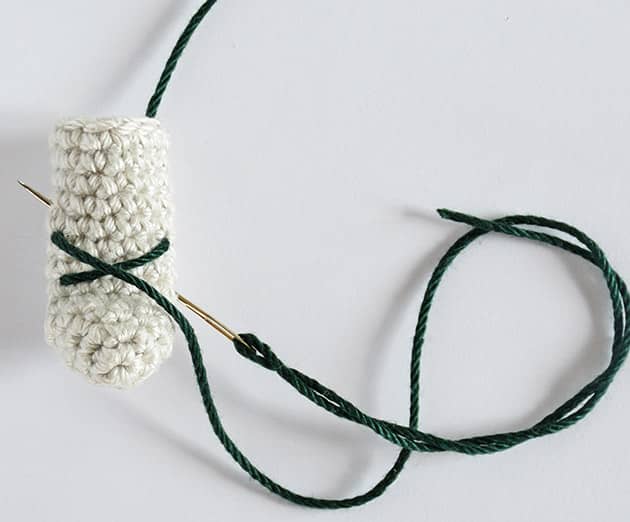
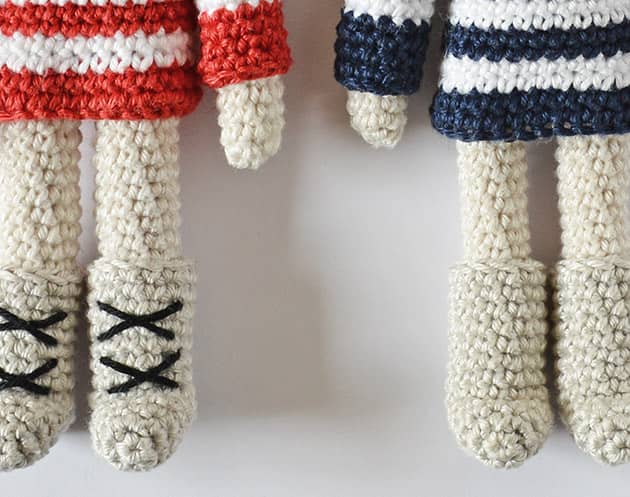 Thread a needle to a 50 c”m (about 20 inches) of the Ebony GrannyKit cotton yarn.
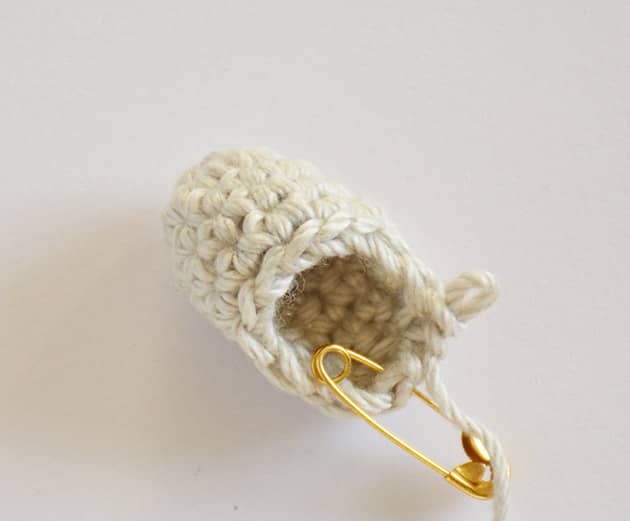
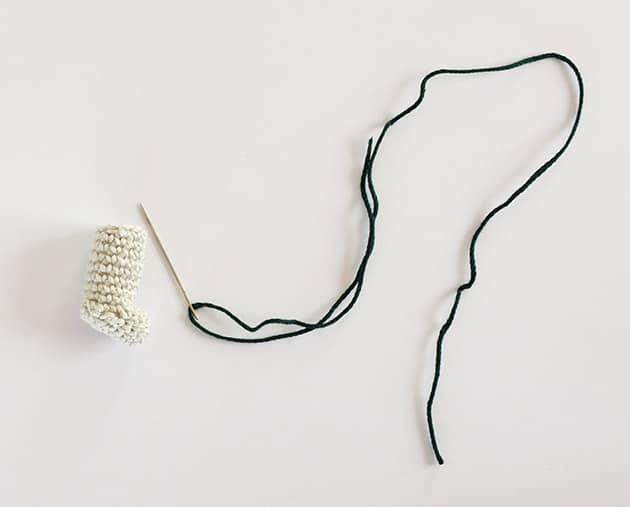 Insert your needle inside the shoe and pull it out through the sts, at the point I show here: the lowest side st.
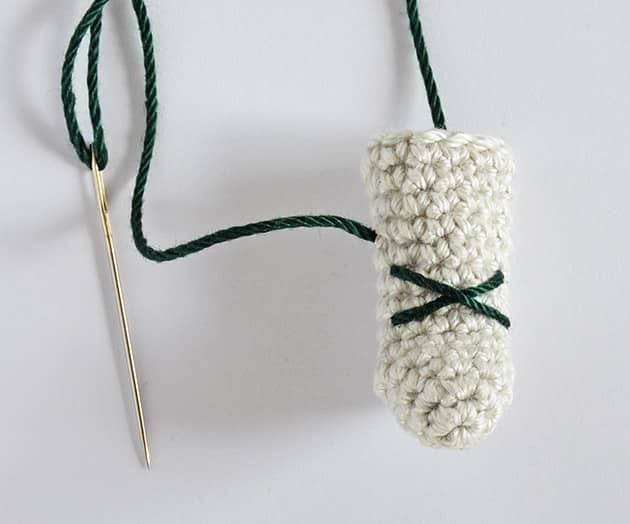
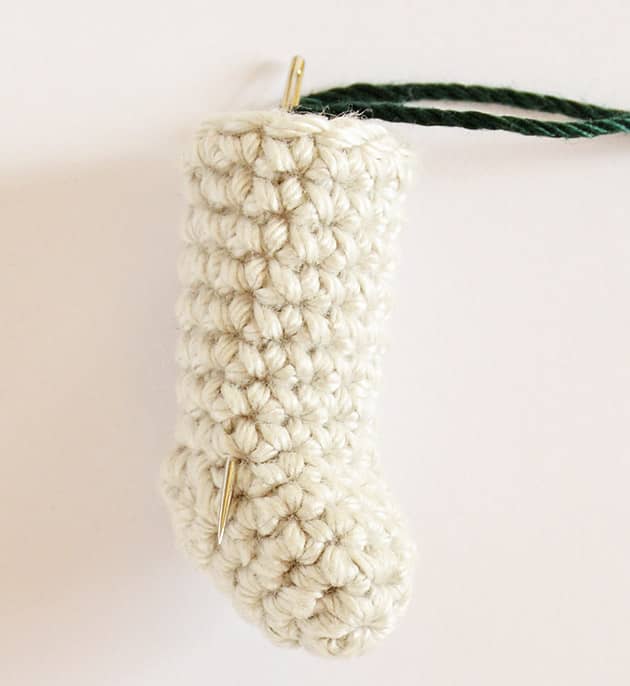 Pull the yarn out and follow the next pictures to complete sewing the shoelaces on the Nordic Boots.
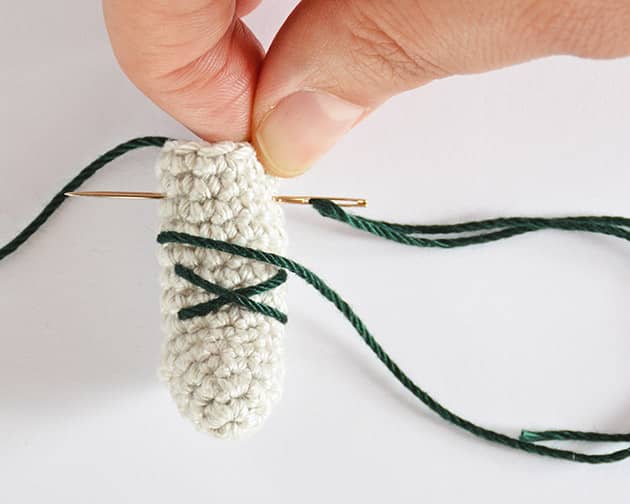
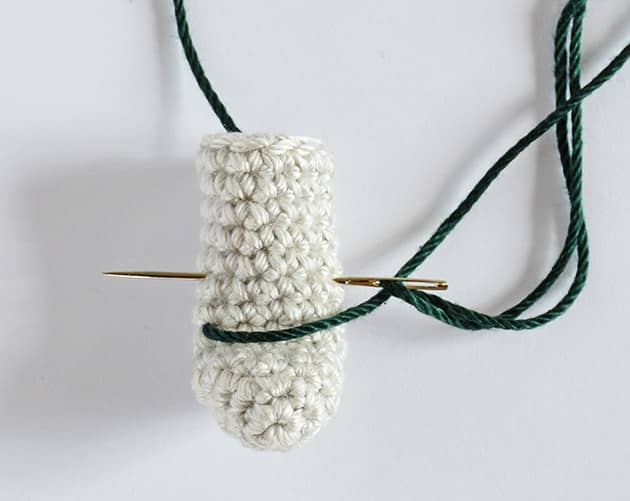
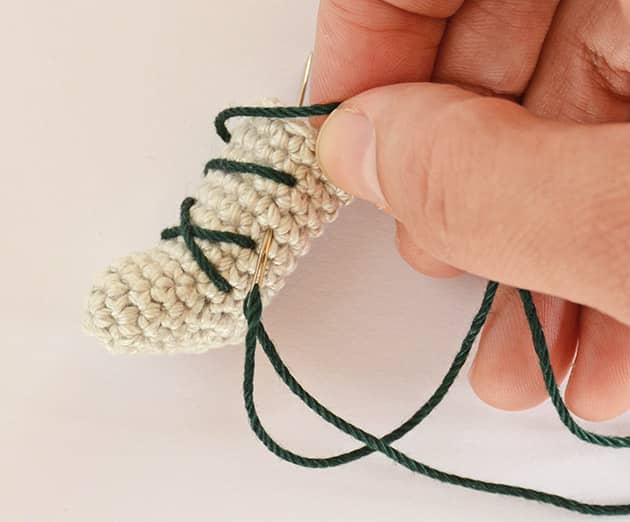
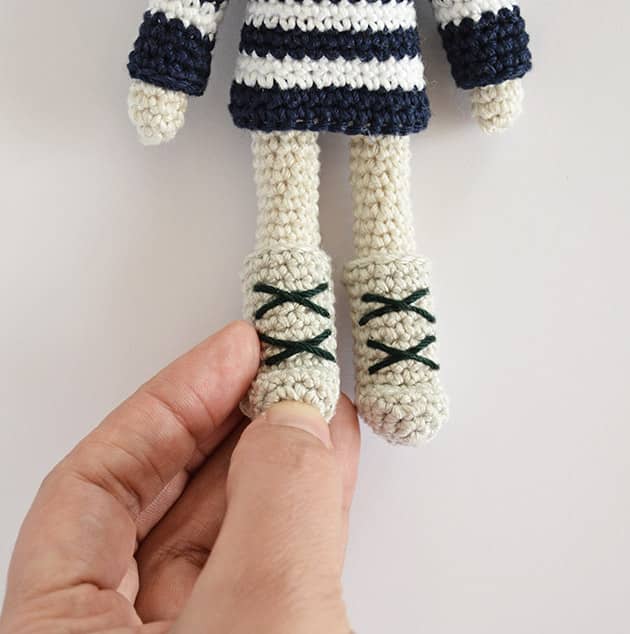
 When done, put it on your bunny leg to make sure it looks right to you. Make any corrections if needed. Weave in the yarn tails OR just push them inside the shoe, into the bottom front side to fill the empty front area of the Nordic Boots.
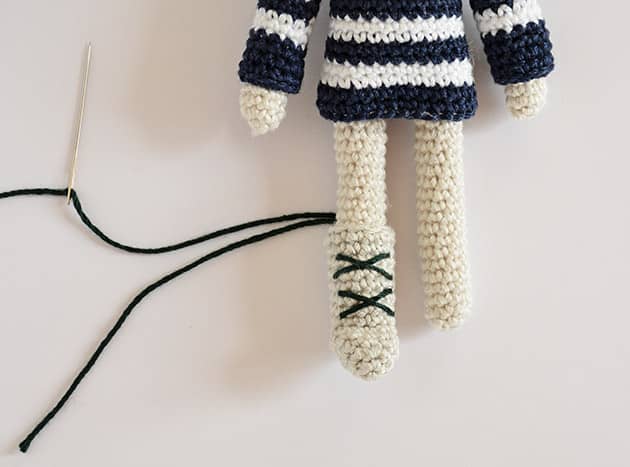 Now sew the shoelaces onto the second shoe. Put it on your bunny legs and push a little “kveatch” with your finger, to push the front point inside a little – to complete the look of these Nordic boots.
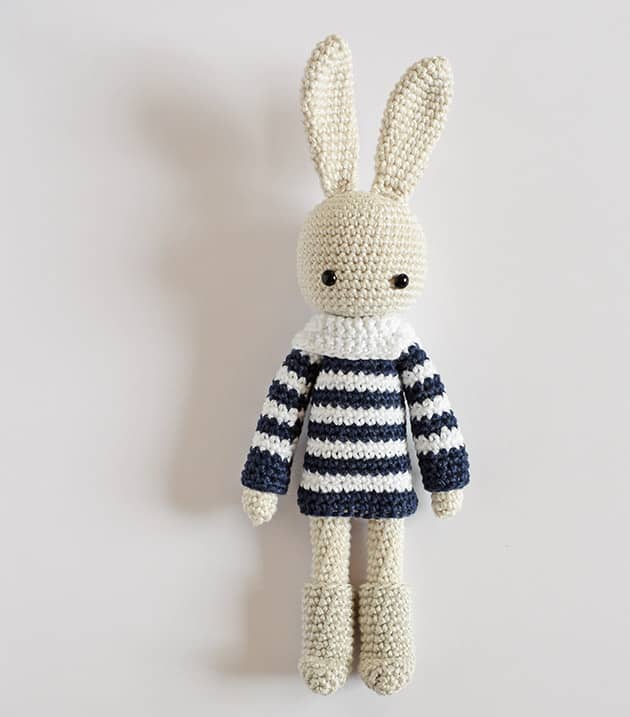
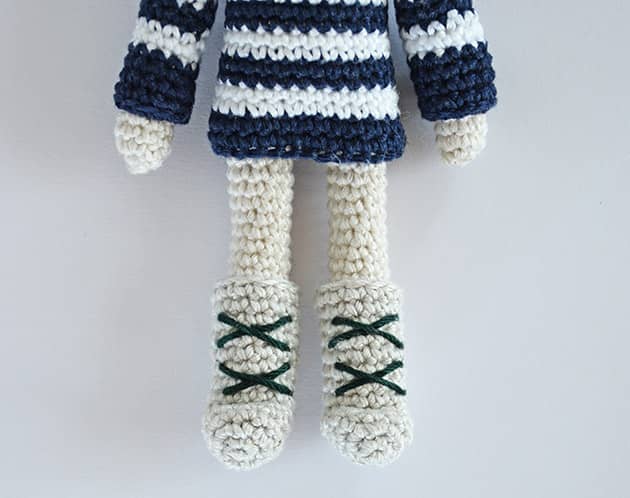 Your Angie Bunny is having the Nordic Boots on now and I think she likes them. Just make sure she take the right steps with them… She is really unbelievably sweet with these Nordic Boots on.
 Make her a friend to add a little bit of pretty to this bunny story.
 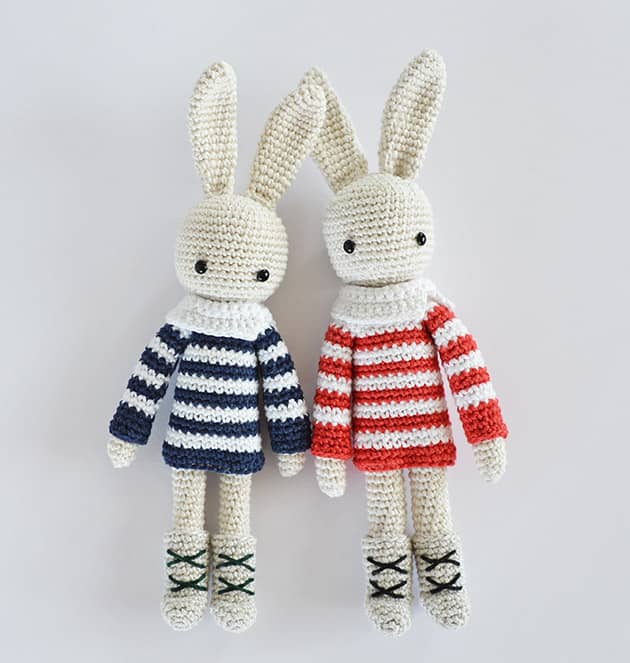 These sweet little Angie Bunnies fill me with huge amount of happiness.
Here is the written pattern for the Nordic Boots, with no pictures included, you can print it out and work with it if you don’t like to crochet next to your computer. For the shoelaces you’ll need to come back here and follow the picture.
**Written Pattern**
To Start: Make a magic loop, with colour ShaleGray
Rnd 1: sc 5 into the yarn lp and tighten the lp – 5 sts
Work spiral and mark your first st in each rnd from now. Try to work on the yarn tail.
Rnd 2: sc 2 in each sts around – 10 sts
Rnd 3: *sc in next 4 sts, sc 2 in next* repeat between ** twice – 12 sts
Rnd 4: sc in each st around – 12 sts
Rnd 5: sc in next 6 sts – 6 sts.
Rnd 6: ch 1 and turn, sc in each of these 6 sts you just made – 6 sts.
Rnd 7: ch 1 and turn, sc2tog, sc in next 2 sts, sc2tog – 4 sts
Rnd 8: ch 1 and turn, sc2tog, sc2tog – 2 sts
Rnd 9: ch 1 and turn, sc2tog – make this sc2tog the same way explained on Angie Bunny pattern.
Now mark you first st (the sc2tog you just made) and continue crochet as follow:
sc 3 in the side of the shoe, sc in each of the 6 front sts, sc 3 on the other side – 13 sts
Now continue working spiral and mark the first st in each rnd.
Rnds 10-17: (8 rnds) sc in each st around – 13 sts
With Ebony/ Jet colour add the shoelaces.
Put the Nordic Boots on your Angie Bunny.
Check if she smiles and give her a hug.
Thank you for joining me, I’m so very happy to have you here. Hope you liked this pattern. Make more bunnies and share them if you like. I invite you to put your Angie Bunnies using #angiebunny on IG. I wish we could have a ‘bunny making’ party.
If you have any nice pattern ideas for our sweet Angie Bunny, OR any idea of creating any cute addition to this pattern, that you would like to share here, please leave a comment on this blog post, share your ideas, leave me a comment here or e mail me. If your ideas/patterns will be something cute and chici that can add some pretty to our Angie making, I’ll share it here on one of my next blog posts. Waiting for your creative cute patterns. Thank you, See you soon, xoxMo
11 comments on Angie Bunny – Nordic Boots
Tj
Hello I purchased the Angie Bunny I did not see a disclosure stating that I could sell the bunny I make. Sell the Angier Bunny or future bunnies is this allowed?
Mo Malron (author)
Thank you for asking,
You can sell few items but not hundreds of them. Please make sure you put a link to the original source : my shop, my brand and my web site.
I wish you luck,
Mo
Susan
What is the weight of the yarn, please? Is the Angie Bunny pattern a free pattern? I think she is so adorable. I am making this for my 9 month old granddaughter as an heirloom piece, with Angie’s clothes. Thank you.
Mo Malron (author)
Hi Susan,
You can find the Angie bunny pattern with all the info about the Granny Kit cotton, here
https://www.etsy.com/shop/CrochetObjet/items
Diane
Thank you so much for offering these free patterns. I’ve purchased the Baby Bunny Pattern and you have made it so easy to follow. I appreciate the pictures because they help me know where to place my stitches. Your work is absolutely beautiful!
Diane
Mo Malron (author)
Thank you Diane,
I love to share patterns and not just to have some on my Etsy shop.
It’s very important for me that same people that purchase my patterns will also enjoy some FREE lovely ones.
I appreciate your ‘makes me happy’ comment.
ActiveFootwear
What is the color of the yarn, please? Really helpful information about the Baby Bunny Pattern. I also want to know these details. And I have also unique shoes and cowboy boot collection sites and you can find all uses and details information about these. So You can Visit here: https://active-footwear.com/
Mo Malron (author)
Hi, do you ask about the colour of the yarn for the boots? It’s SHaleGrey a very light milky Grey.
Linda Midtlyng
Praying for you and your family. 🙏🏻💙🙏🏻