
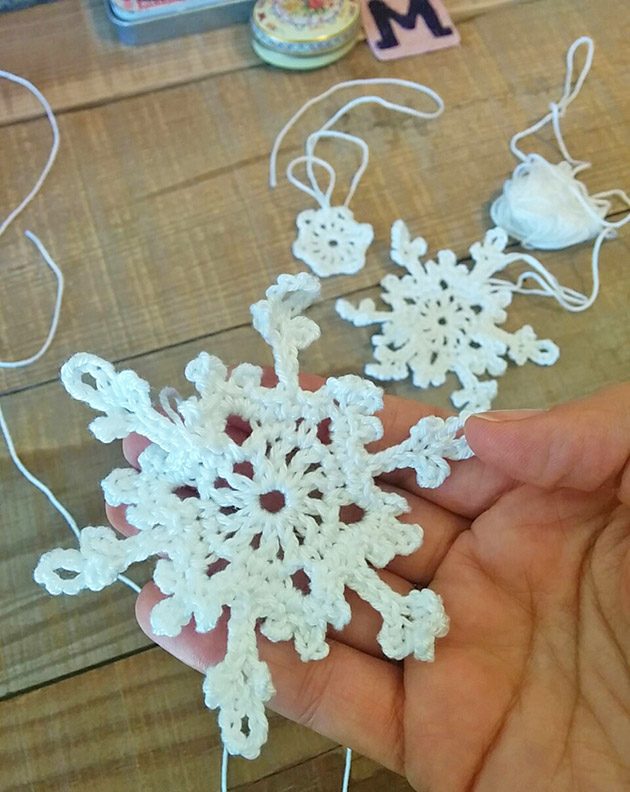
So nice and quiet to be sitting here finally after one very hard week, started with a flood in our apartment continued with a fainting of E’s father and a heart attack of my father who is still in hospital (Thanks God they both are now much better). All these horrible events happened, through a week in which I had 2 workshops and if this is not enough then E had a VERY important gust from NYC at work, which means he had to spend many hours at the office making presentations, going out for dinners almost every evening, and generally taking care of his VIP guest! Gosh, life showed us their ugly side this week, definitely a tough one. I can’t wait for a new week to start on the ‘right leg’ this time. And yes, I had just a little (very little) time to crochet.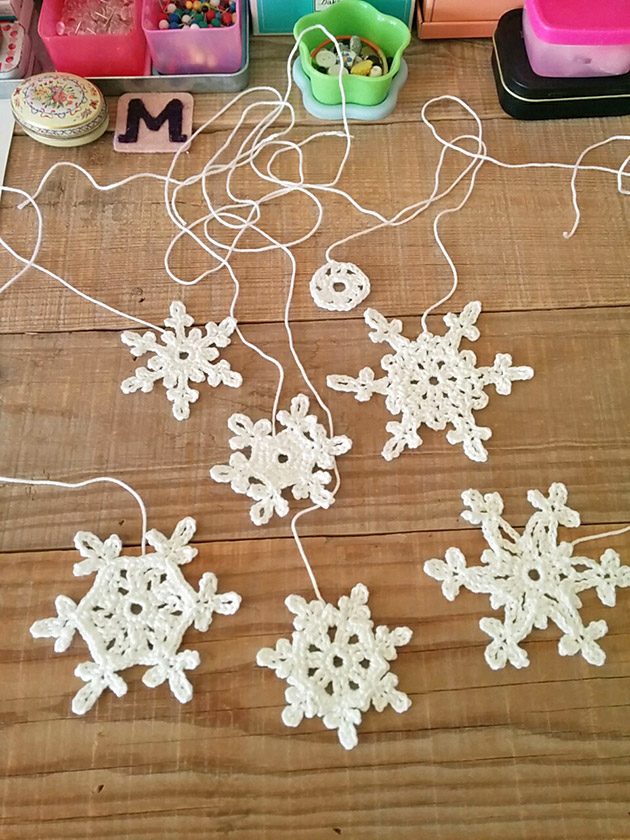 But I did find just a little time slot for crochet, and guess what, it was a huge mental support, both balancing and healing for me during these ugly days. I owe a big THANK YOU to my friend ‘eina’ who participates in a design fair during this weekend. She wanted to decorate her booth with some crocheted snowflakes made by me! What a fun job. I made few pretty white lacy snowflakes, for her. Made them on a late night quiet hours and while making them I just thought that it can be nice to create my own variation of a snowflake pattern than share it with you, as a new year gift, here at my little blog corner. I love LOVE just love to crochet snowflakes and love how they create such a pretty decoration in no time and no extra effort – they bring this kind of elegancy and working on them brings so much joy into the heart and soul. They don’t just have a clean look but rather a clean energy is embedded in their shape and movement. Making them didn’t make me just happy but actually helped me keep positive thinking through this intensive week.
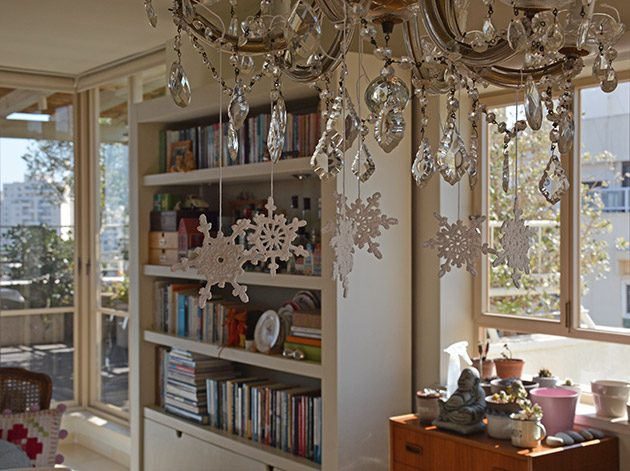 So, are you ready for a nice lacy snowflake pattern now? I’m ready to write it down here for you, I feel so lucky to have this opportunity to share it here on my blog corner, so you can give it a go and decorate your Christmas space or window or door front, with a nice, white, lacy snowflake. Maya (our eldest) and myself just hanged them on our antique chandelier.
This snowflake, 3 rounds pattern, is very easy to make. Make it with any yarn you have. Try to crochet with different sizes of hooks so you get different sizes of snowflakes for your wintery decoration.
I made mine with:
GrannyKit cotton yarn colour LACE
Hook: 2.5mm and 1.75mm
round = rnd
loop(s) = lp(s)
yarn over = yo
stitch(es) = st(s)
chain stitch = ch
repeat = rep
sc = single crochet = insert hook, yo, pull the lp back through the st (2 lps on hook), yo and pull through both lps on hook.
dc = double crochet = yo, insert hook, yo, pull the lp back through the st (3 lps on hook), yo and pull through 2 lps on hook (2 lps left on hook), yo and pull through remaining 2 lps.
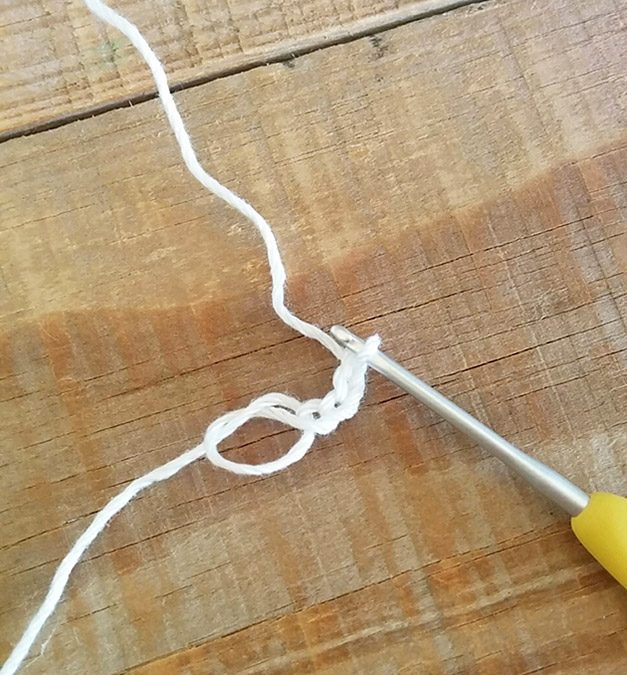
 into the loop centre make *dc + ch1* rep between ** 11 times
 rnd 2:
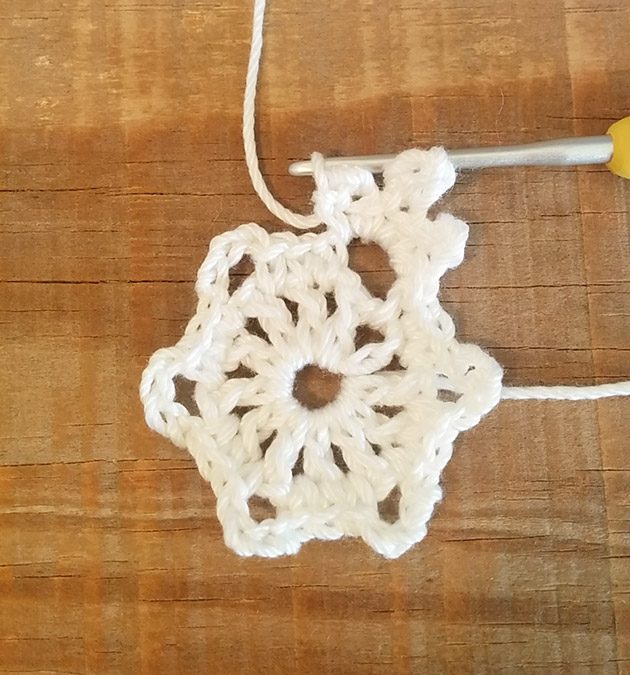 rnd 3:
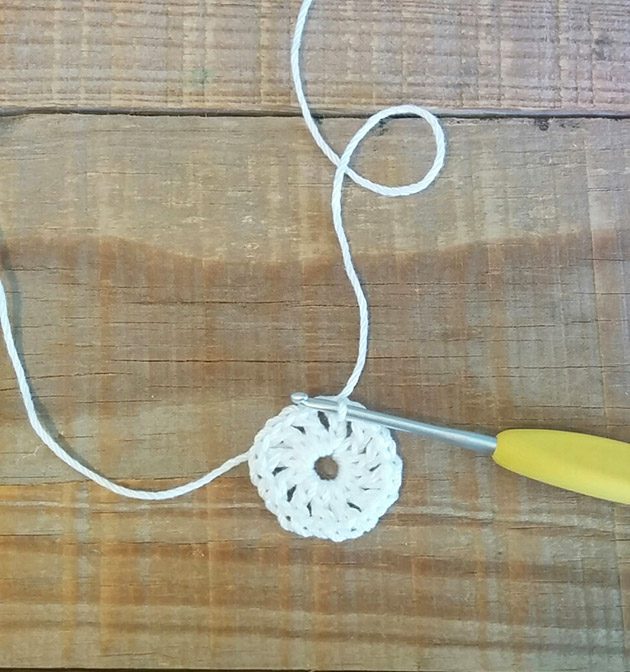
 ch8 and sl st in 4th ch from hook,
 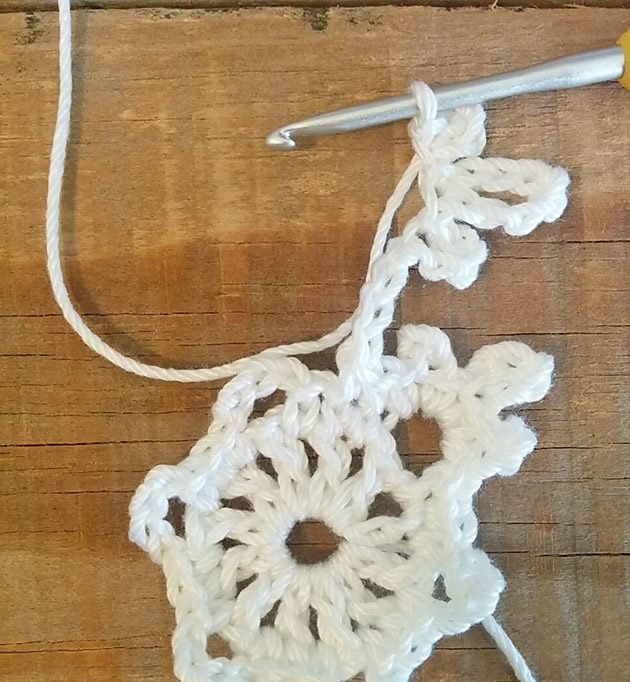 ch8 again and sl st in first ch this time, now ch4 and sl st in first ch.
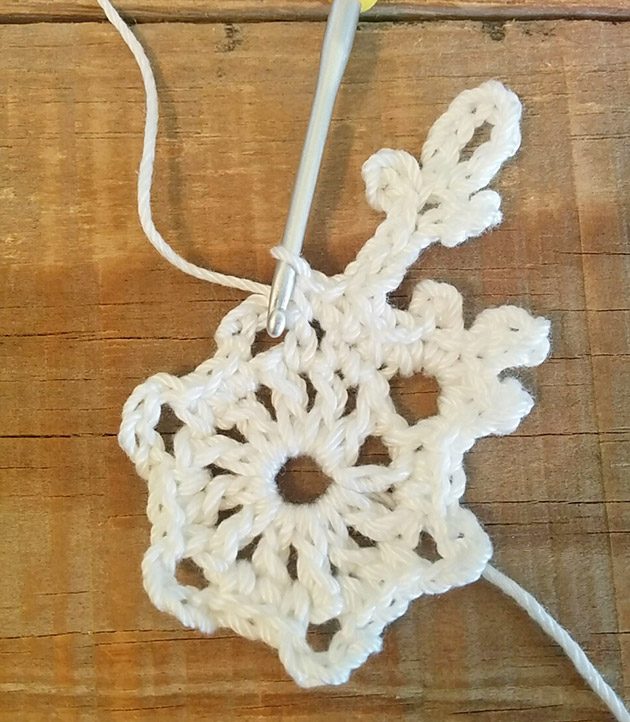 Now sl st in 4 first sts of the first ch8 made. sc in same st where you started you first ch8. sc in next st*
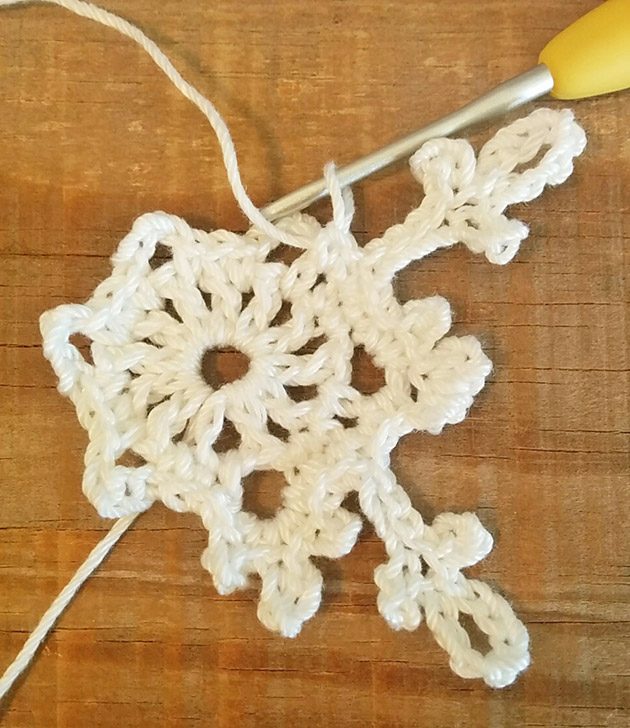
 rep between ** 6 times and sl st into first sc made.
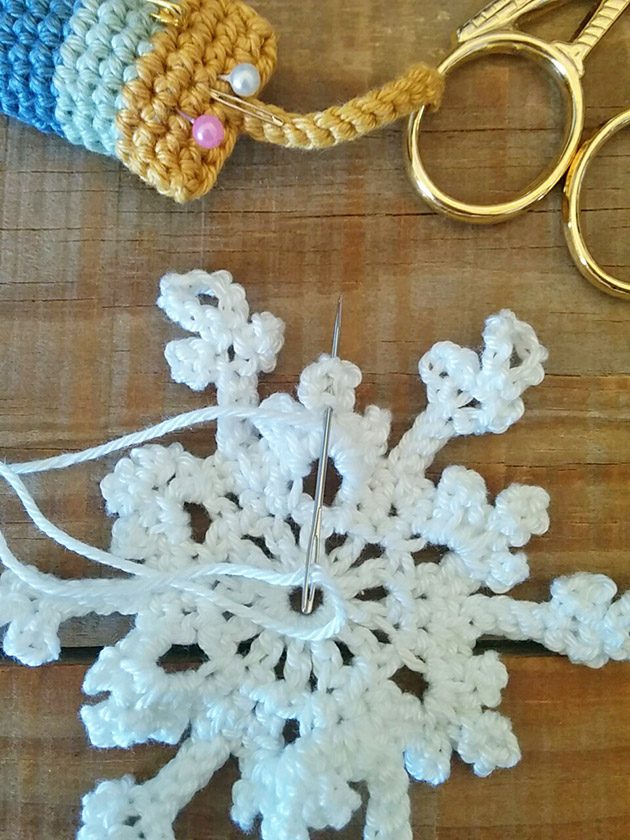
 Fasten off living a long tail to hang your snowflake. Sew the long tail all the way to the top of one of the centred picot, sew it into the lowest or the highest vertex so the tail is in the right position to hang your snowflake.
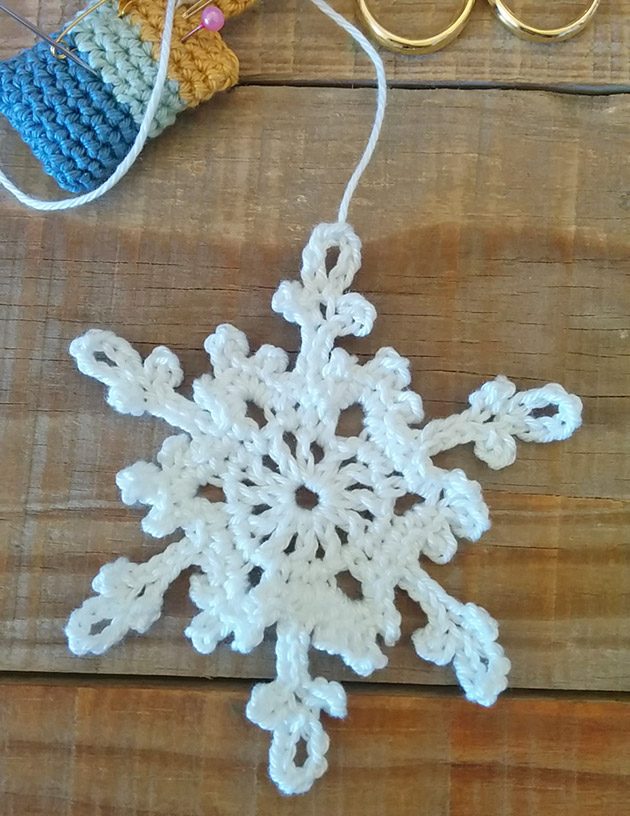
 Blocking a snowflake is just the same as blocking a granny square.
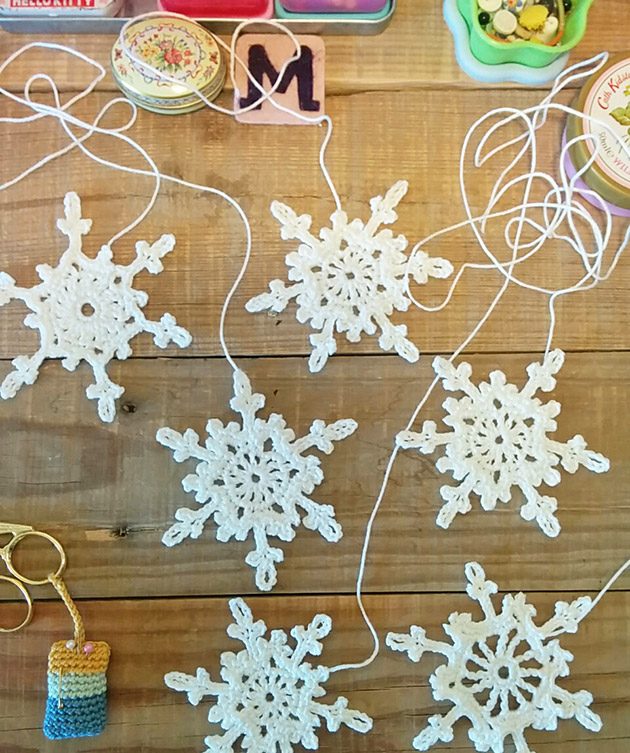 And there you are, your crispy snowflake is now ready. Will you go on making another one? well, I did!
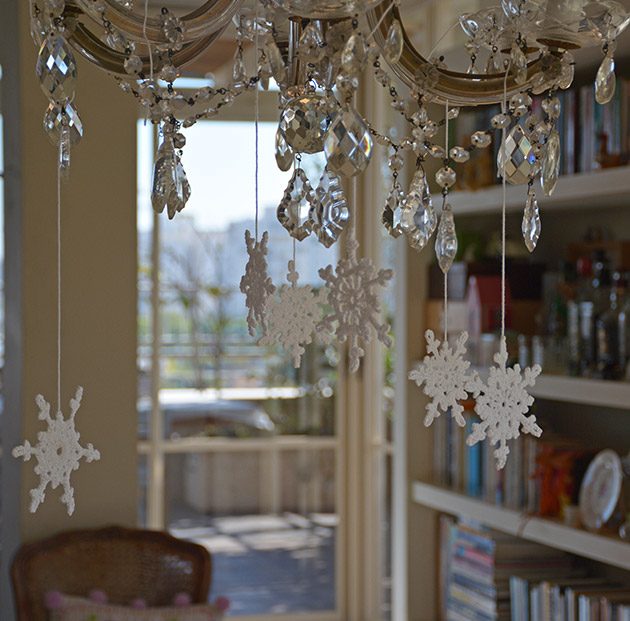 Happy and HEALTHY new year my lovely readers, to you and yours. Enjoy the time with your beloved ones, appreciate these times you spend together. Give these togetherness moments the best of you.
10 comments on Lacy Snowflake Pattern
Anne-Marie Moore
thank you so much – wishing you a creative 2016
Mo Malron (author)
Thank you Anne-Marie HAPPY new year to you!
Mary
Is it possible for you to post the pattern as a diagram!? I don’t understand the abbreviations unfortunately.
Mo Malron (author)
Mary, I’ve made it very easy to follow as a step by step pattern, I don’t have a diagram for it.
Thank you for your understanding
Tammy
Your directions and photos are so clear I can’t wait to try them. Thanks so much.
Mo Malron (author)
Thanks Tammy, please try it, you’ll enjoy making these.
Helen Stitt
Thank you so much for this pattern.
Mo Malron (author)
I’m so happy you enjoyed it Helen.
Julie
Thank you for this pattern! I have a box of snowflakes my mother crocheted but no pattern! Now I can continue to make them to hand down to all my children and 16 grandchildren. Praying for safety, resolution and peace.
Alma
No, Thank you for this Pattern, happy new year for you family