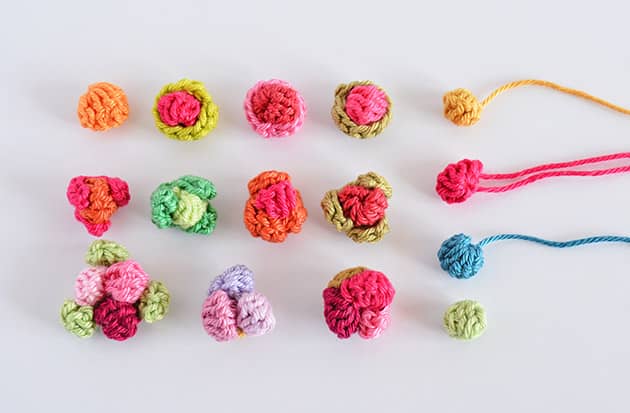
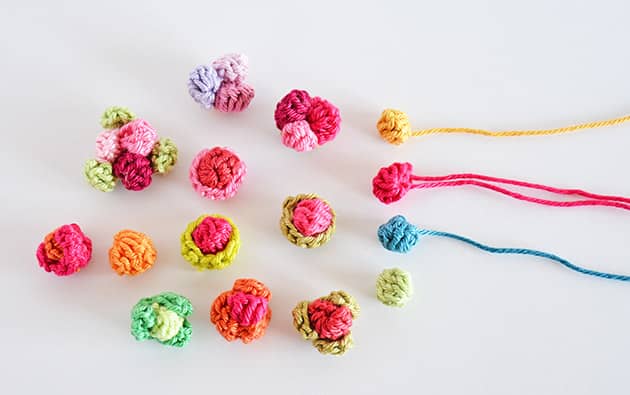
 These Berries were originally designed for my Joyful Bouquet which was made to be placed as a centre front on the Skinny Purse. It was a late night Friday creation when I spontaneously crocheted a variety of greenery related details such as these berries. They added some little colour spots into my bouquet and you might use them for your crafty project. It was such a joy making all of these cute little berries. My plan is to share everything from this joyful journey and today I will share the Berry pattern plus the Greenery nests I made for it.
 WHAT DO YOU NEED
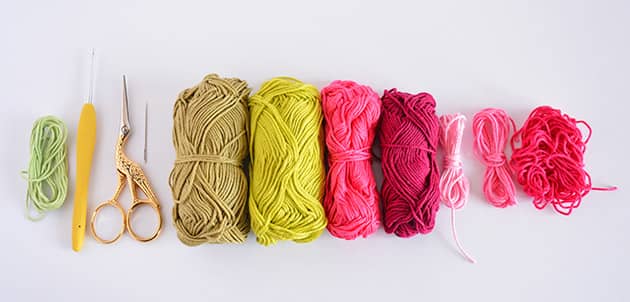
Use any yarn oddments you have in stash, in berries and leaves colours. I use GrannyKit cotton
Crochet hook: 2.5 mm
A pair of crafty scissors
Tapestry needle
 ABREVIATIONS AND STITCHES (US crochet terms)
ch = chain stitch
st(s) = stitch(s)
yo = yarn over
lp(s) = loop(s)
*…* = repeat instructions between ** x times
sl st = slip stitch = insert hook, yo, pull the lp back through the st and through the lp on your hook.
sc = single crochet = insert hook, yo, pull the lp back through the st (2 lps on hook), yo and pull through both lps on hook.
hdc = half double crochet = yo, insert hook, yo, pull the lp back through the st (3 lps on hook), yo and pull through all 3 lps on hook.
dc = double crochet = yo, insert hook, yo, pull the lp back through the st (3 lps on hook), yo and pull through 2 lps (2 lps on hook), you and pull through 2 remaining lps on hook.
dc6tog = double crochet six together = *yo, insert hook, yo, pull the lp back through the st, yo and pull through 2 lps* repeat between ** 6 times (7 lps on hook). yo and pull through all 7 lps.
If you are a beginner you can always go to YouTube and write ‘how to’ on any stitch you wish to learn.
The following three patterns are for Berry, Round Nest and Triple Leaf Nest. All three are step-by-step patterns followed by close up pictures to make it easier for you to follow. We will Start with the Berry pattern.
Berry Pattern I use colour Berry and a 2.5 mm hook for this tutorial.
To Start ch 3. We will make a dc6tog into the first ch made, the one I show with my sewing pin in the picture below. Make the dc6tog step-by-step with me, as follow: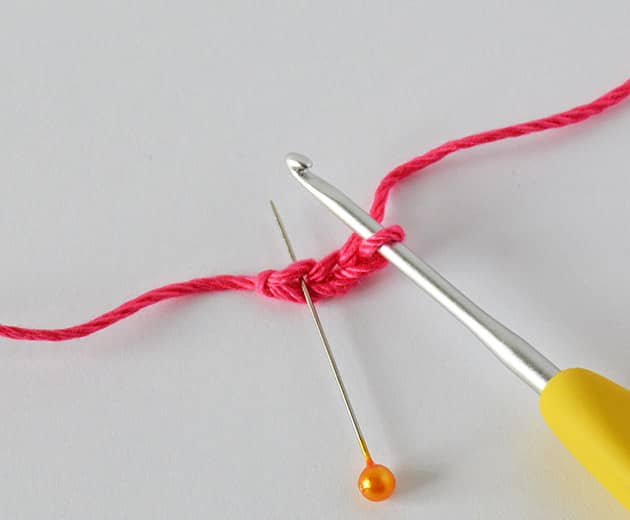 *yo and insert your hook into the first ch made, yo and pull out, yo and pull through 2 sts*
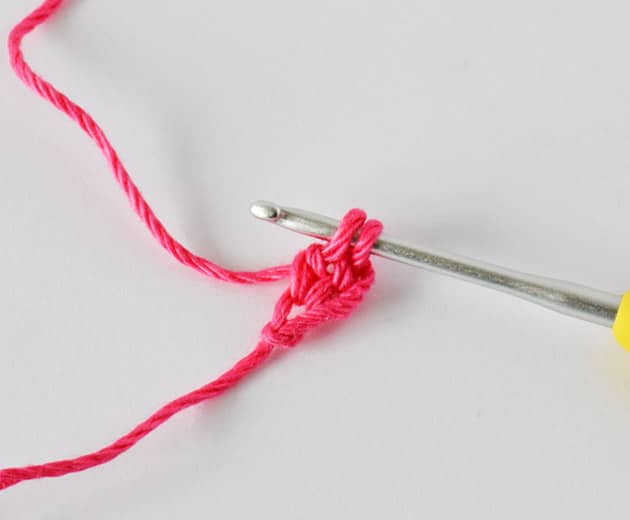 rep between ** 5 more times (6 times in total). You should have 7 lps on hook now.
  When you have 7 lps on hook – yo and pull through all 7 lps. It will look like the below picture now.
 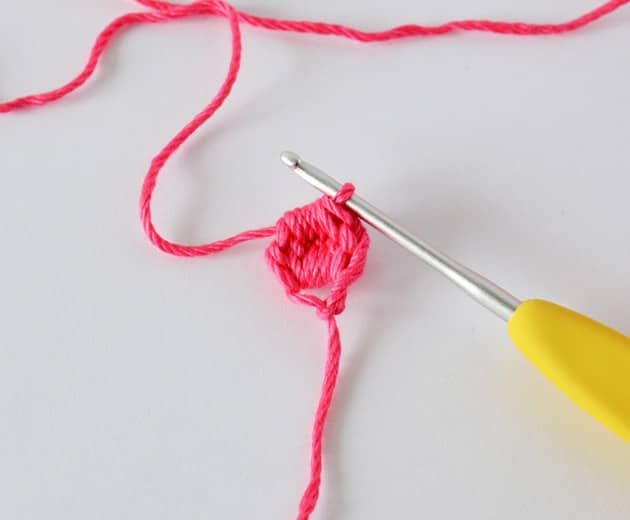 To close sl st into the same st, the base of the dc6tog, where I show with the sewing pin in picture below.
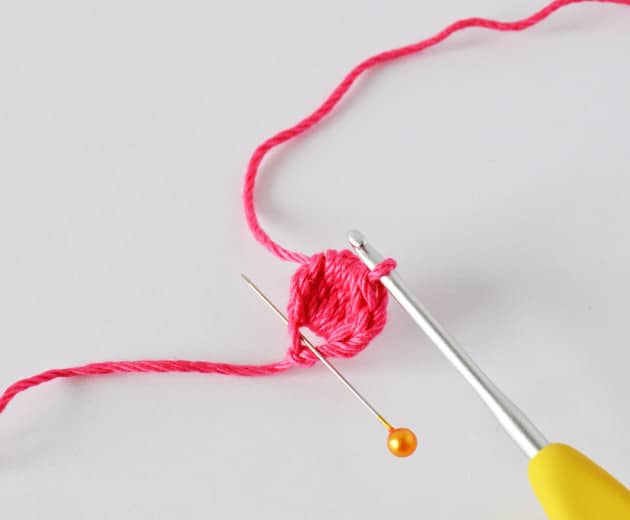 Pull the short tail to close the hole at the base of the dc6tog. Close and make it a Berry with your fingers. Break the yarn and Fasten off. Your Berry looks like the picture below.
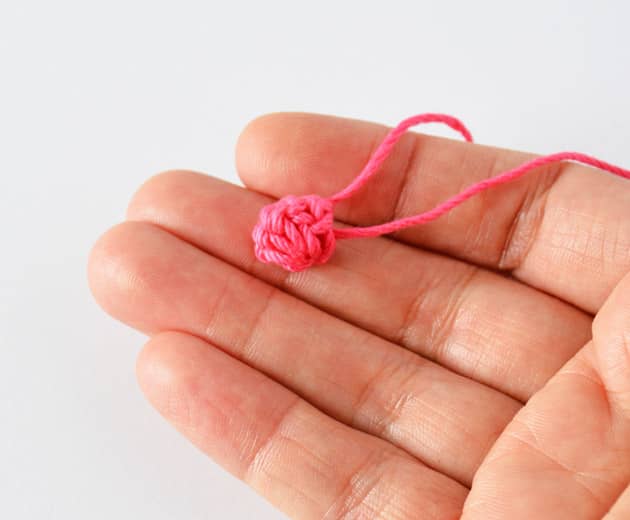 Thread a needle onto yarn tails and weave them in between the sts to hide them.
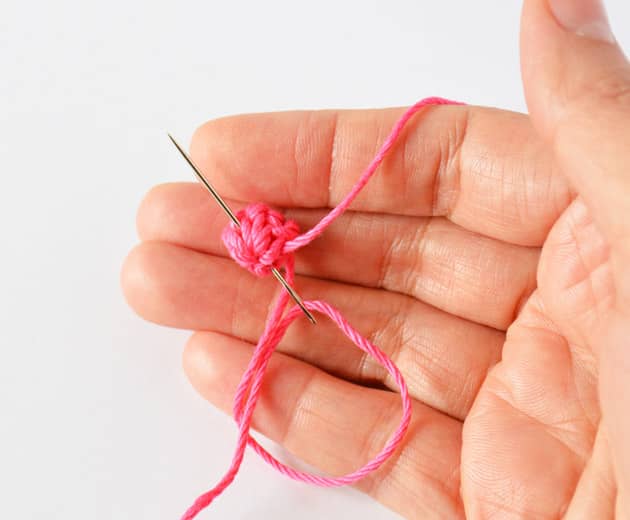 And your tiny Berry is done.
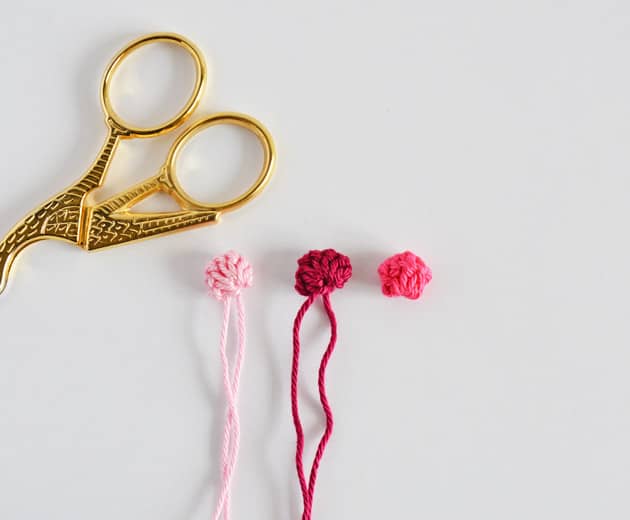 For my original Joyful Bouquet I made some greenery nests to hold these Berries. One is a simple 12 dc’s circle and the other one is more like a triple leaf. Follow me for the patterns.
  Round Greenery Nest This is just a simple 12 dc’s circle that is made to ‘hug’ the Berry. I use colour Olive and a 2.5 mm hook for this tutorial.
To Start make a magic loop and ch 3 (counts as first dc) 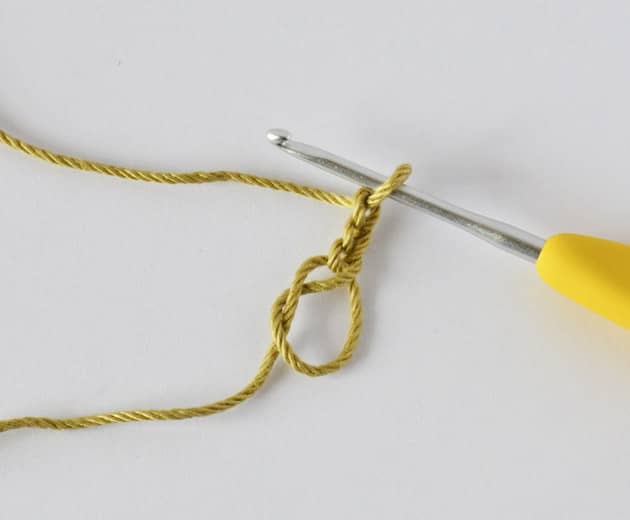 Make 11 more dc’s into the centre of the loop
 Pull the yarn tail and close the centre hole. Leave about 15 cm yarn tail, fasten off and break the yarn. Thread a needle onto the yarn and make this extra stitch as follow: insert your needle into the first dc made, as shown below (not into the 3rd ch of your initial ch3). Pull the yarn all the way out.
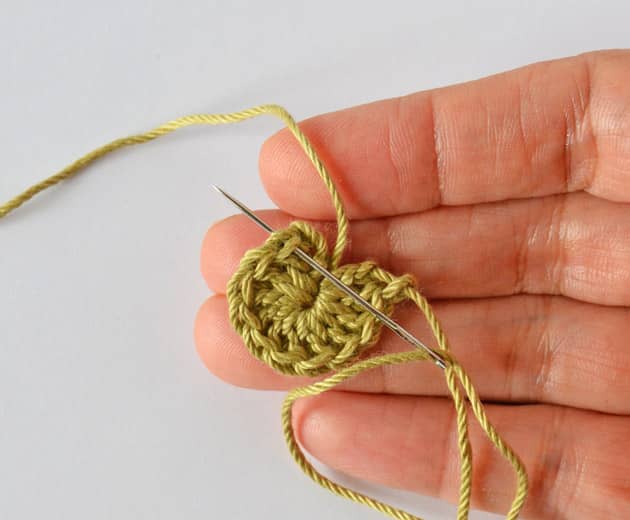 Now go back to the last dc made, insert the needle into the last dc made and under the bar loop at the back of this st, as shown below. Pull the yarn all the way out.
 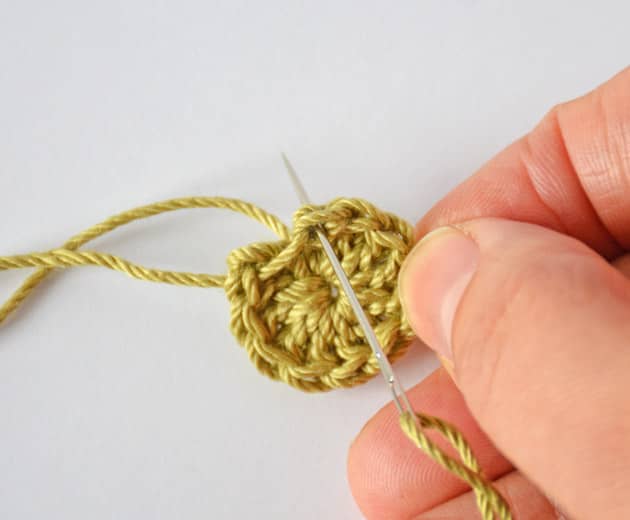 You have a 12 dc’s circle with a clean edge, can you see? If you pull the short tail just a little more and you place your finger in it to shape it, it will turn into a little nest, where you can place your berry.
 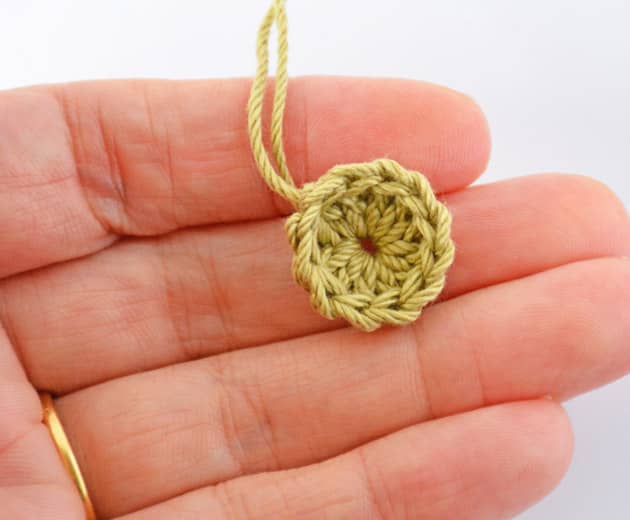 Now put your Berry into the centre of this circle, Let it ‘hug’ your Berry. Use the yarn tails left from your circle to attach the Berry.
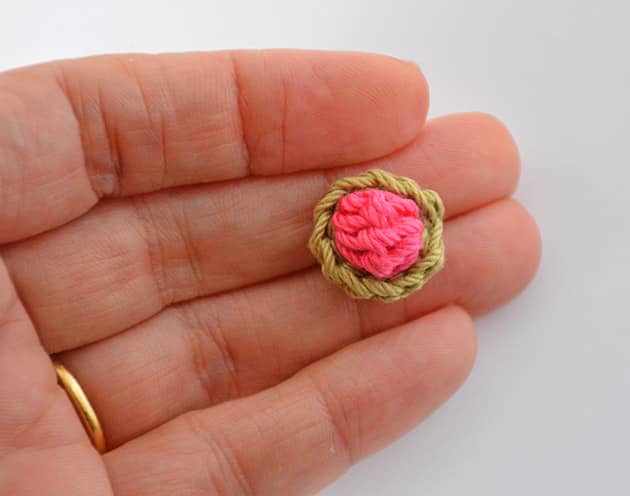 Will you make just one…? I made a few of them for my Joyful Bouquet.
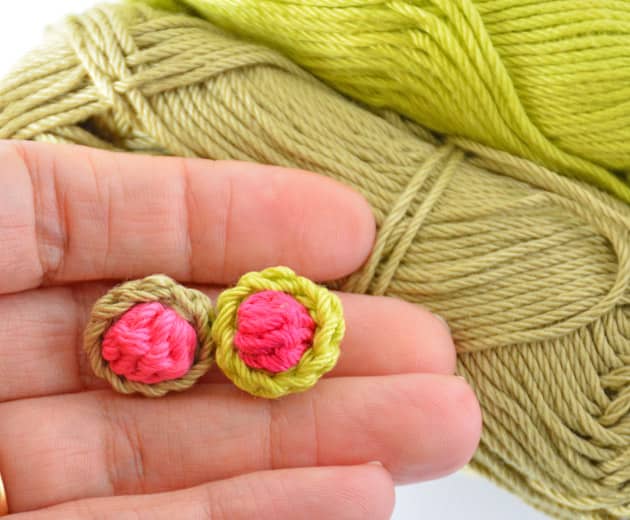 This was the first greenery nest type. Are you ready for another one? I made one which is more like a triple leaf to hold one or more Berries in.
Second Greenery Nest I use colour Pistachio and a 2.5 mm hook for this tutorial.
To Start make a magic loop and make 2 sc’s into the loop centre. It will look like the picture below. 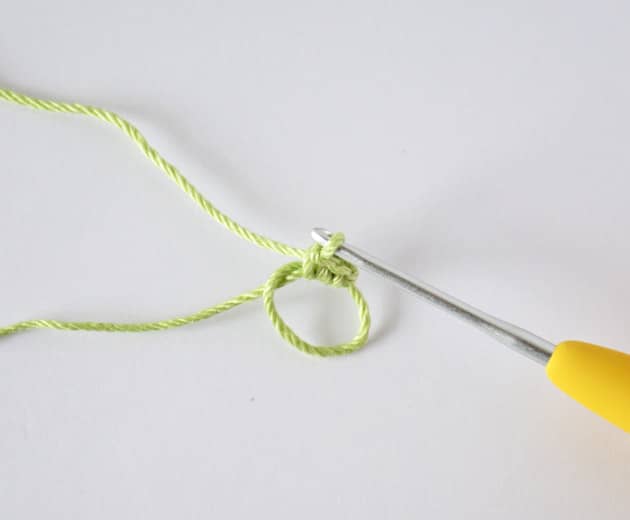 Ch 5 and start working from the 3rd ch from hook, shown by my sewing pin below. Work as follow:
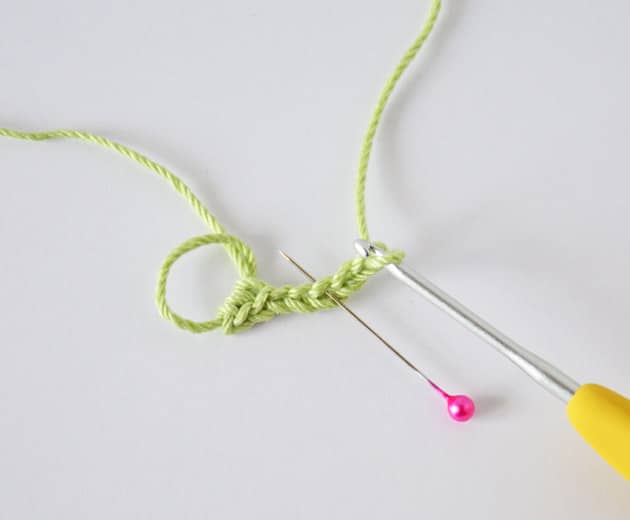 *Make hdc into the 3rd ch from hook, 3 dc’s to the next ch, sl st into the next.
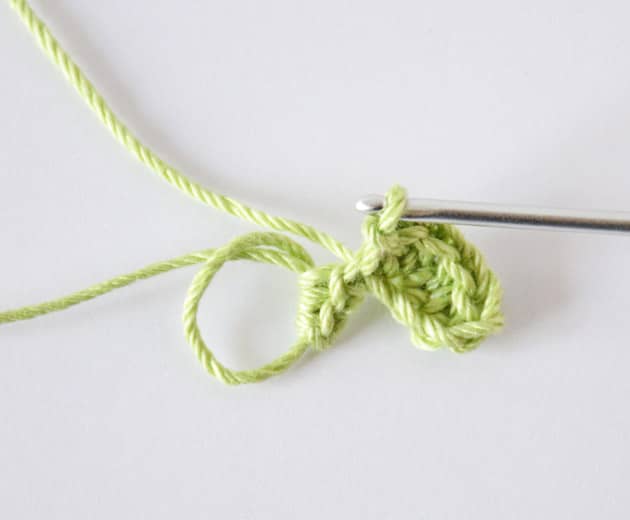 Now make 2 sc’s into the centre of your magic loop* repeat between ** 2 more times. Start by ch 5 and repeat everything between the ** till you have a three little leaves around.
 To close sl st in the first sc made. Now pull the short yarn tail to close the centre hole . Leave about 20 cm tail, break the yarn and fasten off. You work will curl, tha’t fine, it will hold the berries with this curly hug.
 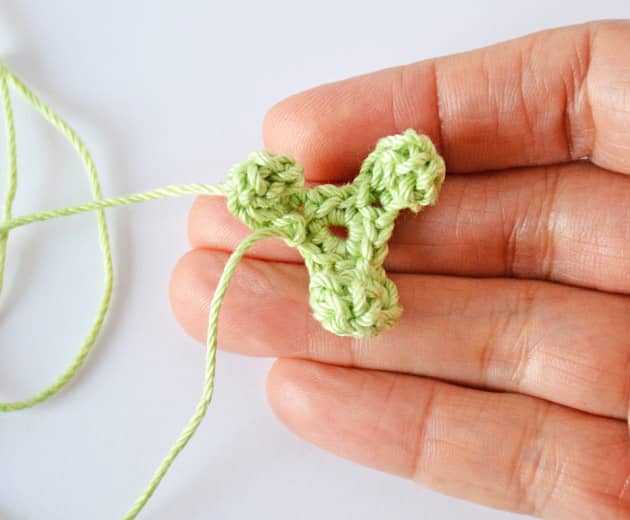 You can now place one or two or three Berries inside this triple greenery nest. Use the yarns left of the triple leaf to attache all of them together.
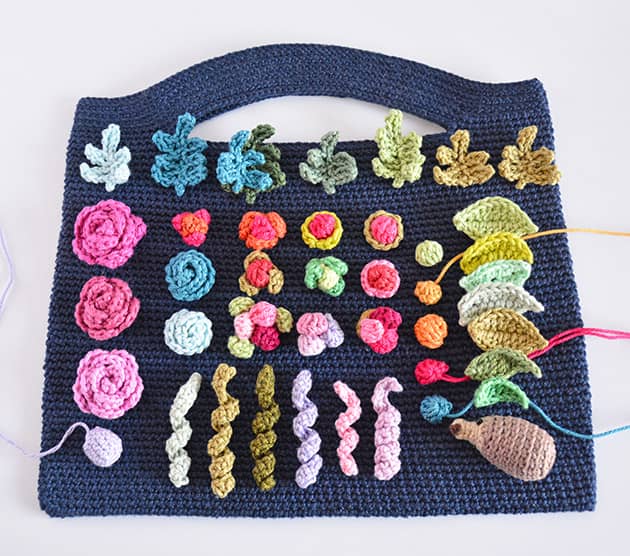
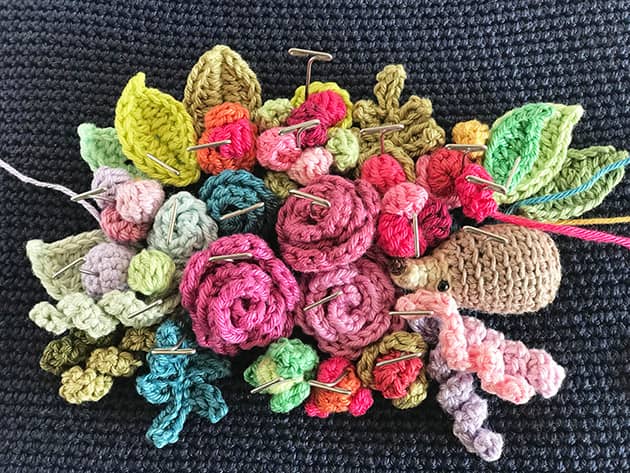
 And here how these are all placed into the Joyful Bouquet. What do you think? isn’t this a ‘makes my heart sing’ kinda thing?
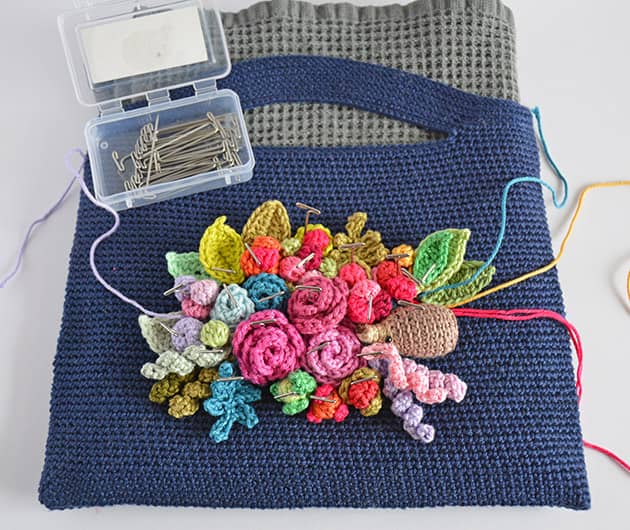
 So now you can enjoy making berries of different kinds. In case you are interested, here are some links for more patterns related to the Joyful Bouquet ::
👛 The Skinny Purse 👛
🦔 Baby Hedgehog & Leaves 🦔
🌿 Tiny Fern Leaf 🌿
As you can see above, The Joyful Bouquet is ready to be attached to the Skinny Purse so I’m gonna put my hands on it now. Thank you so much for joining me on this cheerful journey, xoxMo
5 comments on Crochet Berries and Greenery Nests Pattern
WhitneyBiggie
Hello webmaster, i’ve been reading your page for some time and I
really like coming back here. I can see that you probably don’t make money on your blog.
I know one simple method of earning money, I think you will like it.
Search google for: dracko’s tricks
great idea! It's gorgeous!
My absolute favorite lines of the book
Colleen McLean
Stumbled upon your site while looking for a simple smooth round ball. Seems so simple but nothing I was doing was coming out right. Thank you so much for putting an end to my search. Your beautiful berry pattern should work perfectly.
Ny
This was exactly what I was looking for, I love the way you structure your tutorial! The pin in the indicated stitch was really helpful for me, thank you!
Jenn
I’m confused about the berry, specifically the instruction “to close sl st.” I’ve never come across that particular stitch/ direction before. Thanks for any clarification you could provide!