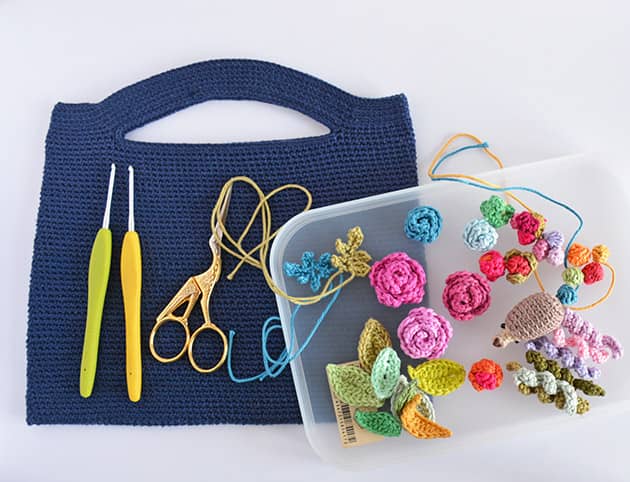
This skinny cotton purse is made out of only two Granny Kit cotton balls crocheted in spiral rounds of just plain sc’s stitches. It was originally designed to be decorated with a colourful bouquet on its front centre. You can read more about the WIP (work in progress) here. On the last few days I’ve been working on the bouquet flower-y details and I am SO excited to have this joyful free crochet bag pattern project as my first 2018 post right here on my blog. 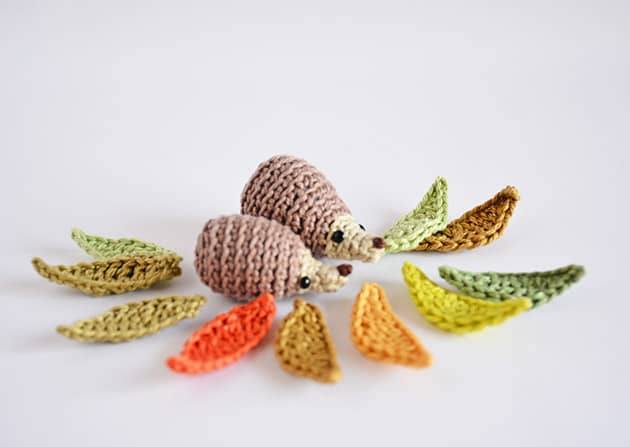 Back in autumn 2016, I shared my tiny Hedgehog and leaves pattern, which is part of the flower-y bouquet. Today I’m here to share the skinny purse pattern.
  The plan is to add a colourful detailed bouquet to the front centre of this skinny purse, as shown above. So before we start working this neat project, let me give you some important information.
WHAT DO YOU NEED
Yarn: You will need 2 ball of GrannyKit cotton
I used colour Navy for my Skinny purse but you can choose any colour you like.
Crochet hook: 2.25 OR 2.5 mm (see tension details below)
A pair of crafty scissors
Tapestry needle
Stitch marker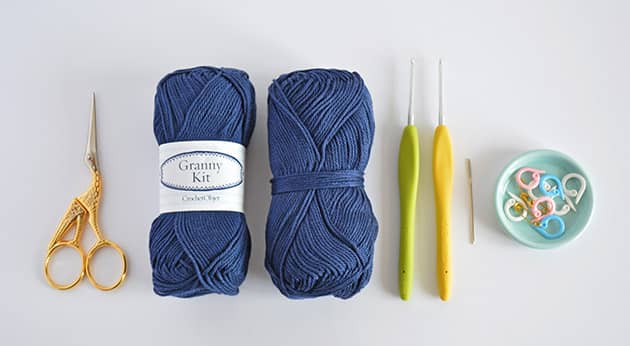 ABREVIATIONS AND STITCHES (US crochet terms)
ch = chain stitch
st(s) = stitch(s)
yo = yarn over
rnd(s) = round(s)
lp(s) = loop(s)
sk = skip
pre = previous
BLO = back loop only
*…* = repeat instructions between ** x times
sl st = slip stitch = insert hook, yo, pull the lp back through the st and through the lp on your hook.
sc = single crochet = insert hook, yo, pull the lp back through the st (2 lps on hook), yo and pull through both lps on hook.
If you are a beginner you can always go to YouTube and write ‘how to’ on any stitch you wish to learn.
TENSION
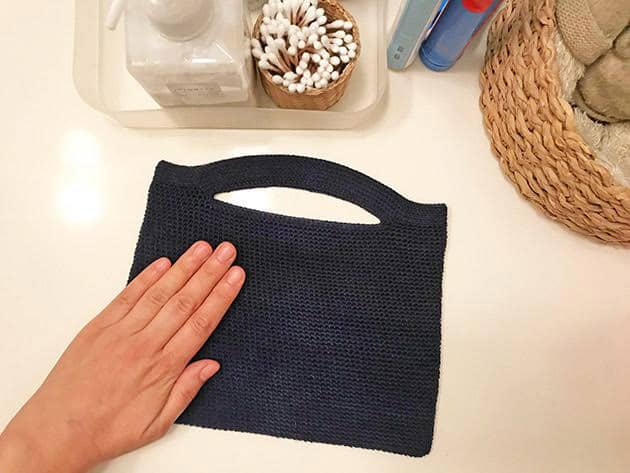
This purse is made out of spiral sc’s rounds. While using only sc’s we would like to keep as plain and neat surface as possible. Try to keep your tension balanced. Keeping your tension even will give your purse this neat and clean look. If you crochet tightly I suggest that you use a 2.5 mm hook. If your crochet is balanced please use a 2.25 mm hook. In any case you have to be careful not to crochet too loose because you can finish the yarn before your’e done with the purse. Aim to create a purse with an even density and without holes on it’s surface. You can see in the pictures that my purse got a little tight at the top. It happened because I crocheted the top part of the purse long time after I started it so my hands “forgot” the tension used at the beginning of this project. It’s ok, it still looks good and I love it ❤ very MUCH. I took the next photo with a tape measure that shows cm’ on top of the crochet surface, it’ll give you an idea of the density.  SIZE
SIZE
With Granny Kit cotton or any other 4 ply cotton + the recommended hook size, your skinny purse will measure approximately 24 X 18.5 cm (not including the handle height)  We will start by creating the bag body with a spiral rounds of sc’s only. I used colour Navy for this tutorial.
TO START ch 60
rnd 1: sc in the 2nd ch from hook – Insert your hook under one loop of the ch st, where I show with my sewing pin in below picture. 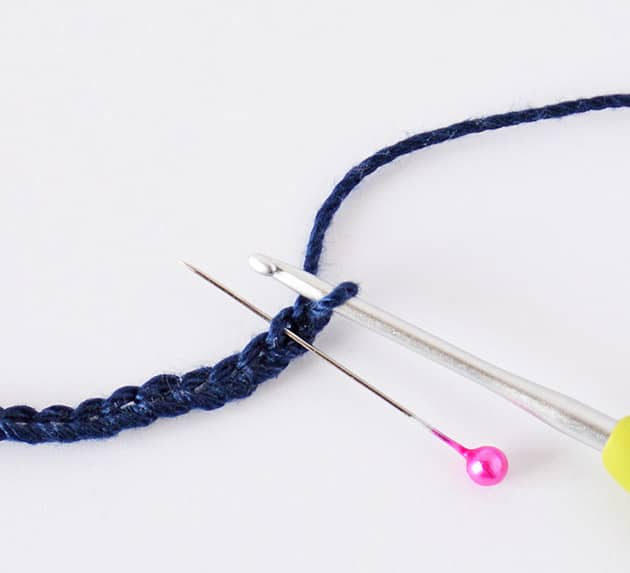 Now mark the first skipped st (it counts as our first sc), like I show in the next picture – this marker will help you later.
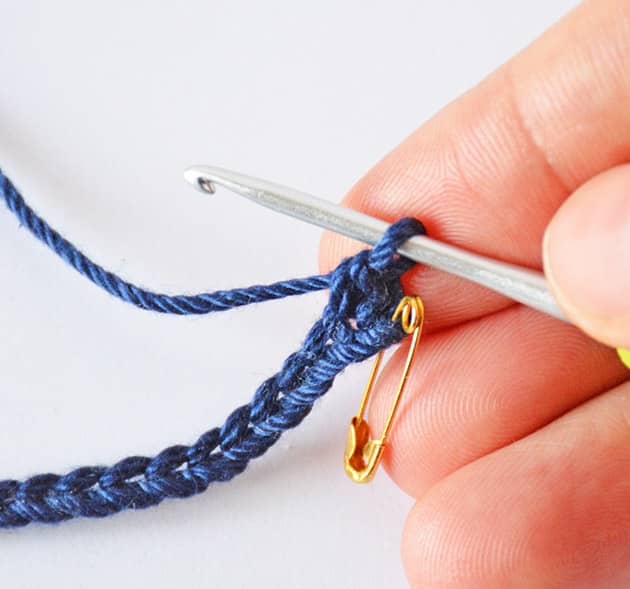
sc in the next 57 sts, insert you hook in one loop only of each and every st. You should have 1 chain remaining, see next picture. Work 3 sc’s into the last st, where I show in the next picture – Corner made. Your work will start to curl and that’s ok. It will get straight later.  Pull the yarn tail to close the hole that created by the 3 sc’s. Continue working now from the other side of the foundation ch. Insert your hook in each and every st right into the little hole where I show in the next picture and sc in next 57 sts. Work over the short tail so you don’t have to weave it in later.
 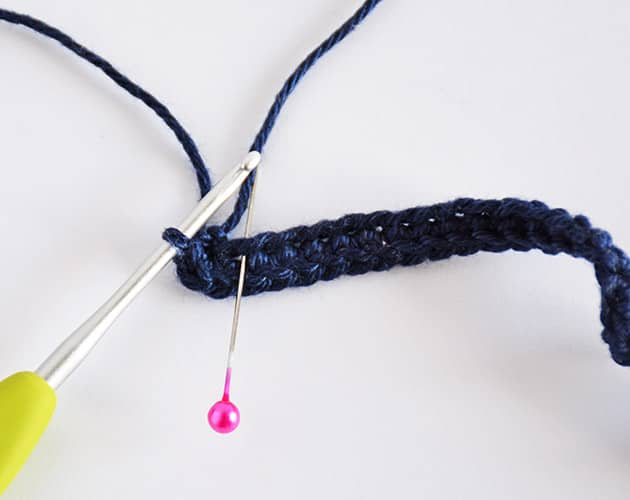 When you reach the starting point again, sc into the base of the first sc made in this rnd – where I show in the next picture.
 You have just finished the first rnd, which is the hardest one. You should have 120 sts around. These 120 sts are the size of your skinny purse. Continue working spiral from here. Mark the first st in each rnd so you know where is the start and where is the end of each rnd.
rnd 2: Remove marker and sc in the same place where marker was located – Mark the first sc. Sc in each st around till you reach the marker again (120 sts). Your work should look like the next picture at the end of this rnd.  rnds 3-49 (47 rnds): Remove marker, sc in the same place where marker was located – Mark the first sc. Sc in each st around till you reach the marker again (120 sts). The next picture shows how it looks at the end of rnd 10.
  It will look like the next picture at the end of rnd 20.
 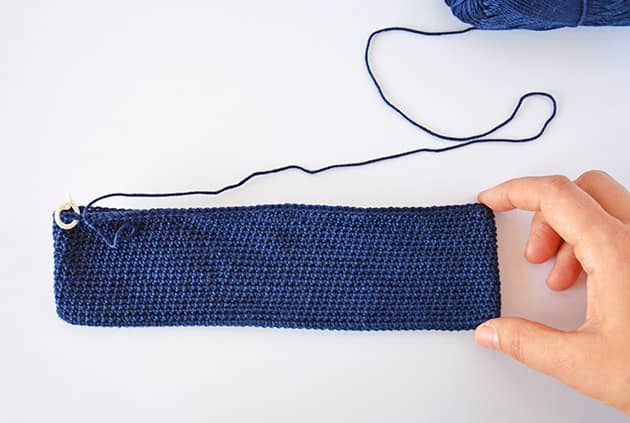 When you reach the point where your first ball is finished, add the second ball as follow: make the last part of the sc with the new yarn on your hook and continue working your sc’s just like you did before. Work over the yarn tails so you don’t have to eave them in later. Continue working spiral till you have 49 rnds completed. We are going to make the purse handles.
HANDLES
Rnd 50: sc till you are 12 sts from corner. Include the corner st in your counting. See next picture.  Now ch 50, sk 36 sts, sc in next – which is 12 sts before the next corner, see next picture. Your first handle is located and it starts to look like a bag. This is the base of the first handle.
 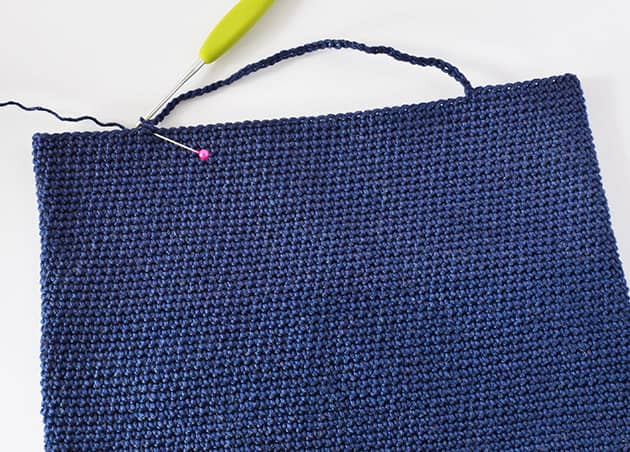 sc in next 23 sts, ch 50, sk 36 sts, sc next to locate the second handle the same as the first one. They shouil be located at the same place on the other side of the purse.
 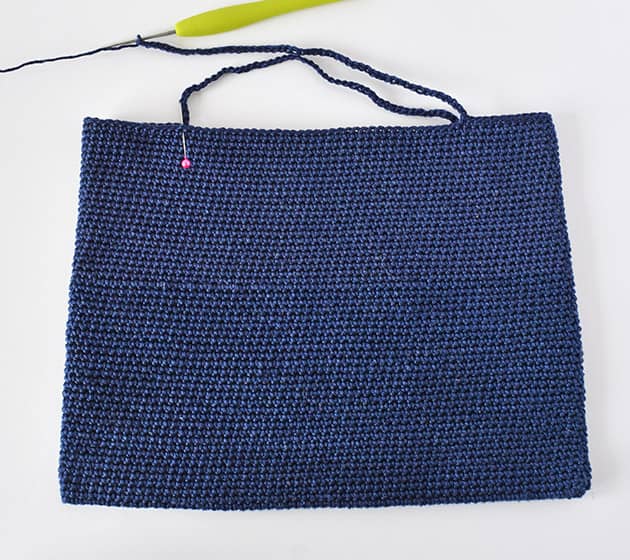 sc in each of the next 23 sts till you reach the first st you made in this rnd. We just created the basic rnd of the handles of this purse. Your work will look like the next picture now.
  Rnd 51: sc in the first sc made on pre rnd. Now sc in each and every st of the ch 50 – insert your hook to one lp of each and every ch st, where I show with my sewing pin here in the next picture.
  sc in next 24 sts. sc in each and every st of the next ch 50. Now sc in each of the last 23 sts. (148 sc’s)
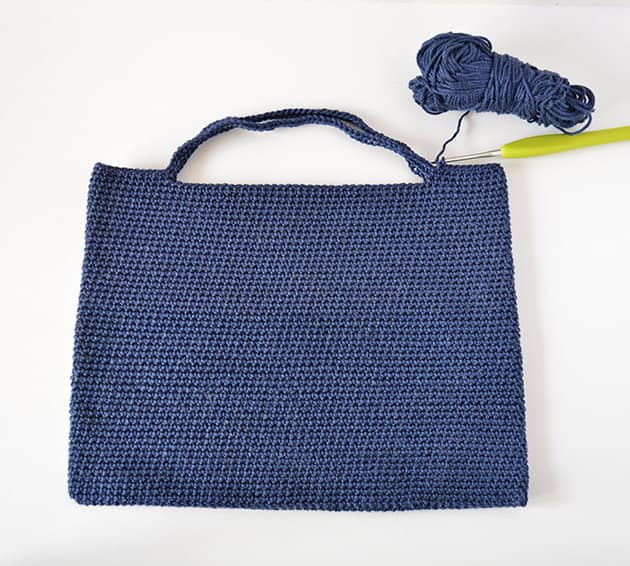 Rnd 52: Sc in the first sc made on pre rnd, mark this first st. *sc in each st of the 50 straps sts, in BLO (back loop only). Now sc regularly in the bag sts* repeat between ** till you reach the first st again. (148 sc’s)
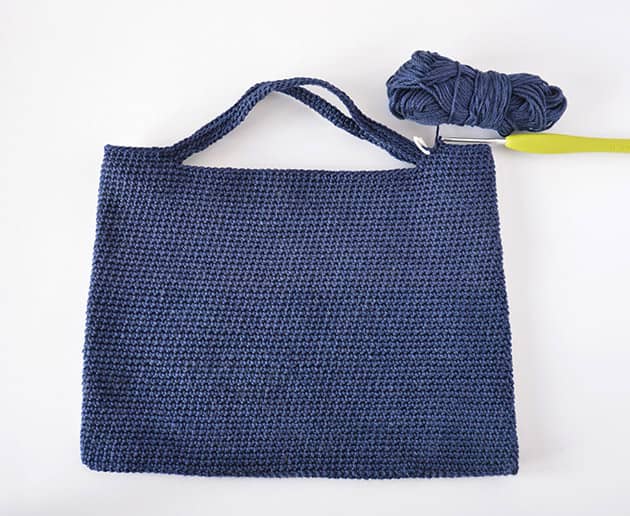 Rnd 53 – 55 (3 rnds): Sc in BLO of the first sc made on pre rnd, mark this first st. sc in BLO of each st around. (148 sc’s)
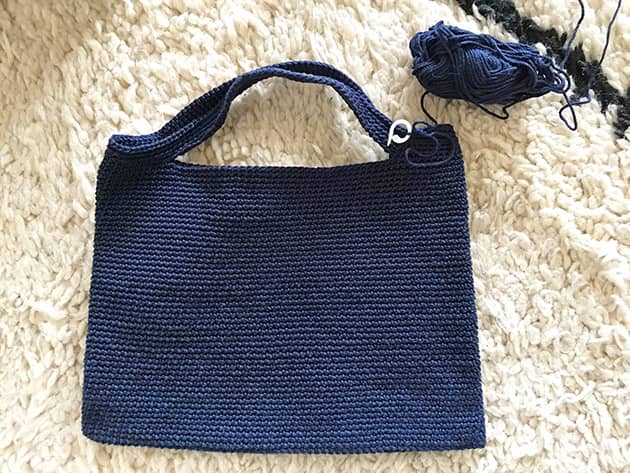 Rnd 56 : Sl st in BLO of the first sc made on pre rnd, mark this first st. Sl st in BLO of each st around. Break the yarn. (148 sc’s)
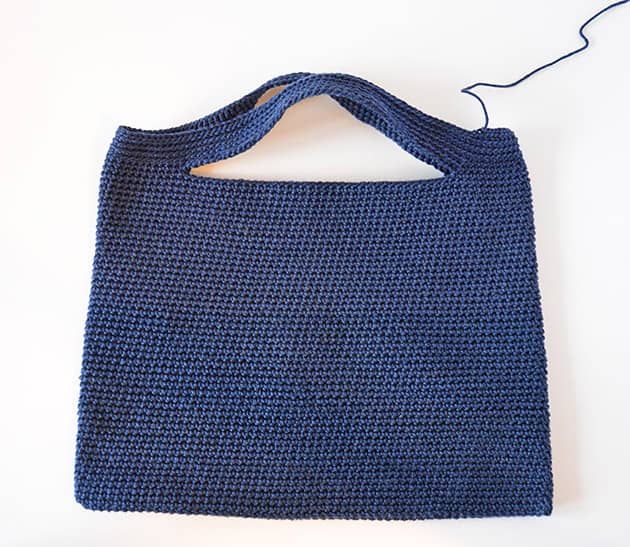 FRAMING THE INSIDE OF THE HANDLES
1). Join a new yarn into the corner st, where I show with my sewing pin in the next picture. 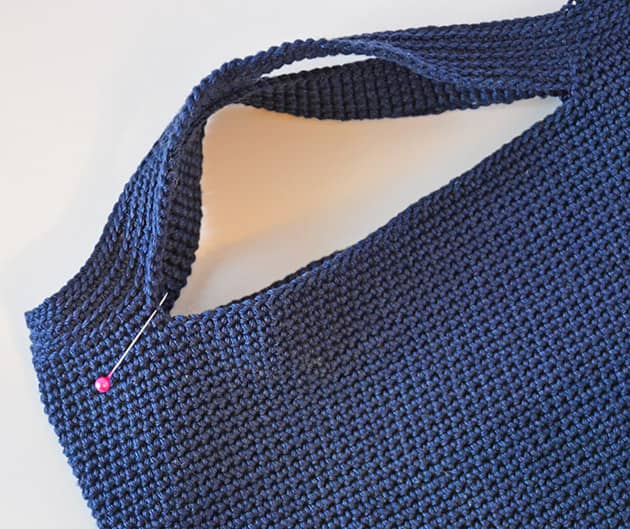 2). Sl st into BLO (back loop only) of each and every st around the inside part of the strap. Starting at the strap side continuing all the way around. Make sure you insert you hook under the BLO (back loop only) of each st, where I show in next two pictures.
3). When you reach the starting point, sl st into the first st made and break the yarn. 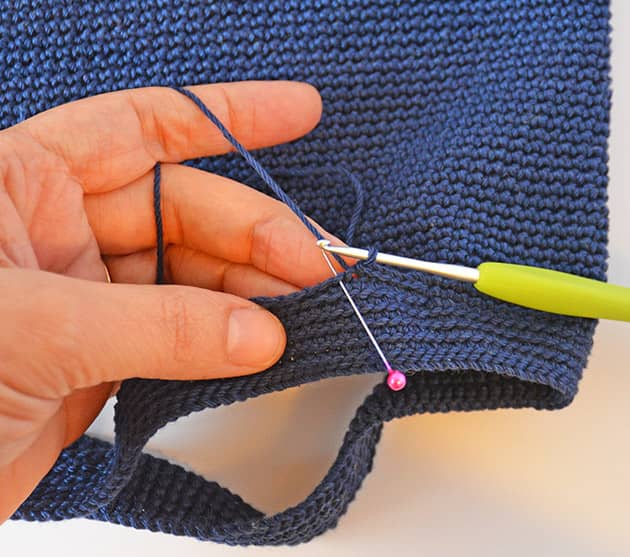
 Repeat steps 1 -3 to frame the second handle. Weave in tails, hide them underneath the sts inside the purse, Like I show in the next picture.
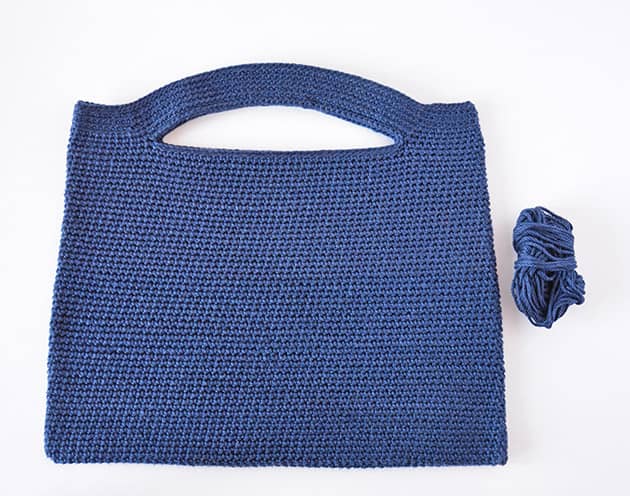
  In the next picture I show the yarn that was left out of the 2 Granny Kit cotton balls, when I finished working on my skinny purse. It gives you an idea of how much yarn I used.
 BLOCKING in 4 steps
1) Put your skinny purse on a flat surface.
2) Spray some water all over the purse from both sides.
3) With your hands, make if flat and give it a sharp shape, make its contour flat and straight.
4) Lay flat till it’s totally dry.
 It was late when I blocked my skinny purse so the above picture is a little dark but when I woke up the next morning it was totally dry.
  And that’s it. This is the Skinny purse. Here is a close up picture of the handles after blocking. Do you like it as much as I do? I love the flatness of this crochet object. It looks high quality, don’t you think so?
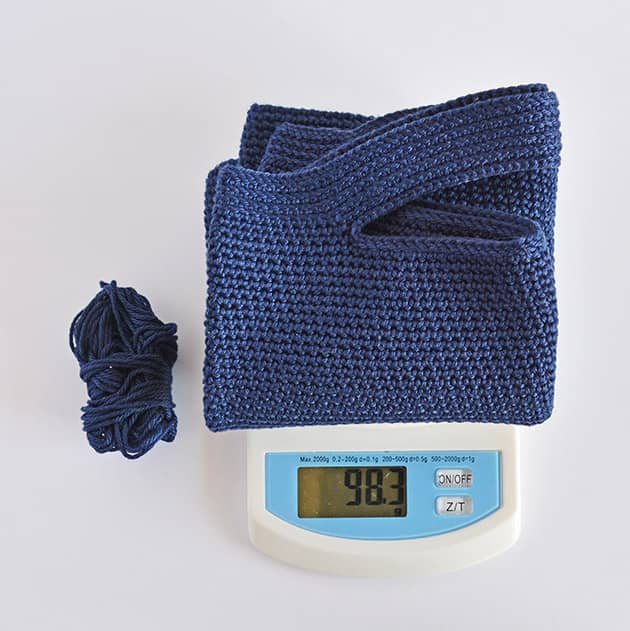 The skinny purse that I made weights 98.3 gr’. Each ball of Granny Kit cotton is 50 gr’ so 2 balls should be enough. The above picture shows how much yarn left out of the two balls when my purse was done.
 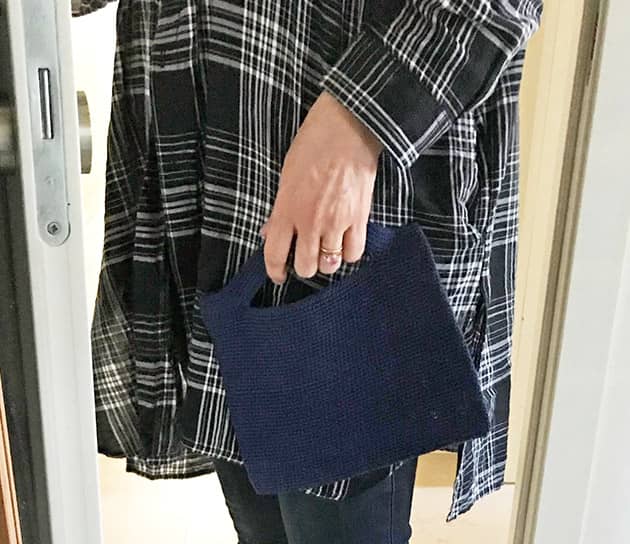 Ok I tried to take a selfie of me holding my skinny purse for you. I did my best 🙂 holding the camera + holding the door + holding the skinny purse in a nice and elegant way – see what I meant by saying ‘I did my best’?
  I really think you can enjoy the skinny purse as is, without adding any decorations on it. It looks very neat and elegant and can be a perfect accessory for an evening going out or so. But in case you plan to add a colourful flower bouquet…… like me, then I plan to share this WIP with you here and give you all the details needed for making such a bouquet.
 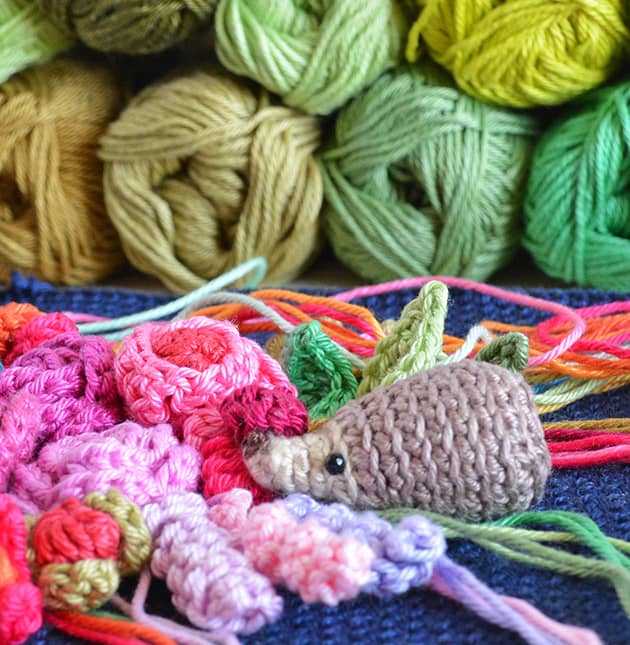 You can now start by crocheting the skinny purse and the tiny little Hedgehog + leaves, just to be ready with these. When you are ready with the purse, you can make these little bouquet details with me using any yarn oddments you have in stash.
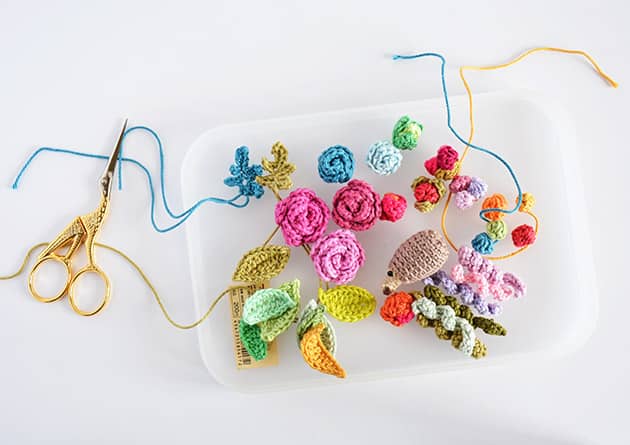 I’m still busy creating the little details that will be included in this centred bouquet.
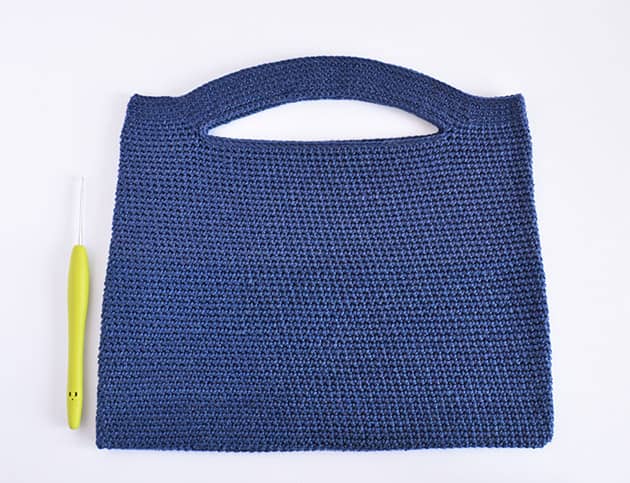 If you are interested in making the skinny purse and you don’t need the step-by-step tutorials, here is a ‘just words’ pattern, which you can copy, paste and print.
TO START ch 60
rnd 1: sc in the 2nd ch from hook. Mark the first skipped st (counts as our first sc). Sc in the next 57 sts, Insert you hook in one loop only of every ch st. sc 3 in the last st.
Pull the yarn tail to close the hole. Continue working now from the other side of the foundation ch. sc in next 57 sts. Work on the yarn tail. When you reach the starting point again, sc into the base of the first sc made in this rnd. (120 sts)
Work spiral from here. Mark the first st in each rnd.
rnd 2: Remove marker and sc in the same place where marker was located – Mark the first sc. Sc in each st around till you reach the marker again (120 sts).
rnds 3-49 (47 rnds): Remove marker, sc in the same place where marker was located – Mark the first sc. Sc in each st around till you reach the marker again (120 sts).
STRAPS
Rnd 50: Sc till you are 12 sts from corner, ch 50, sk 36 sts, sc 13 sts before the next corner. sc in next 24 sts, ch 50, sc in the parallel st on the other side. sc in each of the next 23 sts till you reach the first st you made in this rnd.
Rnd 51: Sc in the first sc made on pre rnd. Now sc in each and every st of the ch 50 – make sure you insert your hook into each st, insert your hook to one lp of each ch st. Sc in next 24 sts. sc in each and every st of the next ch 50. Now sc in each of the last 23 sts. (148 sc’s)
Rnd 52: Sc in the first sc made on pre rnd, mark this first st. *sc in each st of the 50 straps sts, in BLO (back loop only). Now sc regularly in the bag sts* repeat between ** till you reach the first st again. (148 sc’s)
Rnd 53 – 55 (3 rnds): Sc in BLO of the first sc made on pre rnd, mark this first st. Sc in BLO of each st around. (148 sc’s)
Rnd 56 : Sl st in BLO of the first sc made on pre rnd, mark this first st. Sl st in BLO of each st around. Break the yarn. (148 sc’s).
FRAMING THE INSIDE OF THE HANDLES
1) Join a new yarn into any corner st of the handles inside part.
2) Sl st into BLO (back loop only) of each and every st around the inside part of the strap. Starting at the strap side all the way around.
3) When you reach the starting point, sl st into the first st made and break the yarn.
Repeat steps 1 -3 for the second strap. Weave in tails.
BLOCKING in 4 steps
1) Put your skinny purse on a flat surface.
2) Spray some water all over the purse from both sides.
3) With your hands, make if flat and give it a sharp shape, make it’s contour flat and straight.
4) Lay flat till it’s totally dry. And that’s it- Skinny purse done.  So I’m back to work my final bouquet details now + a few more preparations for the upcoming workshops. I really love to be here in my little blog corner and I hope that you enjoy it too. Thank you for joining me in this colourful project. xxxMo
5 comments on Crochet Skinny Purse – Free bag Pattern
Michelle
This is fabulous! I can think of several uses for this chic accessory. Would there be a way to place a longer handle on it so that it might also be used as a cross-body purse? I am still loving the idea of the colorful bouquet that will go on the center. So excited to see the bouquet on this skinny purse! And you did a great job in getting a selfie with all of that going on 🙂 So very chic, yet practical! Thank you so much for the inspiration. I’ll have to place an order for some Granny Kit for this new project soon! Have a lovely day, Mo. XO
Mo Malron (author)
Thank you Michelle, it’ll be pretty with longer handles and it’s really not complicated to create them longer. I’ll share more of this bouquet soon xxxMo
Yeşim Korucu
I definitely will try this one
Martha LoCoco
Where are the patterns for the flowers
Mo Malron (author)
Find them all here as well as on the FREE PATTERNS section on the right hand side bar of mu blog.
https://crochetobjet.com/2018/01/30/crochet-berries-and-greenery-nests-pattern/