
The Joyful Bouquet is finally DONE. YU HOO ! All the little greenery details are joined together, making such a rich and cheerful centre piece. I can’t tell you how excited I am to be sharing this today with you. So So So excited. This work provided me with hours of pure pleasure and so many happy moments. I am so pleased with it and so looking forward to be sharing it on my little blog corner, with you.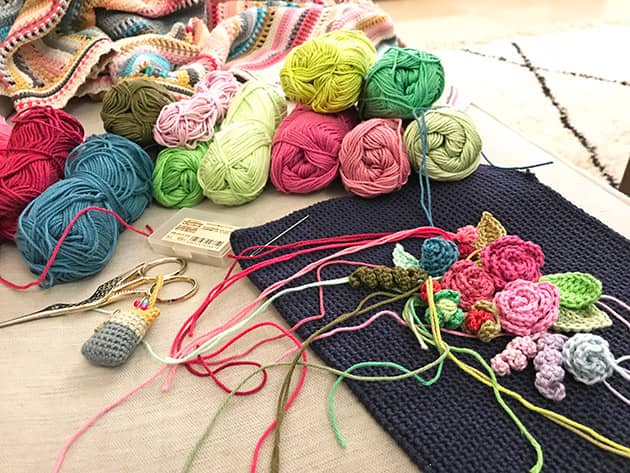 I started working on this bouquet last autumn (November 10th as my photo gallery reminded me), right after I finished designing and crocheting the Stripes & Colours blanket. It was Friday evening and we had one of those quiet family evenings. I had no crochet in hands, which looked rather strange. I was looking for something to keep me busy because ‘no WIP = no joy’. This Navy blue purse was placed in my ‘WIP’s box’, for quite a while. The plan was to add some kind of cotton flowers decoration to it and BANG that was exactly the right project at the right time. It was a few minutes later that I was seated on the sofa, surrounded by these Granny Kit cotton colours….. and here comes the hook, fingers & creative mind dance, which I enjoy the most.
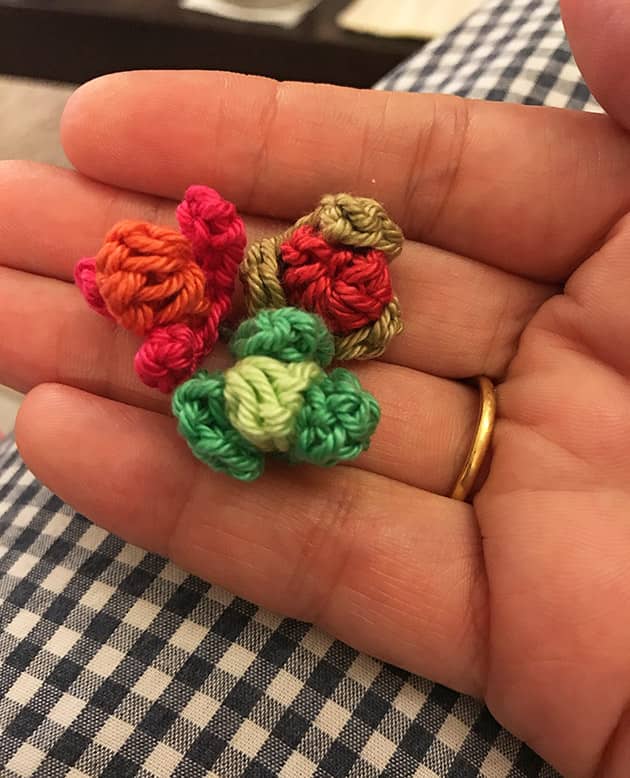 I crocheted all kinds of greenery details, for hours. A late night crochet is my usual. Especially on Friday evenings when it’s all quiet and no ‘wake up calls’ expected in the morning after. It was such a pleasure crocheting all these cotton flowers and leaves. Some of them just flew out of my hands and some of them were just lovely patterns I found on the net.
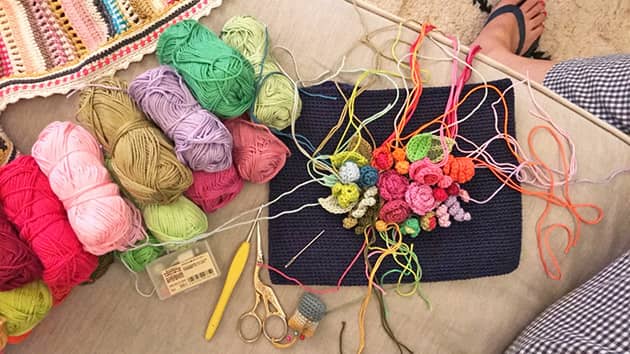 And That’s what I found, laying there on the sofa, when I woke up the next morning. I had my first cup of coffee next to it. I looked at it with a huge smile on my face and I knew this is a plain Joyful Bouquet.
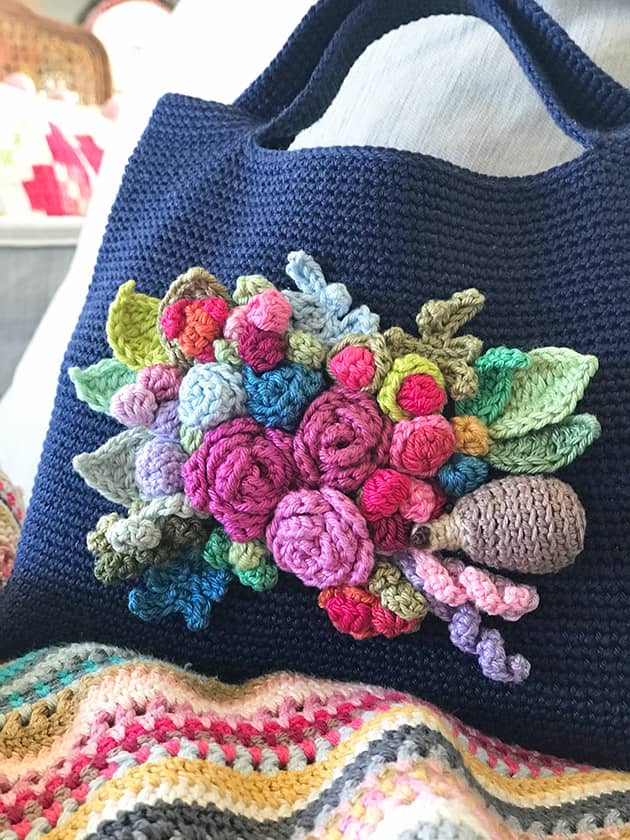
 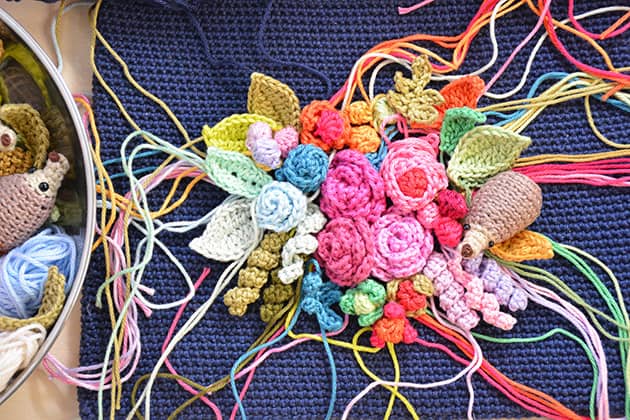 I spent hours on that slow and cosy weekend, crocheting and designing this bouquet. At some point I realised that there’s something missing in it…. something like a tiny little hedgehog. After a few cute hedgehog-ing trials, It was finally placed there between some curly brunches and some leaves. You can find this tiny baby hedgehog pattern in the right hand bar, on the free patterns section here on my blog.
  I was so pleased thinking of a little purse to hold this Joyful Bouquet and the next step was to finish up designing the navy purse. It was not long after, that I shared the Skinny Purse pattern here on my blog. I thought you might like to give it a go and enjoy this purse making. It is so simple to make and I love it with or without a bouquet on it.
 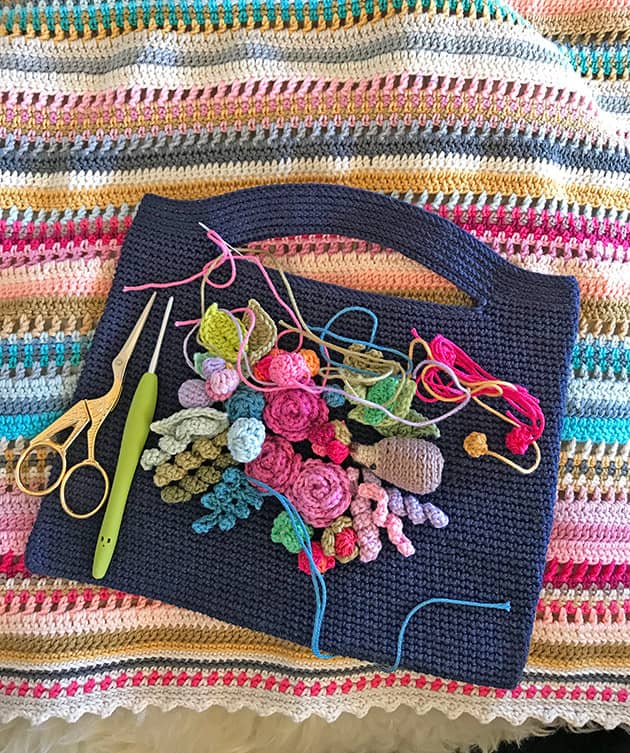 The joyful bouquet was a long WIP indeed. It was done in little time spots between workshops and Monday’s and so many other things, as usual. While working on it I developed a few new patterns for some greenery details.
  I shared a few patterns of these little greenery details and placed them on the free pattern section here on the right side bar such as this tiny fern leaf.
 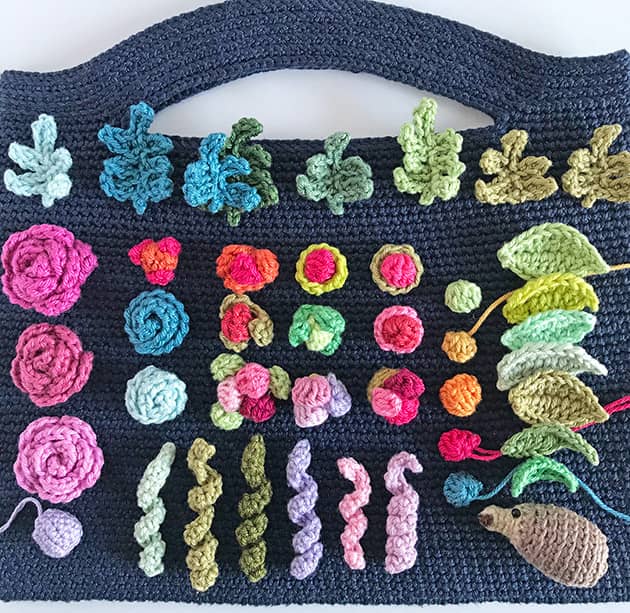 When all the ingredients were in place, I started the assembly work but not before I took some photos for you. ‘So like candies’ photos. So, lets first see what is in this Joyful bouquet. On the following pictures I will share every little piece that I made on this project, while adding links to patterns plus giving you colouring info. I used Granny Kit cotton on this project but I’m sure you can create your own Joyful Bouquet using any yarn oddments you have in stash. Are you ready to go through all these cute little ingredients?….. So first thing first…
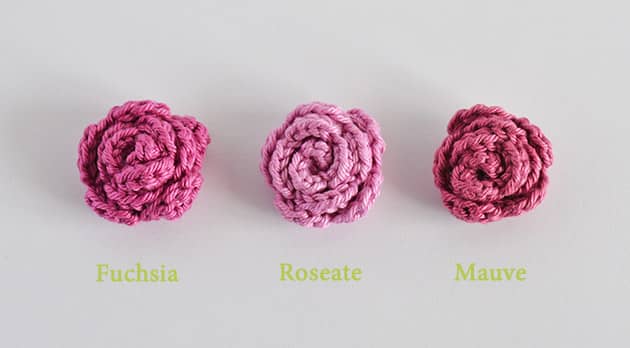 How could you start working on a bouquet and not being started up with some roses? As I just started working on this bouquet I new that I need 3 roses in it. First things I crocheted for this bouquet were these three Attic24 May Roses. These roses are such a pleasure to crochet and I just love these three cotton ones. I crocheted them with a 2.5 mm hook.
 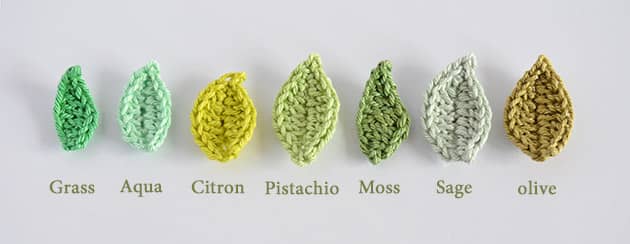 Well if you have roses you have to add some leaves right? I crocheted the first leaves right after I finished working on the roses. I added more of them while on the go whenever I felt more leaves are needed. Patterns I used are from the My Rose Cushion and from the Baby Hedgehog pattern. I crocheted these leaves in a 2.25 mm and a 2.5 mm crochet hook.
Shell we continue with some Berries? 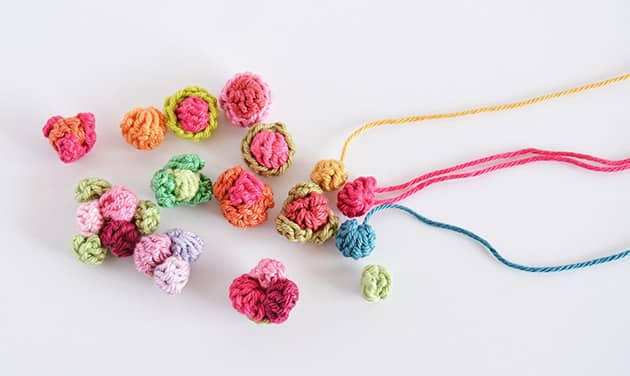
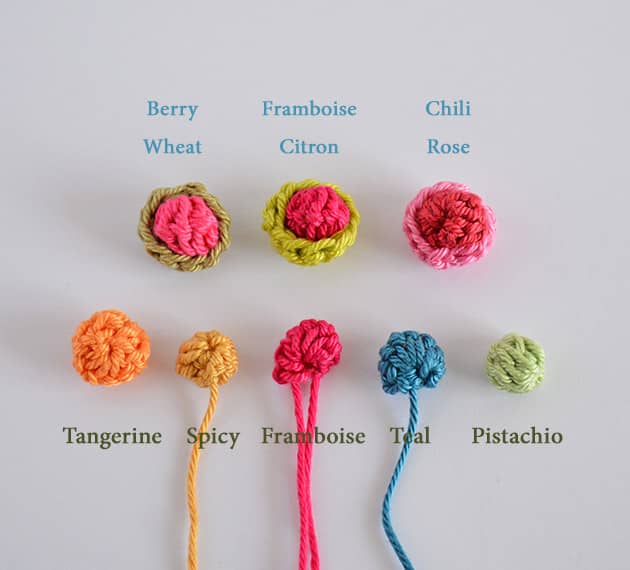 I made a few kind of berries. I needed them to be simple and to add colour with a detail-y feeling. You know me already, I need tiny little details included in my work and I need them to look super fine. So, I designed a simple berry pattern that has a very detailed surface by no work plus I made a few nests to hold some of them. You can find the Berries and nests patterns here. On the picture above you can see what cotton colours I used for each.
 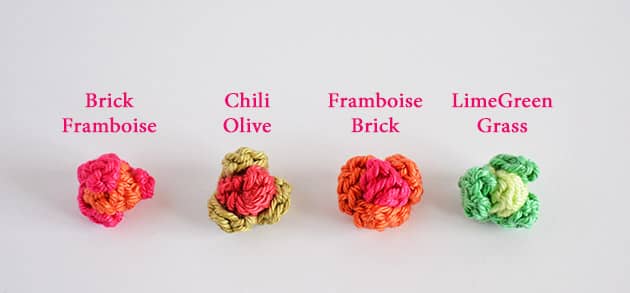 The Berry pattern includes a few different berries versions. As seen above, these berries are placed in one of these greenery nests I have included in my pattern. These were much needed to complete the feeling I wanted to reach in my Joyful Bouquet.
 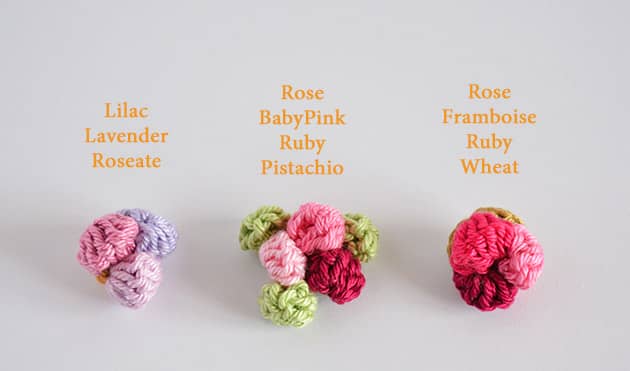 I also added these berry clusters, placed on a triple leaf nest. You will find them as well on my berries pattern. I used a 2.5 mm hook for all my berries.
 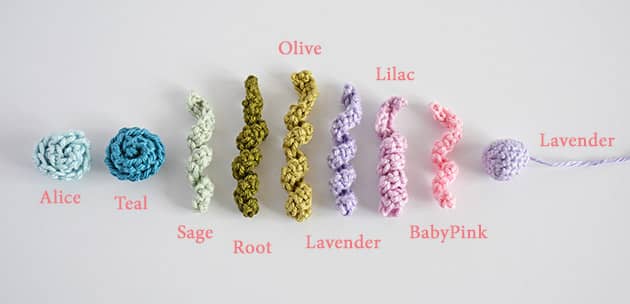 These Curly branches are so simple to make. You just ch 15 / 20 / whatever size you need and starting from the 2nd ch from hook, sc 2 in each st across. They will curl before you even finish. The 2 little curly bulbs at the left of the above picture are made of: ch1o, start from the 3 ch from hook, make 2 dc’s into each and every st across. The lavender at the right is just the Bulb shape that is included in my Chamomile bouquet pattern. All of them are crocheted in a 2.5 mm hook.
 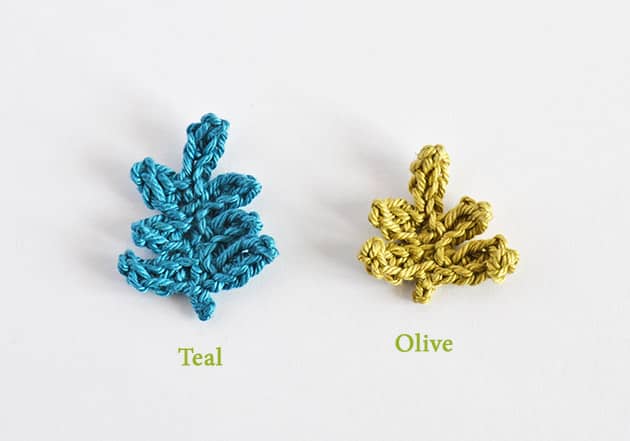 I made 2 fern leaves from this pattern. As you will see later, I have added on the last minute, another small fern leaf in colour Alice.
 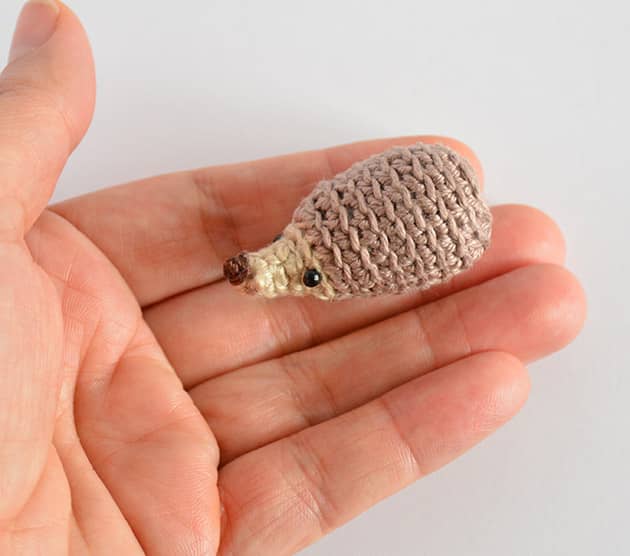 And this cute Baby Hedgehog to make it all look right. find the pattern here.
 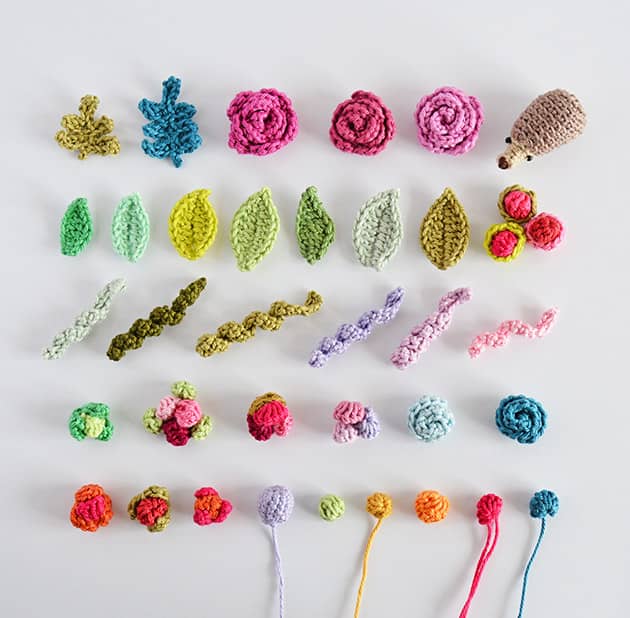 This is it. Everything needed for my Joyful bouquet is ready. I think you can imagine, I took so SO many pictures of these greenery crocheted miniatures. I really couldn’t help myself, it was too too cute.
 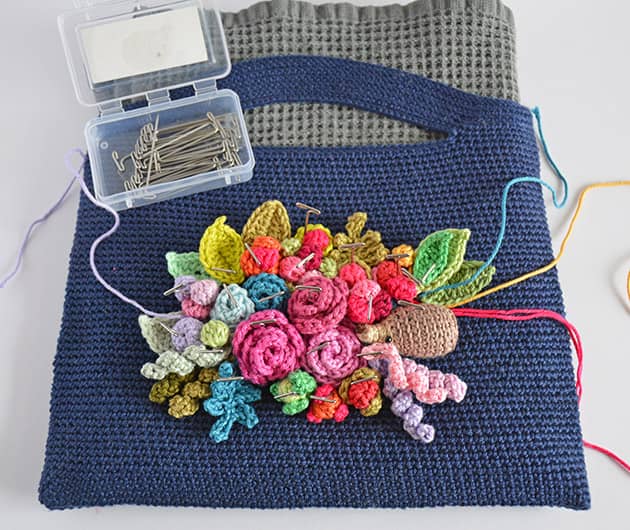 Here comes the serious job. I took a kitchen towel, a thick one, fold it into 4 and placed it into my Skinny Purse. It made it easier for me to pin everything back in it’s right place, using these brilliant T-pins. And my Joyful Bouquet was ready to be placed. Good luck for me with this one.
  And I started stitching. I believe you could imagine, it took ages. Hours of stitching. Not fun job. Not at ALL. I used a strong and strudy sewing thread and spent hours on this job.
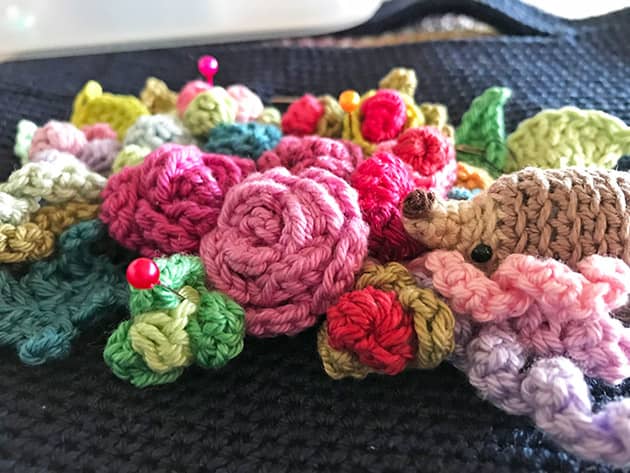
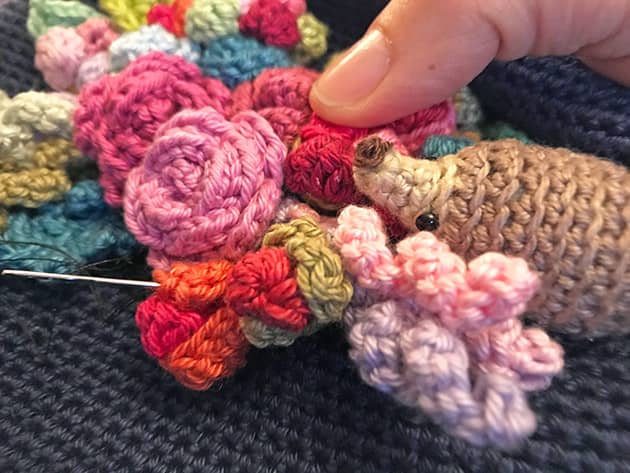 I have nothing NOTHING really not even one tip for you here. Stitching so many tiny little details together and trying to keep one happy bouquet composition as planed, is a hard work. The only thing I found helpful is to keep a few needles and threads in work at the same time and just like I explained in the My Rose Cushion pattern, make it little by little. Attach a few pieces in parallel and make sure you don’t over stitch anything if you want to keep it alive. The bouquet can be easily flattened by over stitching and lose it’s vitality.
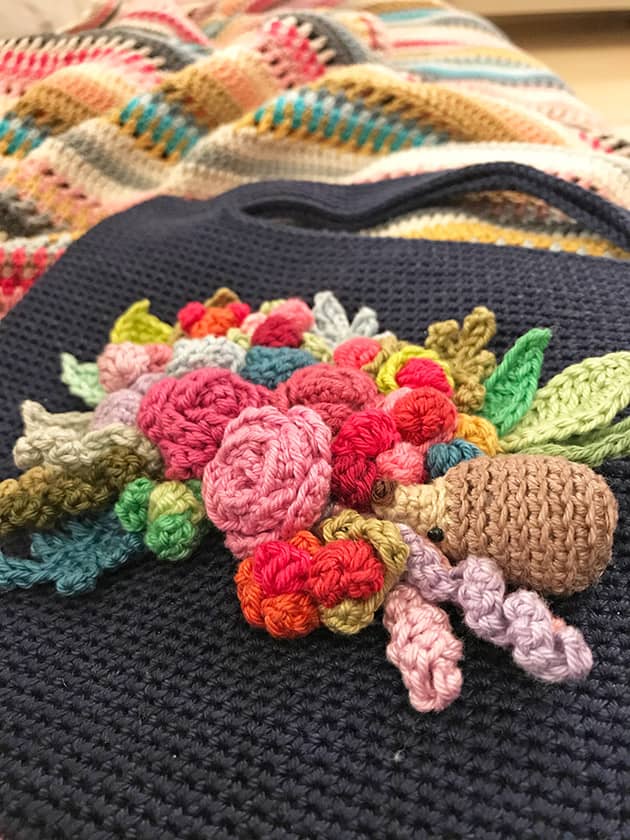 It was too late when I was almost done with this job so I decided to leave the little finishing stitches and final touch ups to be made the day after. The day After -I had it done after some little finishing stitches. And once I had it done I was Huhuuu I was so So just so excited. It came out so soooooo beautiful, deliciously beautiful. Here is my finished Joyful Bouquet project….. Are you ready? Ta Da Di Da DAM!!!
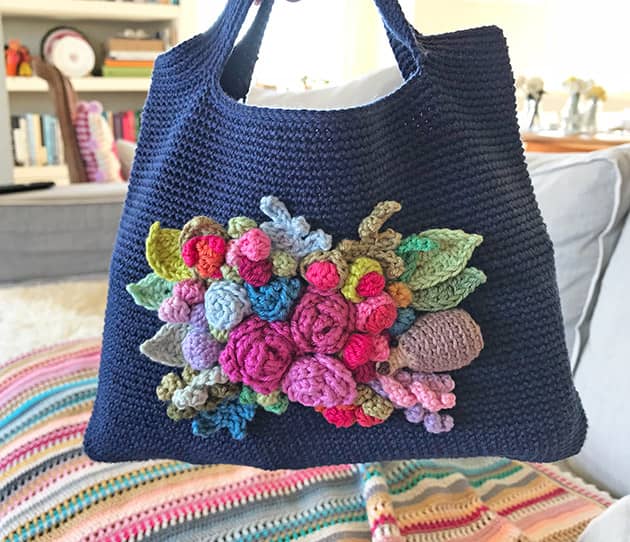 On my last stitches, a minute before finishing it, I decided to add one more small fern leaf (made of colour Alice), right there at the top, can you see it? While stitching it all to the purse, the whole composition moved a little and it felt right to me to add one more tiny fern leaf into my Joyful Bouquet to adjust it. I Am so in LOVE. Can’t take my eyes of it. So bright and rich and cheerful.
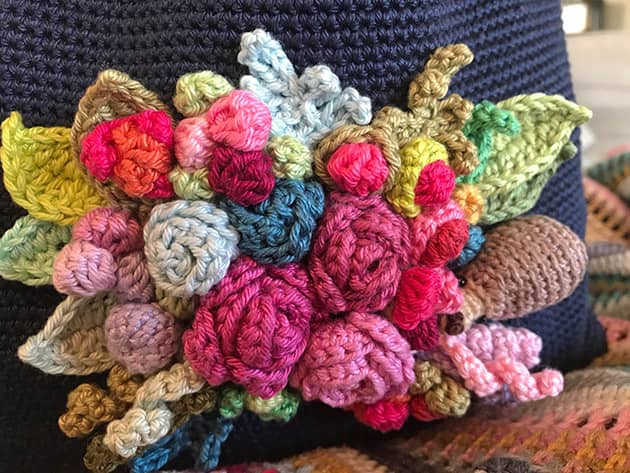

 This Joyful project came to it’s end and the WIP became a finished bag which I proudly took out with me for a little walk the same morning it was done.
 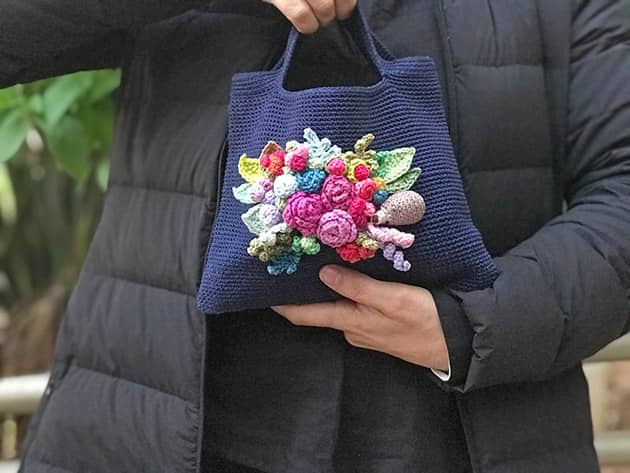 The above photo was taken by my 10 years old boy. I wanted to show you a picture of me holding my joyful Bouquet Purse and all the pictures I took came out pretty bad. This picture was taken by Minion #2, on our way to his English lesson. I was so pleased with this picture he took. This was a one shot photo, as we were both in a rush. I’m very busy today, finishing so many things, preparing everything before I’m flying to Amsterdam. I’m going to spend a long weekend with my beloved friend Shirley…. Yes! Just like we did in the last four winters, we looked for the cheapest tickets with a low cost flying company and this time it’s going to be Amsterdam!
 Yes Amsterdam. So, by the time you read this post I will busy packing or on my way to the Netherlands. What WIP am I going to pack? No WIP no travel. I think I might take two of them… can’t wait to show you what I packed in my project bag. xoxMo
10 comments on Joyful Bouquet How To
Gail Dixon
Gosh! It’s beautiful and thank you for sharing all your beautiful photographs. Your work is so lovely colourful and neat…..and inspiring…again, I wish I lived nearby. Gail x
Mo Malron (author)
Thank you Gail, xxx
Michelle
Oh Mo! Your Bouquet Purse is gorgeous! I can’t stop looking at the last picture of you holding it. The colors, the details, the placement, the various flowers, berries, and leaves, and the little hedgie . . . . all work wonderfully well together to form the perfect touch for this purse. I understand when you talk about no WIP in your hands . . . there is something very satisfying and calming with a big sense of pure enjoyment when I have a crochet project in my hands. So happy that your fingers dance because they dance beautifully and you share those dances with us. Looking forward with great anticipation & excitement to see what your project bag to Amsterdam holds! Have a great vacation! XO
Mo Malron (author)
Love LOVE to read your comments. Thank you so much Michelle, xxx
Donna
Beautiful! Like Gail said, I wish I lived closer!
Janet
This is truly glorious! Your work and colors are so inspiring! and like the others….I wish I lived closer 🙂
Gayle
Are you going to make this into a kit?
Thanks!
Gayle
sarah
This is so beautiful! Your work is awesome! Colorful and eye catching!
And thank you for sharing such beautiful pictures and crafts with us!
Appreciate it💜😍😍😍
Much love💜
Carol
This is simply beautiful. What a great job you did.
Debbie
Oh my goodness I have so enjoyed your patterns I started chrocheting only in December and can’t believe I could make this. I made it into a cushion for my granddaughters bedroom about to sow it all together. wish I could share my photo as I’m so proud of myself.