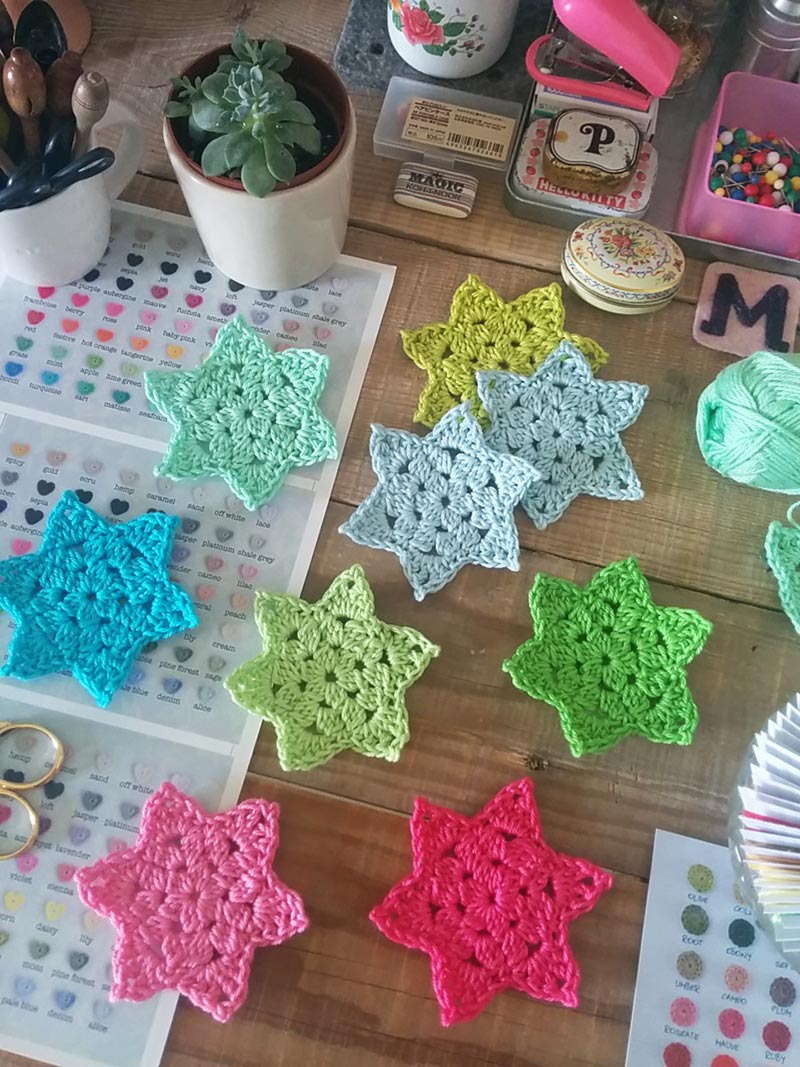
This granny chic star is an addiction :: lets make it clear from the very start :: A D D I C T I O N :: with only 3 rounds you have a star :: I made few garlands from this star pattern and each time I was surprised to see the happiness on face while opening the gift wrap :: 2 weeks ago minion3 turned 5 and we made him a family Bday party where at the end we gave each kid a star crocheted by me :: believe me, both mothers and kids were very happy with this little gift :: you saw the pictures on my IG while making these gifts :: and yes you want the pattern :: I saw your beautiful comments and promised to write down the pattern for you :: so what are you waiting for? :: lets get started :: you talk too much :: start crochet ::
First thing we do :: we go through all the stitches and abbreviations needed for this pattern ::
I write my crochet patterns using US crochet terms ::
Granny Kit cotton yarn :: 3mm or 3.25mm crochet hook ::
round = rnd
loop(s) = lp(s)
yarn over = yo
stitch(es) = st(s)
chain stitch = ch
sl st = slip stitch = insert hook, yo, pull the lp back through the st and through the lp on your hook.
sc = single crochet = insert hook, yo, pull the lp back through the st (2 lps on hook), yo and pull through both lps on hook.
hdc = half double crochet = yo, insert hook, yo, pull the lp back through the st (3 lps on hook), yo and pull through all 3 lps on hook.
dc = double crochet = yo, insert hook, yo, pull the lp back through the st (3 lps on hook), yo and pull through 2 lps on hook (2 lps left on hook), yo and pull through remaining 2 lps.
tr = treble crochet = yo twice, insert hook, yo, pull the lp back trough the st (4 lp on hook), yo, pull through 2 lps on hook (3 lps on hook), yo, pull through 2 lps on hook (2 lps on hook), yo, pull through remaining 2 lps.
2dc bubble = 2 double crochet connected in the same stitch = yo, insert hook through the st, yo, hook back through st (3 lps on hook), yo and pull through 2 lps (2 lps on hook). yo and insert hook through same st, yo, hook back through st (4 ps on hook), yo and pull through 2 lps (3 lps left on hook), yo and pull through all 3 lps together.
3dc bubble = 3 double crochet connected in the same stitch = yo, insert hook through the st, yo, hook back through st (3 lps on hook), yo and pull through 2 lps (2 lps on hook). yo and insert hook through same st, yo, hook back through st (4 lps on hook) yo and pull through 2 lps (3 lps on hook), yo insert hook through same st, yo, hook back through st (5 lps on hook) yo and pull through 2 lps (4 lps on hook) yo and pull through all 4 lps together.
TO START ::
Make a magic loop, work the next rnd into the centre of the lp :: rnd 1 :: ch3 and then make a 2dc bubble stitch (this counts as first bubble), now ch2.
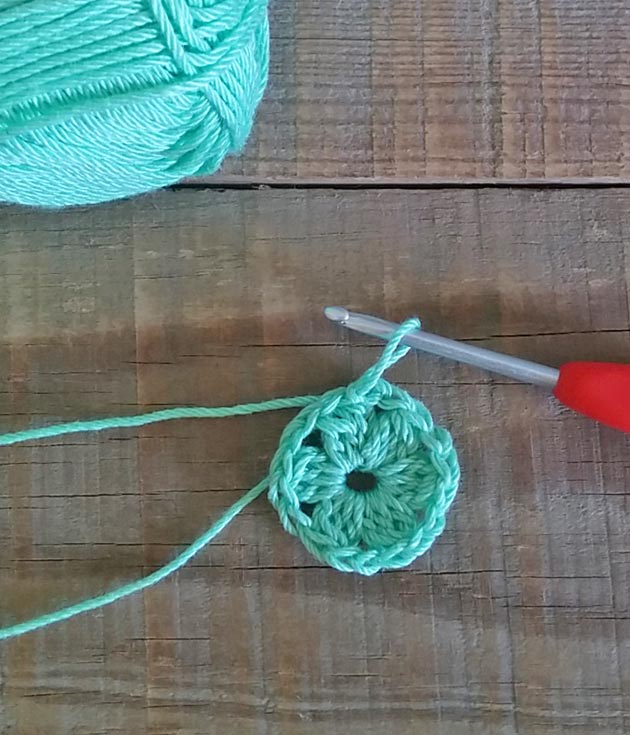 *make a 3dc bubble + ch2* repeat between** till you have 6 bubbles with ch2 space between them. sl st into the first bubble made. now tighten the loop, pull the yarn tail and close the centre hole just a little. leave a small aesthetic hole like I show here at the above picture.
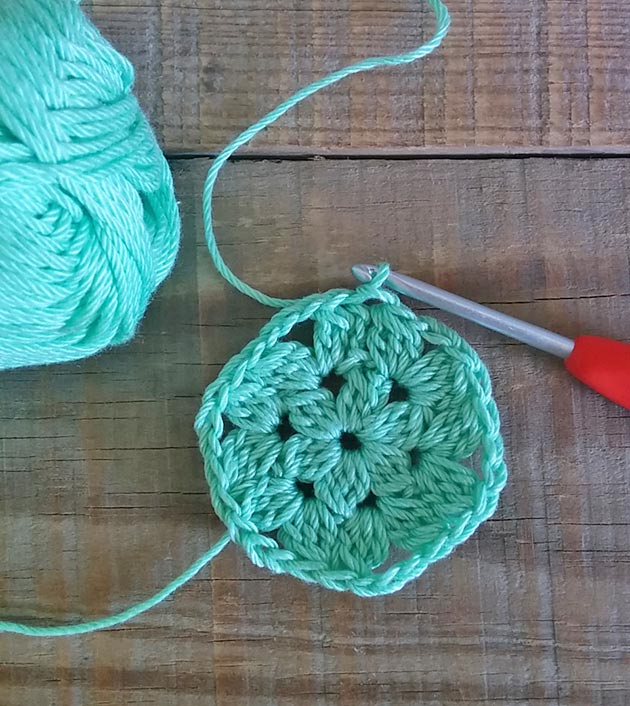 rnd 2 :: sl st into the first ch space, ch3 and make a 2dc bubble to complete your first bubble, ch3 and make 3dc bubble into the same ch space. *into the next ch space make: 3dc bubble, ch3, 3dc bubble* repeat between ** till you have 2 bobbles and ch3 space between them – in each ch2 space (6 times). sl st in the first bubble made.
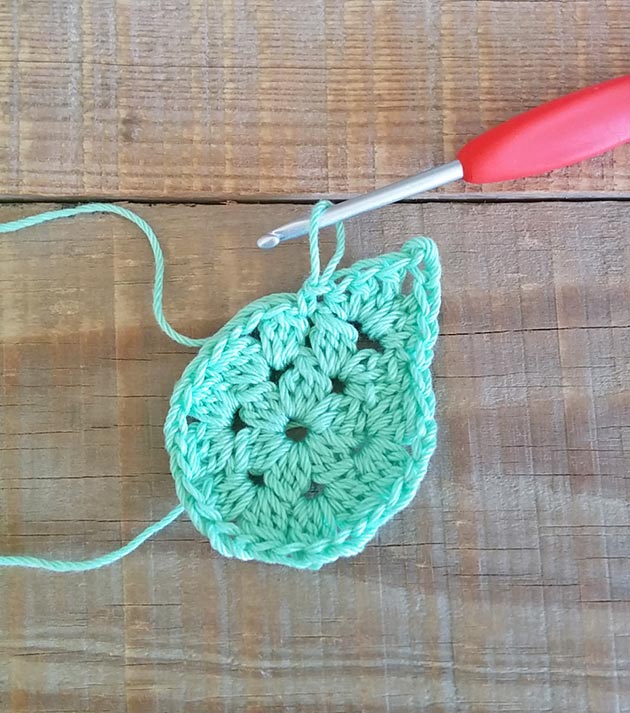 rnd 3 :: *into the next ch space make : hdc, dc, tr, ch2, sl st into the first ch (picote made), tr, dc, hdc. now sc between next 2 bubbles* repeat between till you have 6 triangles made. sl st into the first hdc. Fasten off and weave in tails.
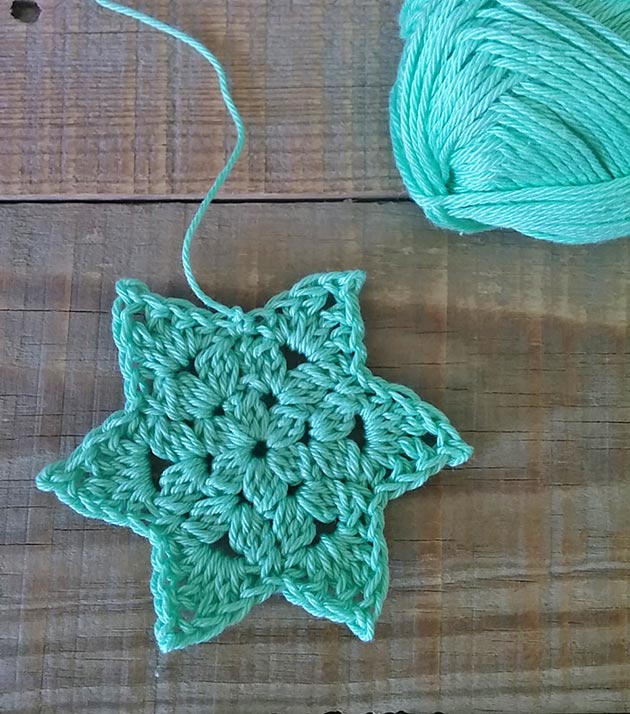 Here is your star :: a granny chic star :: so beautiful and so easy to make :: crochet few more now ::
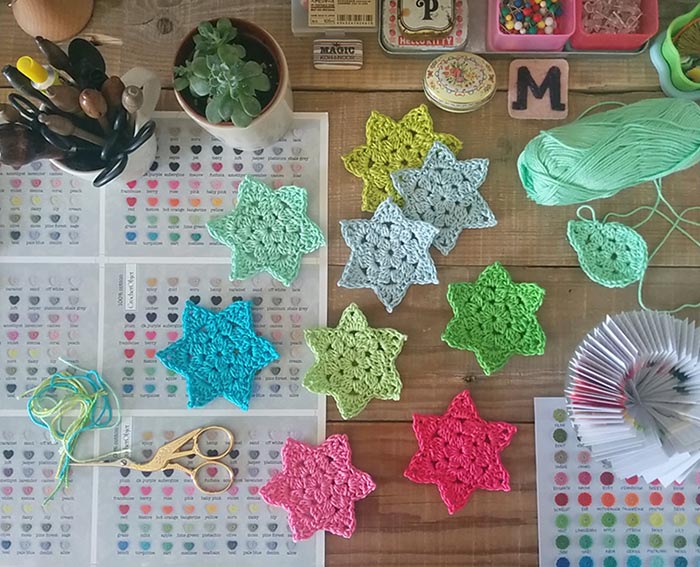 They will make a pretty star garland :: a gift I made few times :: and it works in one colour as pretty as if you make it multicoloured garland ::
 I guess you want to block them now and give them a sharp shape right? :: so here is how I do that :: Put them on the Ironing board or any other flat surface :: spay a little water on them :: shape them with my hands just to help them understand they are stars now :: then I stick a sewing pin into each vertex :: and just lay them flat to dry over night or till they are totally dry ::
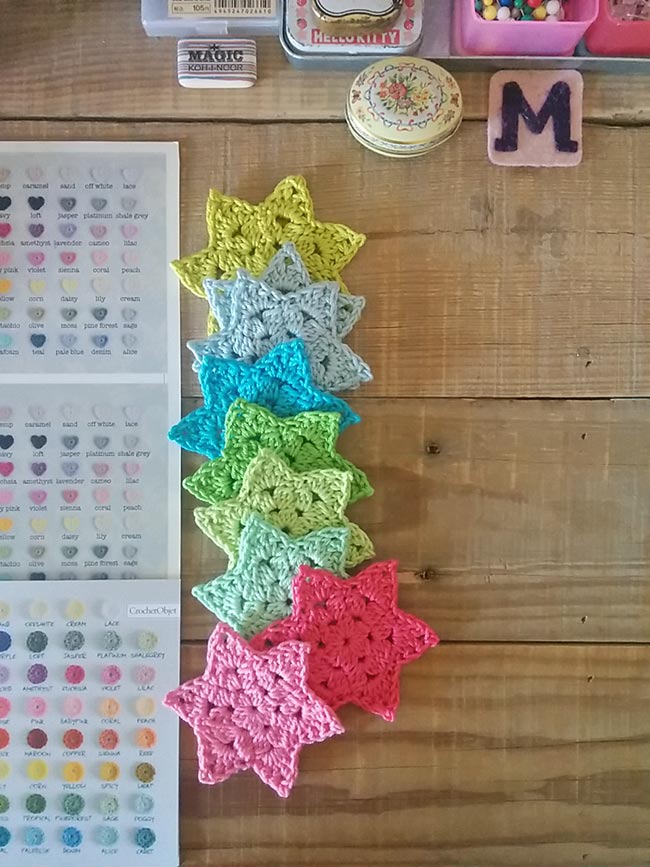 Are you already in love with this star? :: hope you enjoyed this tutorial :: and don’t say I haven’t told you :: this star is an addiction :: E N J O Y ::
21 comments on Crochet Star
בטינה
מקסים!!!
בטינה
מקסים!!
Mo Malron (author)
תודה רבה בטינה
Charlene Brown
I whipped one of these out in about 3 minutes…great tutorial!
Mo Malron (author)
Great!!! Thanks Charlene
Mariela
Maravilloso..inmensas gracias!!!!!! ♥♥♥
Mo Malron (author)
xox, Thanks
maya e.
That’s great!! Thank you
Mo Malron (author)
🙂 so good to hear 🙂
Jane Miller
Awesome tutorial…I love the stars so much. Thanks!
Mo Malron (author)
Thank you Jane
yael heller
מקסים מקסים
Mo Malron (author)
תודה תודה 🙂
Marshall
F*ckin’ tremendous issues here. I’m very happy to look your article. Thank you so much and i’m taking a look forward to touch you. Will you please drop me a e-mail?
cd label print
Hello! I’m at work surfing around your blog from my new iphone 4! Just wanted to say I love reading your blog and look forward to all your posts! Keep up the superb work!
Mo Malron (author)
Thank you 🙂
christiane
bonjour , j’aimerais faire les ètoiles pourrais je avoir le tuto pour les tricoter merçi
Mo Malron (author)
http://crochetobjet.com/2015/06/04/a-step-by-step-crochet-star-tutorial/
Carol Flanagan
Thank you for this cute idea!
Sandra
I just made this star in sparkling yarn. It looks gredat and I’m going to decorate my Christmas presentt with them! Thank you for the free pattern which is much appreciated!
Charmaine Castro
Love it! So glad I figured your pattern out. Plan on making this into a granny square. Thanks again!