Hello!!!!!! This was definitely a loooooong break, since I was sitting here writing my last blog post. Well, ever since we came back from our dreamy vacation in France, I find it very hard to catch up with my normal routine and I’m really sooooo behind with just everything. This is not the first time I write it down here – being a working at home mom, having a home studio is THE most difficult/ complicated job ever. I find myself struggling juggling between motherhood and my CrochetObjet little world so often. Not to mention that there’s always something extra to add into my motherhood being. About two weeks ago, our eldest (15 years old teenage girl), slipped from her skateboard, broke her leg and stretched a strap on her leg. To make a long story short, she’s got half a leg in plaster and she can only walk with crutches, imagine that (with all details included here). So, being here now, writing down at my little blog corner – this simple thing is a real big fat bonus for me now. I’m still having my on going crochet workshops along with my Monday’s weekly sessions, which helps me to keep myself on track. These mornings are so up lifters, colourful and peaceful. So many beautiful projects and patterns in progress and I wanted to share one of them with you today.
 It was really a long time ago when I first told you about this bubble-y cotton bracelet. We made quite a lot of them, here on our crochet workshops and Monday’s sessions. I also made it for myself and for my friend Hilit, when traveling to Budapest. While crocheting on the plane, on our way to Budapest, I knew I would like to share this pattern with you. I didn’t know it’ll take so long till I’ll actually do it.
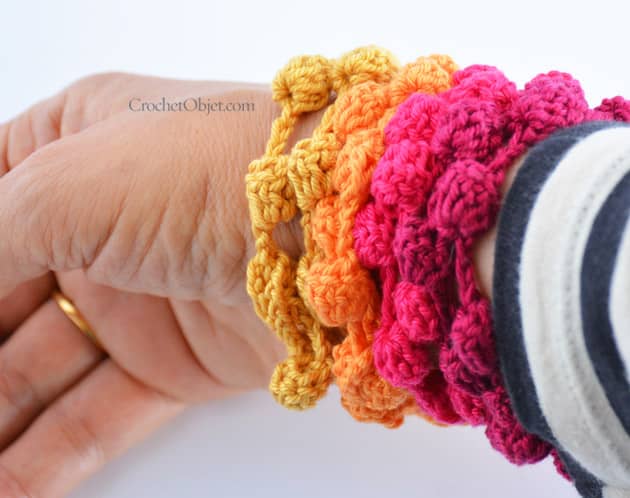
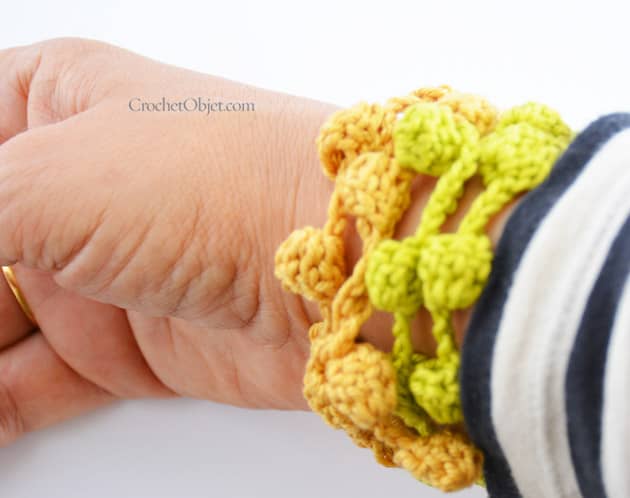
 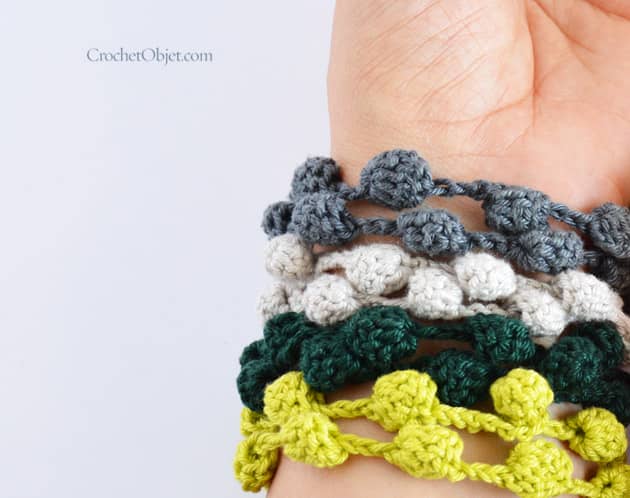 SO, today is the day and I’m finally here with this step-by-step pattern for you, And you know what? Eventually I realize that now it is the best time for it, because summer is just around the corner and a set of colourful Buddha bracelets can be just a perfect addition to any summer light T shirt or dress.
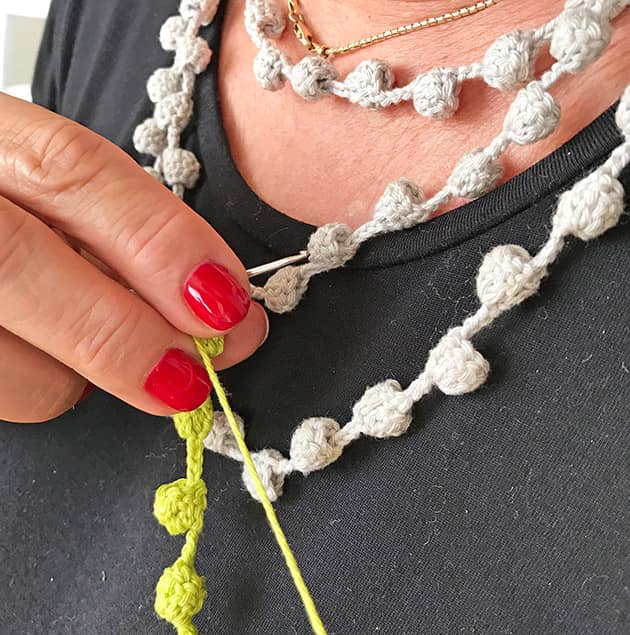 THE STORY
Where did it come from you ask? well, you know I have these Monday’s weekly sessions here? We meet just a few of us, it is more or less the same 5-8 ladies every week. These meetings are meant for those who would like to meet me frequently and not just once a month, like with my workshops. Anyway one of the ladies here, lets say her name is Ronny (sweet sweet heart Ronny), she told us about a crocheted necklace she saw on a friend the other morning and she really wanted me to teach her how to make it. 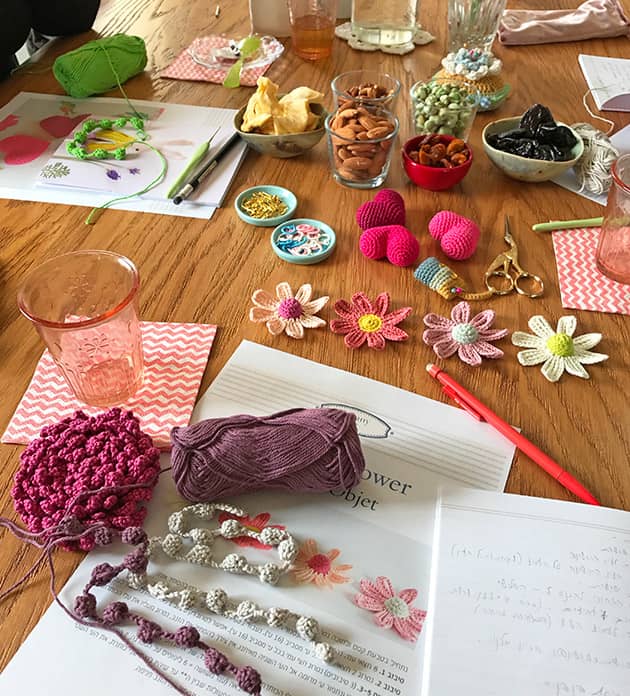
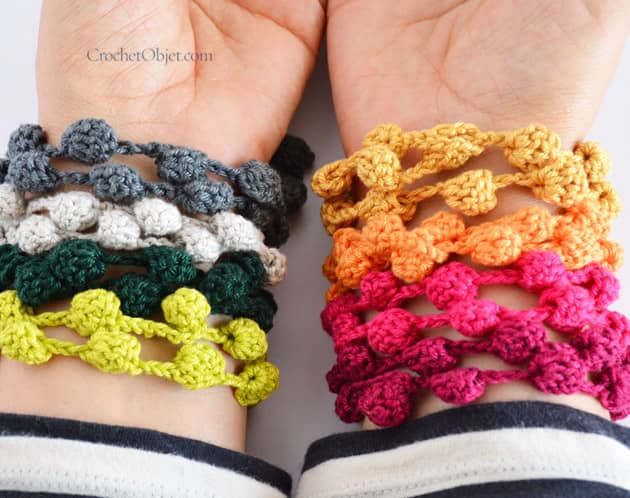
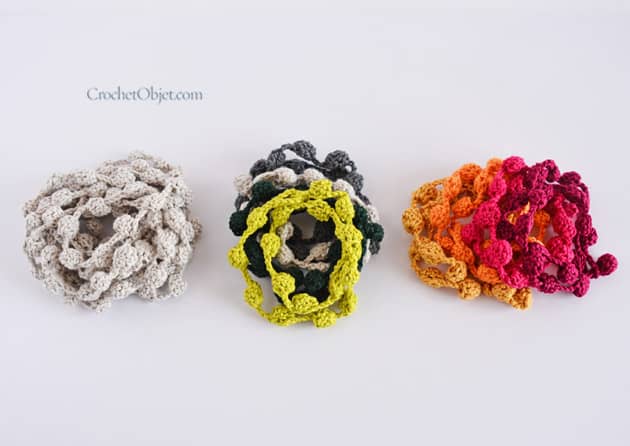
 So, after many descriptions and trials, we finally came out with this pattern. Ronny was very happy with it and so were the others. We crocheted many colourful necklaces and bracelets here on our meetings and workshops. I posted some of them on my FB and IG pages. Today you’ll also be able to crochet a Buddha bracelet or necklace of your own.
 Before we start with the pattern, here is some important information you should know.
LEVEL
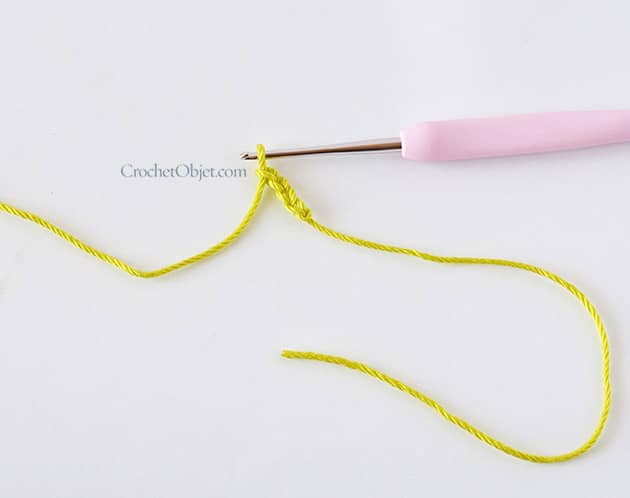
This is a step-by-step pattern, followed by close up pictures to show each step along the way. It will be very easy for you if you are familiar with crochet sts and if this is not your first crochet project. If it is your first crochet project, you might need to go to YouTube and look for some “how-to” for the relevant sts.
WHAT DO YOU NEED
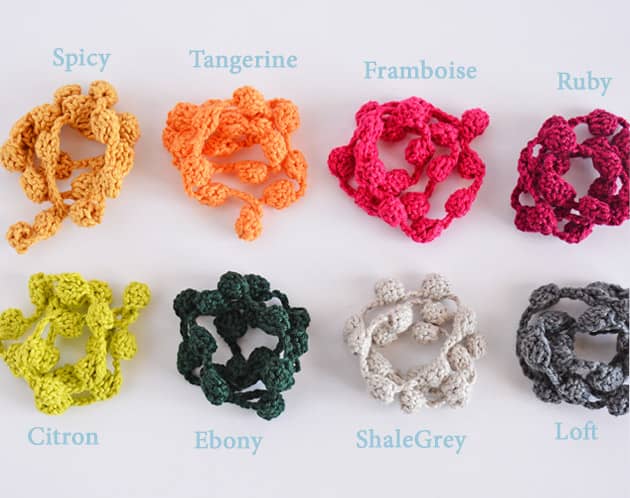
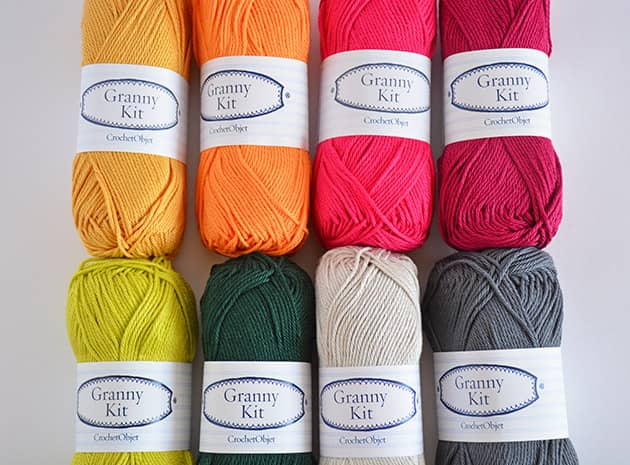
Yarn: Buddha bracelet kit or GrannyKit cotton in any colour. As you can see in the below picture you’ll only need less than 5 gr’ per one bracelet so if you have some oddments it’ll work perfectly.
Crochet hook: You can use 1.5 / 1.75 / 2mm – you’ll know what size you prefer after you crochet the first few bubbles. I use them all as I like to create a different density when I make a colourful set.
A pair of crafty scissors
Tapestry needle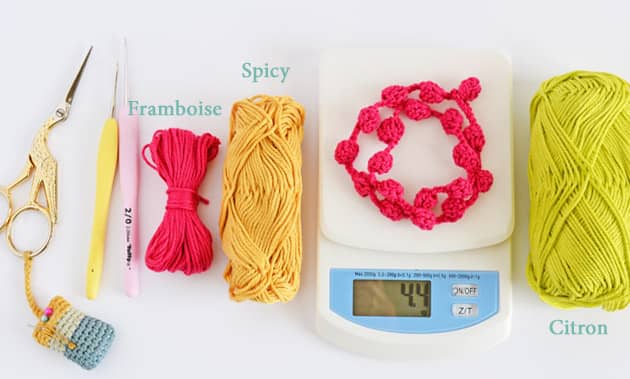 ABREVIATIONS AND STITCHES (US crochet terms)
ch = chain stitch
st(s) = stitch(s)
yo = yarn over
sl st = slip stitch = insert hook, yo, pull the lp back through the st and through the lp on your hook.
dc = double crochet = yo, insert hook, yo, pull the lp back through the st (3 lps on hook), yo and pull through 2 lps on hook (2 lps left on hook), yo and pull through remaining 2 lps.
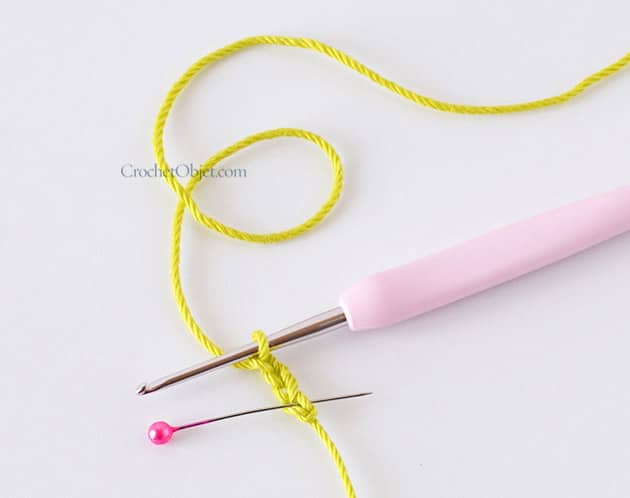


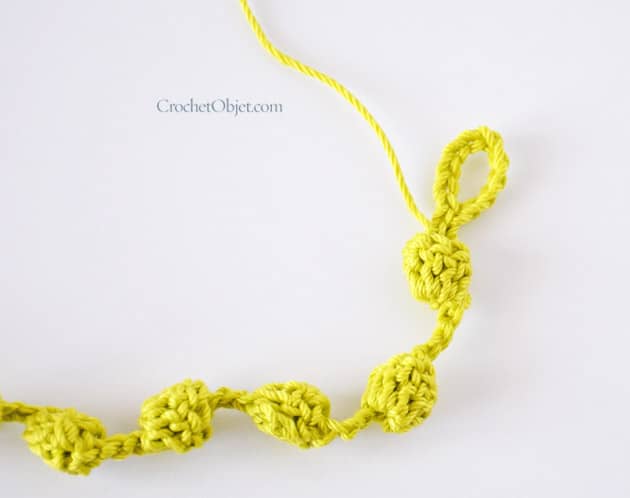
 Step 3: Hold your first bubble in a position that it’s facing you and ch 6, make these ch sts not too tight please.
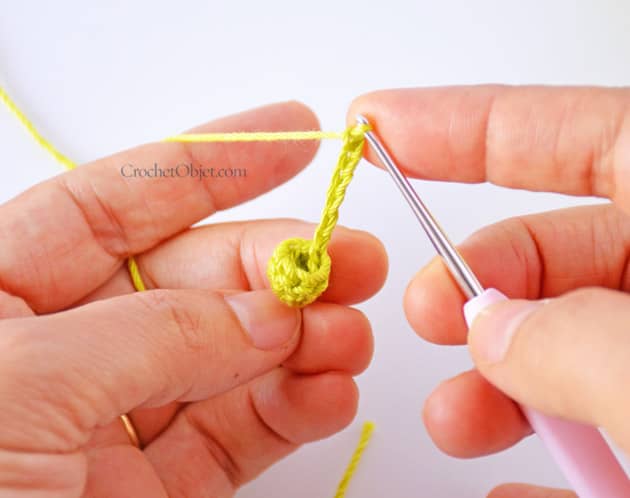

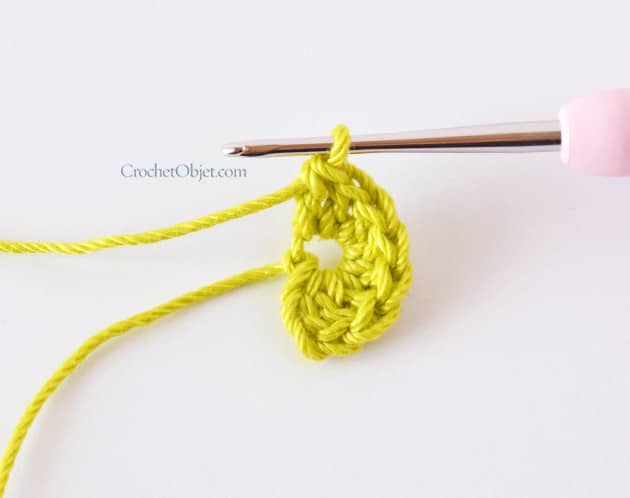
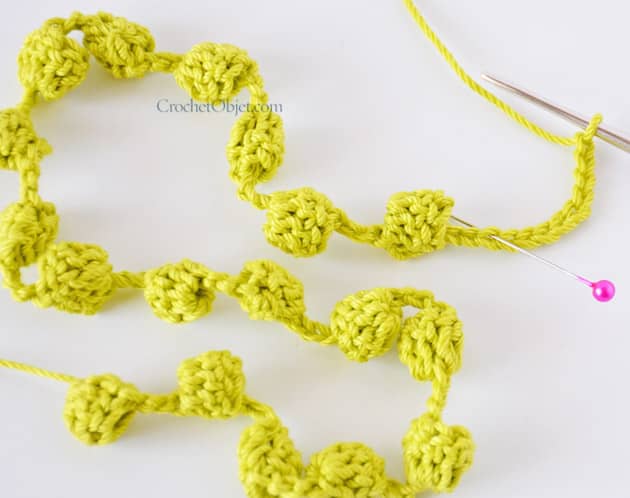
 On the below picture you can see the 7 dc’s crocheted on the 3rd BAR loop of the 3rd st from your hook.
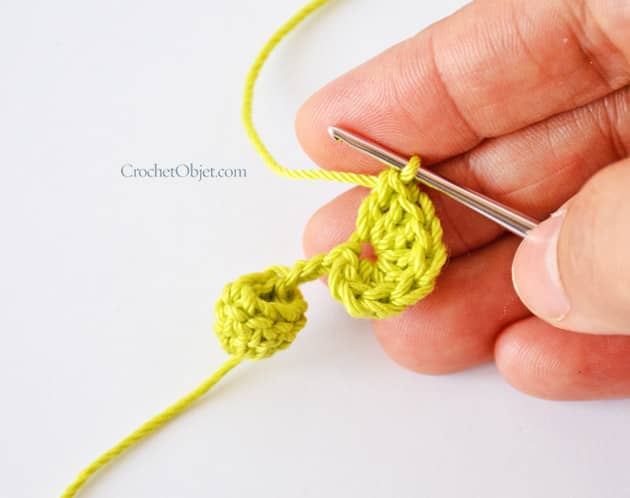

When you have reached the desired length, the next step is making the loop to close the bracelet.

 Weave in the tails
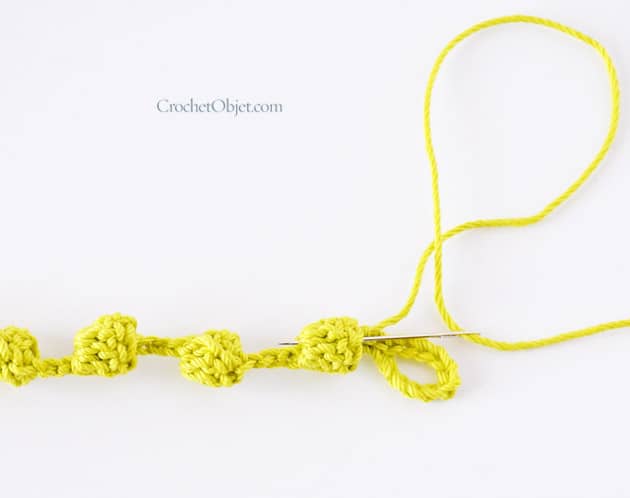
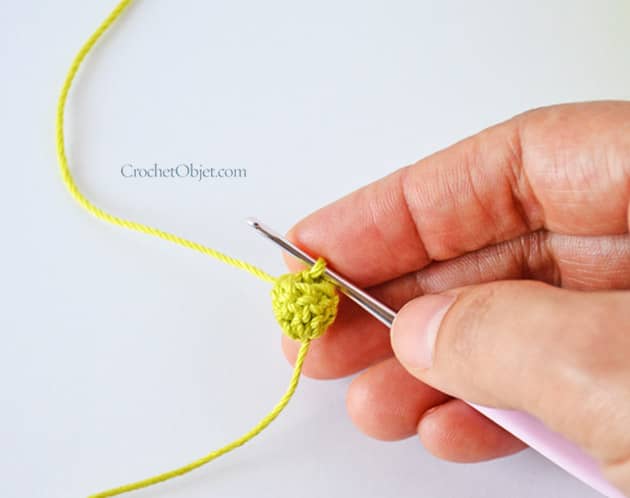
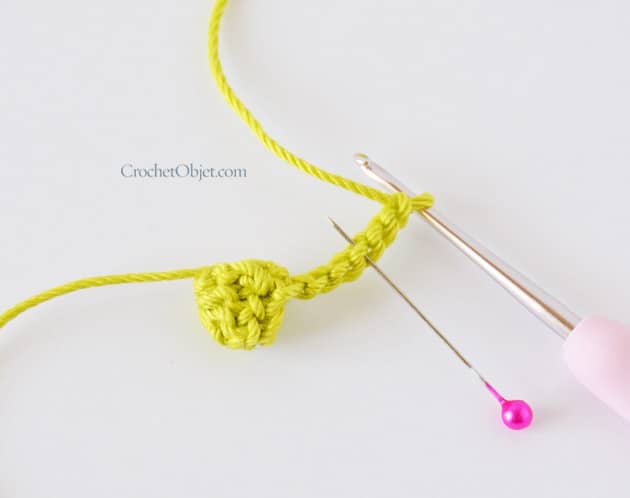
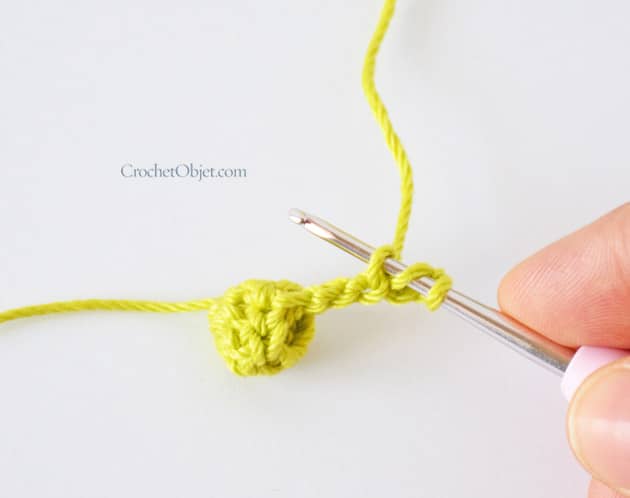
Step 2: Don’t take your hook out. Fold your work and make a sl st into the first real dc made. Roll it with your fingers and shape your bubble-y popcorn.
Step 3: Hold your first bubble in a position that it’s facing you and ch 6, make these ch sts not too tight please.
Step 4: Make 7 dc’s into the 3rd BAR loop of the 3rd st from hook.
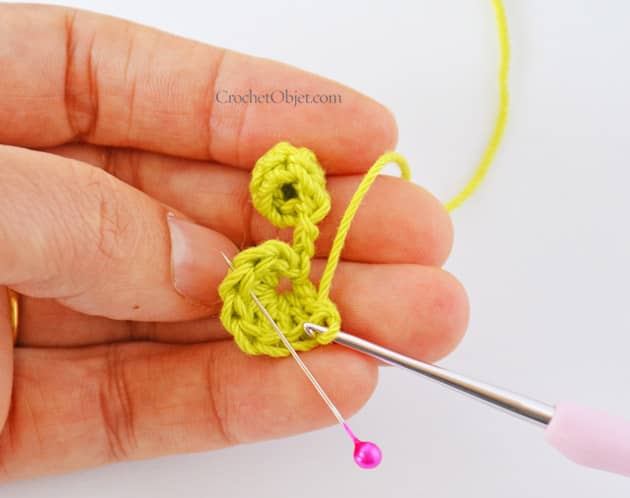
Step 5: Don’t take your hook out. Fold your work and make a sl st into the first real dc made. Now hold your bubble in a position that it is facing you and repeat steps 3-5 till you have as much bubble-y popcorns as you like. For bracelet we crocheted 18 – 19 bubbles. For necklace we crocheted about 104 bubbles.
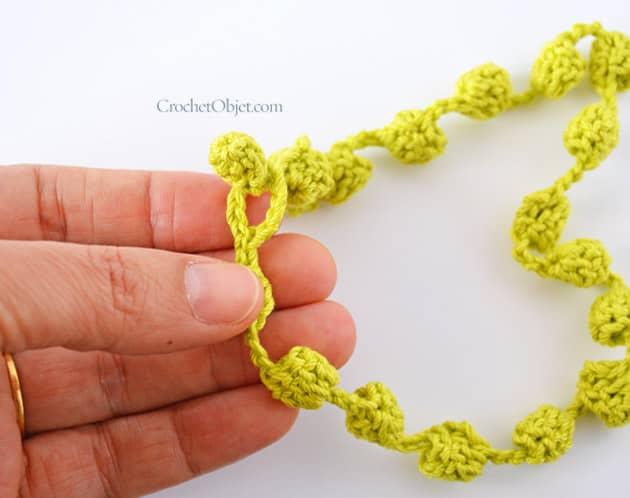
Step 6: Ch 12 and sl st into the first 3 ch sts made. Sl st into the st at the base of your ch 12. Leave about 15 c”m yarn tail, Break the yarn and fasten off. Weave in both tails. Pull the first bubble through the closing loop and your Buddha bracelet is here!!!

19 comments on Buddha Bracelet – DIY Crochet Pattern
IRENE
Thank you for this eye catcher. As always, the instructions are impeccable and the colors just dance before your eyes.
Mo Malron (author)
Thank you Irene!
Jane Miller
Love the bracelet pattern! Thanks so much!
Hope your daughter is getting along okay and heals quickly. My grandson is a skateboarder so we know the risks involved!
Hugs,
Jane
Mo Malron (author)
Thank you Jane, Maya will be fine, time will fix the damage + a little rest. I’m so happy you loved the bracelet pattern, thank you xxxMo
snowhite
So Simple
So Accurate
So Beautiful
So Mo
= Perfect.
Mo Malron (author)
אלוהים אני אוהבת אותך
Jo
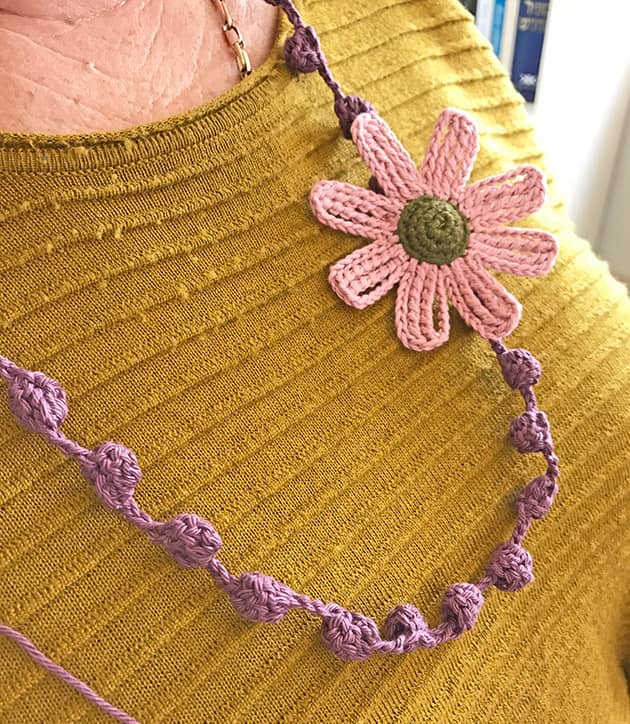
Hi, Mo ~ Welcome back to your little blog corner! I’m glad you experienced a “dreamy” trip to France. I hope your daughter is recovering well and fast from her injury! Thank you for the detailed pattern for the Buddha bracelet/necklace. I love how you added the flower to the necklace—so cute and summery. Hang in there, Mo. In the blink of an eye your children will be all grown up, and you will have more time for your home business.
Mo Malron (author)
Thank you Jo, I know how they grow up so quickly and that’s why I spend as much time as possible with them. It makes me so happy that you liked the bracelet and that you took the moment to write down this lovely comment. Thanks again,Mo
Valchera
Thank you for this pattern, Mo. I’m going to make a whole load of these for the summer. I love your colour choices. They’re so cheerful.
Mo Malron (author)
Thank YOU Valchera, I’m so happy you are going to give it a go, sure you’ll love crocheting them.
Algmiae
Merci beaucoup pour le DIY ! Je vais en fabriquer pour mes filles !
Mo Malron (author)
Thank you, this is my pleasure
Jo
Hi, I am just making my first Buddha bracelet, it’s a lovely pattern. Is there a pattern for flower that you used for the necklace?
Thanks Jo
Mo Malron (author)
Thank you Jo,
I will put a pattern for a flower soon, but you can find plenty of them on Pinterest.
Michelle
Mo, this is fabulous! I am so excited to find a moment to sit down and begin one of these lovely bracelets. And, how beautiful is the flower attached to the necklace! So lovely! I like your idea of using the multiple hooks to create the different densities. It’s good to have you back in your CrochetObjet world, but being a mom is the best. Wishing your daughter a full and quick recovery – hope she is doing well. Have a lovely day! Many thanks for the pattern and inspiration you give through visiting with you on your blog.
Mo Malron (author)
Thank you so much Michelle, for this “makes me happy” comment
Sally
I love this pattern, it’s calming and in this busy world it’s nice to have something that is relaxing. I just want to keep making them. Thank you for all the stories and lovely patterns. I look forward to many more.
April
You’ve inspired me to use this pattern for a chakra bracelet. One bracelet in each of the seven colors of the chakra!!! Thanks for a relaxing Saturday project!
Zia
You my dear, are brilliant!!! The pattern in so lovely, but the idea to use an eye-catching straight pi to mark where the next stitch should go is BRILLIANT!!!!! Would that I could send you every crocheting pattern in my to do list and you would go through every one and place pictures like these. I AM kidding, but honestly, it is a game changer for me. You have a new follower!