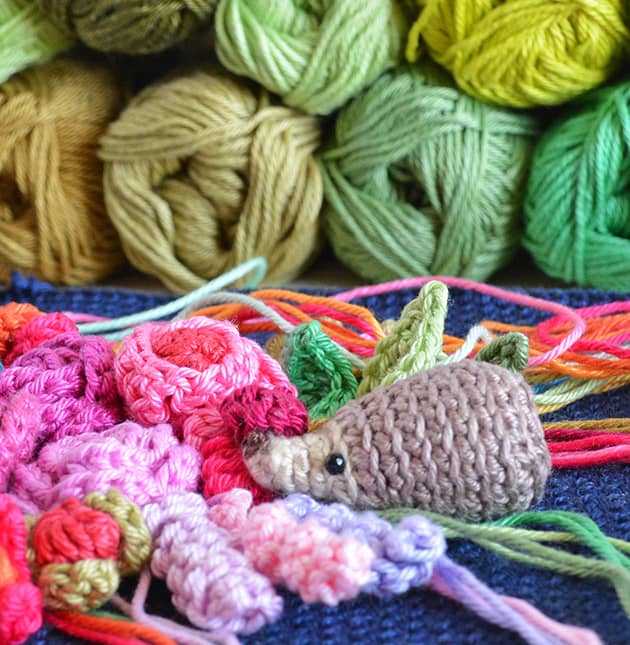
 This tiny little baby Hedgehog was originally made as a part of a bouquet I crocheted to decorate a blue clutch. My tiny little hedgehog was made to be laid beside some leaves and under the berries. I wrote down the pattern for you so you can keep youtself busy while waiting for your package of Stripes&Colours kit to arrive.
I made my Hedgehog using GrannyKit cotton and a 1.75 mm crochet hook as it was meant to be really as tiny as possible for my bouquet.  You can crochet the baby hedgehog using a few different sizes of hooks 1.75 / 2 / 2.25 / 2.5 mm. Playing with different sizes of hooks will make different sizes of this cute Hedgehog. If you like to make a family than make each hedgehog with a different hook size. But please don’t make your first one with a 1.75 mm – it can be a bit of a frustration. Start with a bigger size. For these step-by-step tutorials I’ll use 2.25 mm hook.
If you don’t need the step-by-step instructions please scroll down for the ‘just words-no pictures’ pattern.
HEDGEHOG SIZE
With GrannyKit cotton and a 2.25mm crochet hook the baby Hedgehog will come out aproxx: 4 cm’ long and 2.5 cm’ on it’s wide side.
WHAT DO YOU NEED
Yarn: GrannyKit cotton In colours: Hemp for the head, Umber for the body and a small piece of Sepia to make the nose.
Crochet hook: 1.75 – 2.5 mm.
2 black eyes – size 4 mm – if you make this tiny Hedgehog for a kid please DO NOT use any glass or plastic eyes, just make a French Knot using any other Black yarn or Jet in GrannyKit cotton.
A small piece of stuffing material.
Crafty scissors
Stitch marker.
Tapestry needle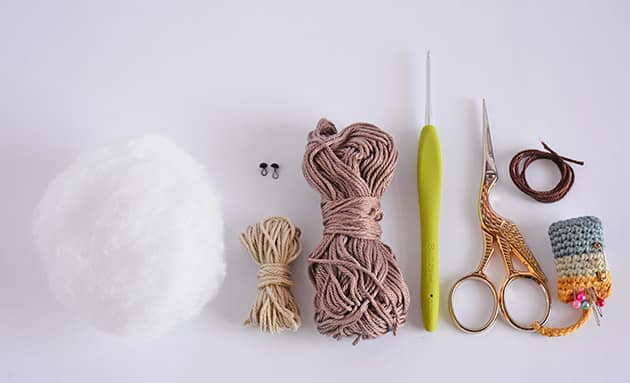 ABREVIATIONS AND STITCHES (US crochet terms)
ch = chain stitch
st(s) = stitch(s)
rnd(s) = round(s)
yo = yarn over
lp(s) = loop(s)
BLO = back loop only
*…* = repeat instructions between ** x times
sl st = slip stitch = insert hook, yo, pull the lp back through the st and through the lp on your hook.
sc = single crochet = insert hook, yo, pull the lp back through the st (2 lps on hook), yo and pull through both lps on hook.
sc2tog = single crochet 2 next stitches together = Insert you hook to the next st BLO, yo and pull back (2 lps on hook), now insert your hook to next st BLO, yo and pull back (3 lps on hook). Now yo again and pull through all 3 lps.
hdc = half double crochet = yo, insert hook, yo, pull the lp back through the st (3 lps on hook), yo and pull through all 3 lps on hook.
hdc = half double crochet = yo, insert hook, yo, pull the lp back through the st (3 lps on hook), yo and pull through all 3 lps on hook.
dc = double crochet = yo, insert hook, yo, pull the lp back through the st (3 lps on hook), yo and pull through 2 lps on hook (2 lps left on hook), yo and pull through remaining 2 lps.
tr = treble crochet = yo twice, insert hook, yo, pull the lp back through the st (4 lps on hook), yo and pull through 2 lps on hook (3 lps left on hook), yo and pull through 2 lps on hook (2 lps left on hook), yo and pull through remaining 2 lps.
NOTE: Keep your tension a little looser than normal on the first 2 rnds, as it will be very hard to insert the hook in the sts if not. Work tightly after rnd 2 because we don’t want the stuffing material to show through the sts. Work in spiral, mark your first st on each rnd – from rnd 3.
To start With colour Hemp. Make a magic lp. If you don’t work with magic lp please ch 2 and work the first rnd into the first ch made, the closest one to the knot.
rnd 1. sc 4 in the yarn loop and tighten the loop.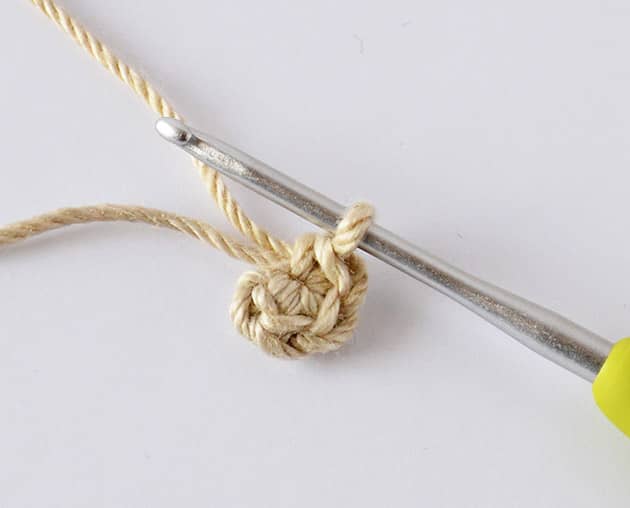 rnd 2. sc in each st around. Start from the next sts, right next to your hook, where I show with my sewing pin in the below picture. (4 sts) It is not an easy breezy work to do but we want our tiny baby Hedgehog really small. Make sure your work is with the right side facing out, it will turn to the worg sied and you’ll have to turn it back. Try not to hate me for making it sooooo tiny, you will love your Hedgehog when it’s done.
  rnd 3. * sc 2 in next st, sc in next * repeat between ** twice. (6 sts) It is so tiny at this point.
 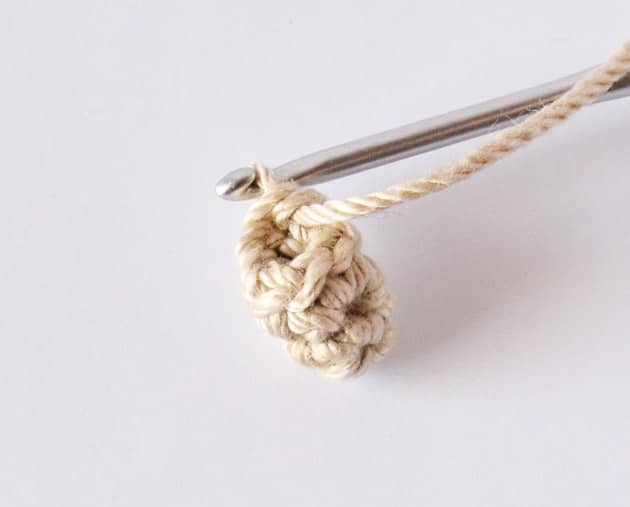 rnd 4. * sc 2 in next st, sc in next 2 sts * repeat between ** twice. (8 sts)
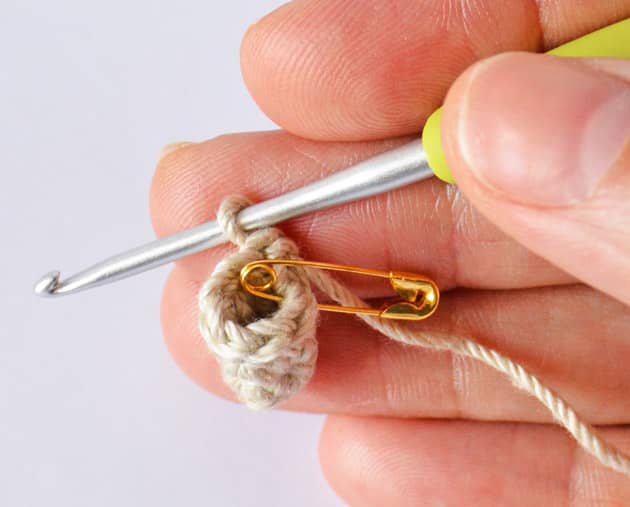 You will be working in BLO from now – in back lps only of each st from now on, till the end of the work. Continue working from the back lp of the next sts, where I show in the below picture.
 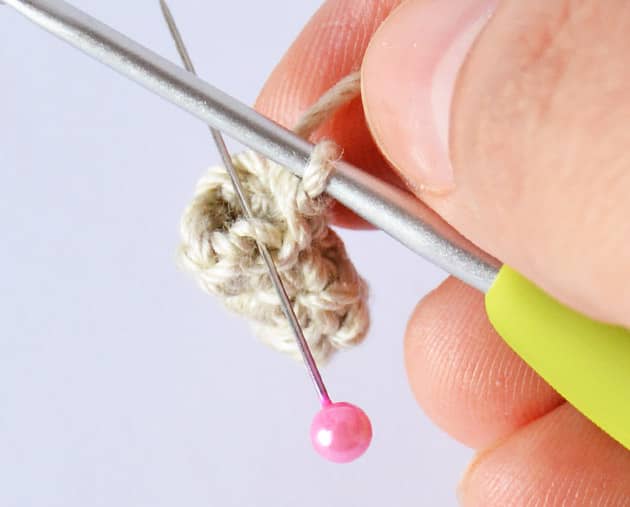 rnd 5. * sc 2 in next st, sc in next 3 sts * repeat between ** twice, ending the last part of the last sc with the next colour (Umber) on your hook. (10 sts) You can cut the first (Hemp) yarn now, leaving a shot tail that you will be working over in the next rnd.
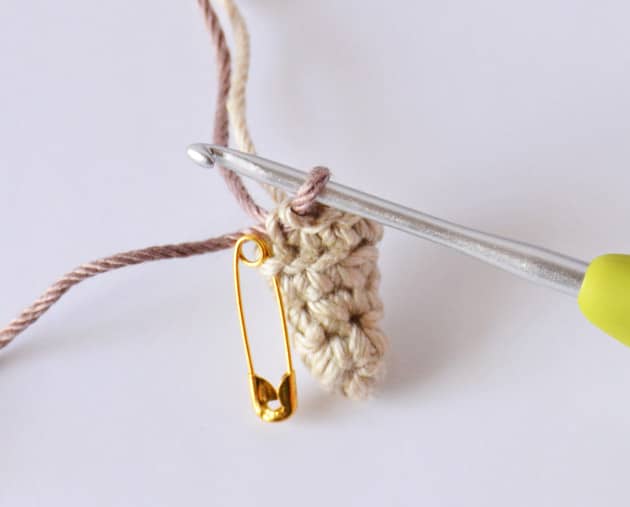 We have just finished crocheting the head. We will be working the body now. Continue working with colour Umber.
rnd 6. In this rnd try to work on both yarn tails so you don’t have to weave them in later. Continue working in BLO. * sc 2 in next st, sc in next * repeat between ** to the end of the rnd, which is 5 times. (15 sts)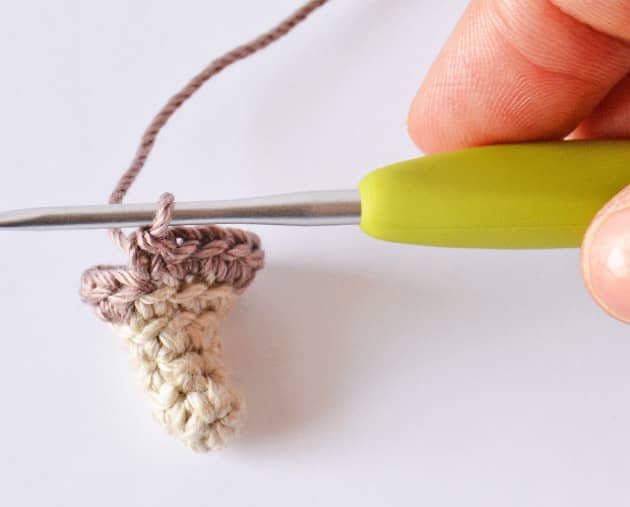 rnd 7. * sc 2 in next st, sc in next 4 sts * repeat between ** 3 times to the end of the rnd. (18 sts)
We will be attaching the tiny eyes to their place now. I use these Black glass eyes that I use for Angie bunny family – in 3 or 4 mm. If you make this tiny baby Hedgehog to a small child or to a baby, you better make a ‘French Knot’ instead of using any glass or plastic eyes.
Attaching the eyes Insert the first eye right under the FRONT lp left from the last row of the head, where I show here in the below picture.  Now insert the second eye 3 tst distant from the firat eye.
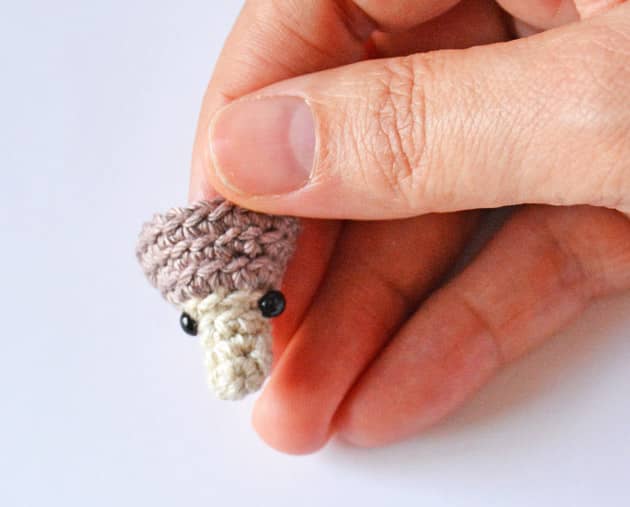 Now fold your work to the wrong side. Darn a needle into a piece of yarn and insert it through both loops that are connected to the back side of the eyes. Make a knot to secure it. Fold your work back and continue working the body.
  rnd 8-10 (3 rnds). Make 1 sc in each st around BLO. (18 sts) Your work should look like the below picture at the end of rnd 10.
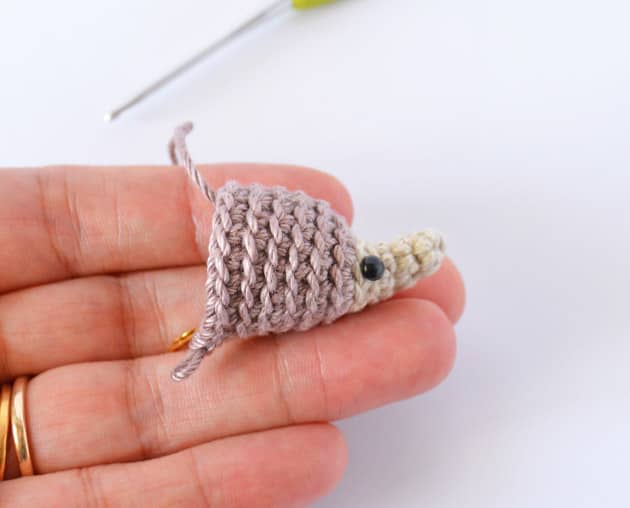 We will start making the last part of our tiny hedgehog by decreasing sts as follow: Continue working in back lps only. Look up at the ABREVIATIONS AND STITCHES for the – how to ‘sc2tog’.
rnd 11. * sc2tog, sc in next 7 sts * repeat between ** 2 times to the end of the rnd. (16 sts)
rnd 12. * sc2tog, sc in next 2 sts * repeat between ** 4 times to the end of the rnd. (12 sts)
Fill in some stuffing material now. Fill it in but don’t let it touch your last rnd sts.  rnd 13. * sc2tog * repeat between ** 6 times to the end of the rnd. (6 sts) Leave about 20 cm yarn tail, Fasten off and break the yarn. Fill in a little more stuffing material. Darn a needle onto the yarn tail and weave it in to close it nicely.
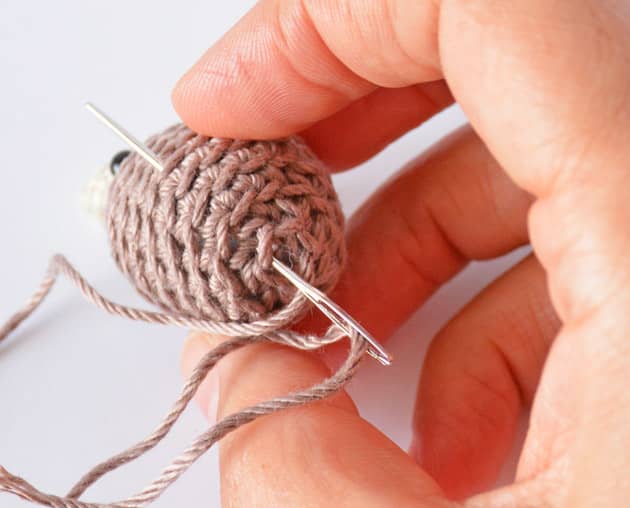 When you finish darning in the yarn tail, your work should look like the below picture.
 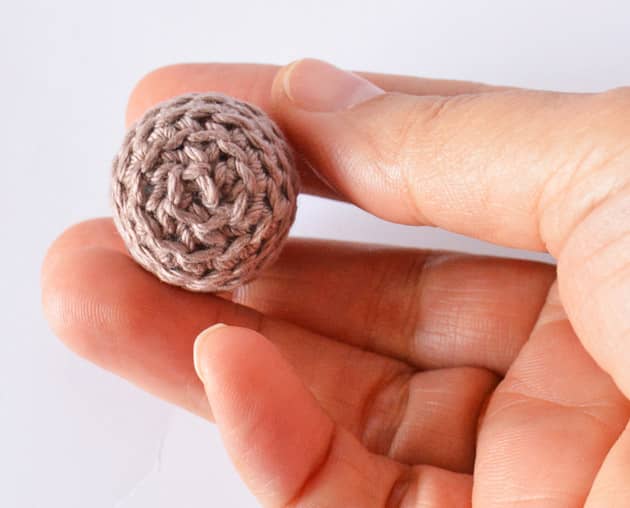 Now we will be making the little baby Hedgehog nose. Take a piece of Sepia (or any other dark brown yarn you have). Darn a needle and work with a double strand Sepia yarn. Insert your needle into the belly of your tiny Hedgehog and push it all the way to the front.
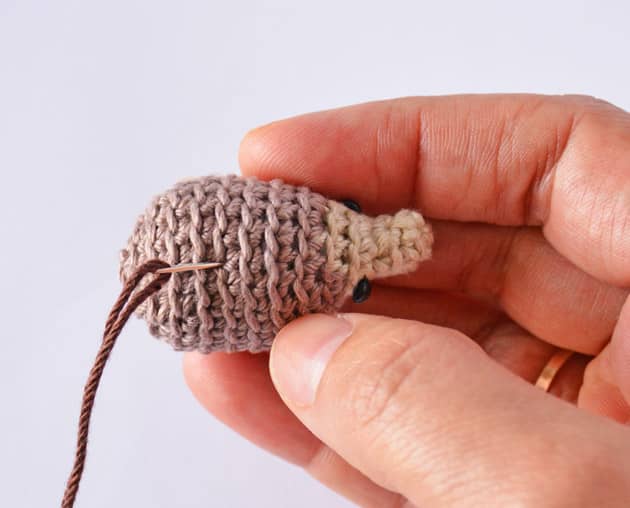 Take your needle out at the top front side, where I show here with my needle. Pull the yarn out but leave the end of it inside the little belly stuffing.
 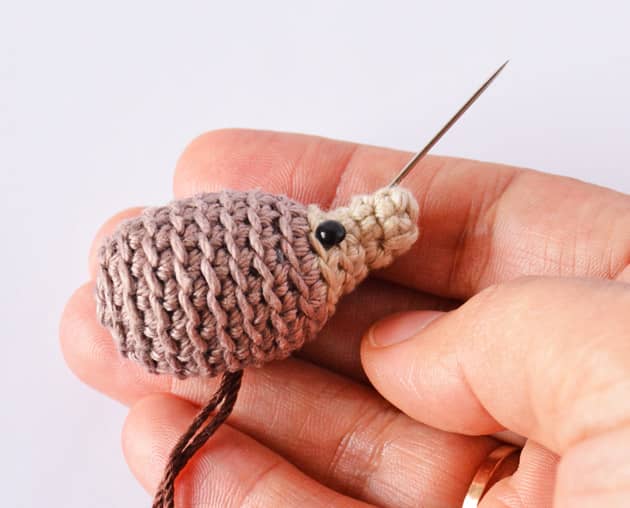 Now make a French Knot to create the tiny little hedgehog nose. Make it just as seen in This Video – This is exactly how I made it.
 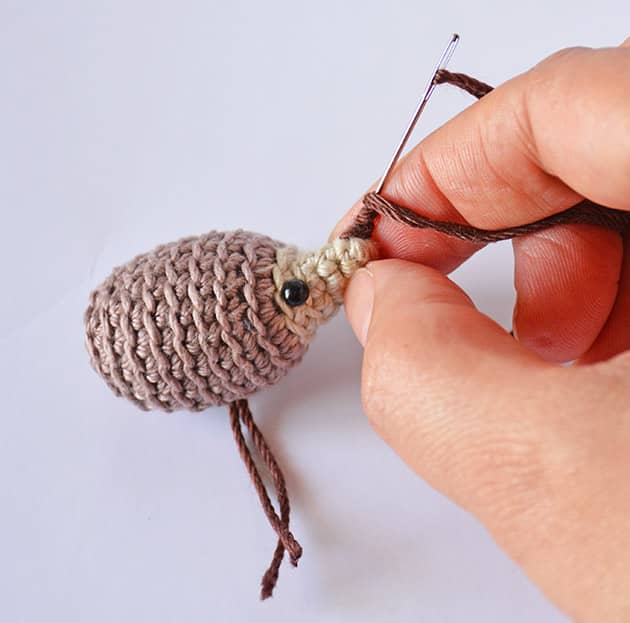 Cut the yarn tails that were left out of the body.
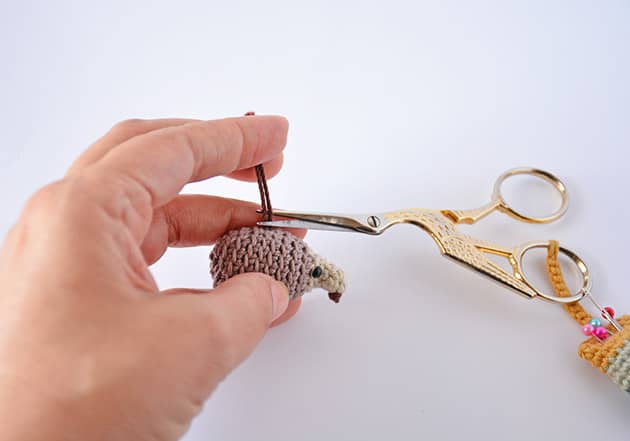 Is that tiny tini little Hedgehog looking at you? Is it a heart melting little creature? I am so in love.
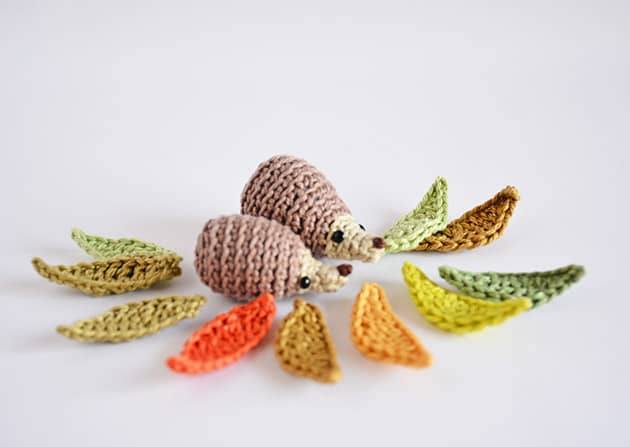
  Now look at this adorable baby Hedgehog, Do you think it needs some tiny leaves to lay on?
Lets make this simple one row leaf, for it now. Use any yarn oddments you have in stash.
To Start Ch 12.
Start working in 2nd chain from hook, as follows : 1 slst, 1 sc, 1 hdc, 1 dc, 1 tr, 2tr, 1 tr, 1 dc, 1 hdc, 1 sc, 1 slst. Fasten of, cut the yarn and darn in tails.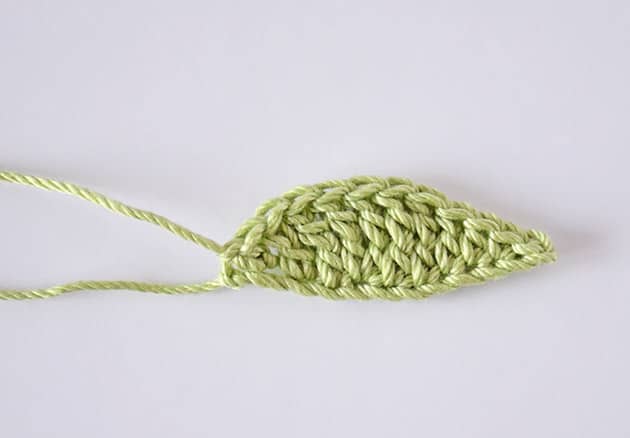 Make more of them, use any yarn oddments you have. In any colour you like.
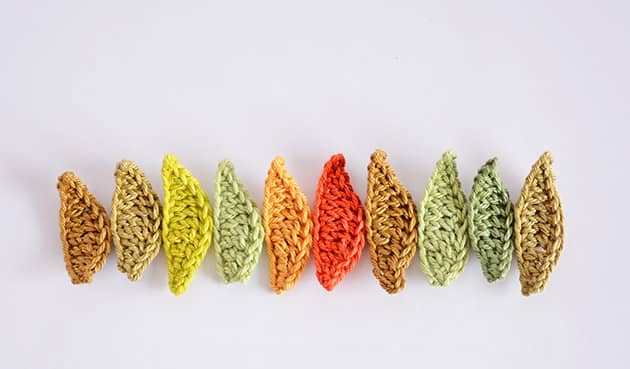
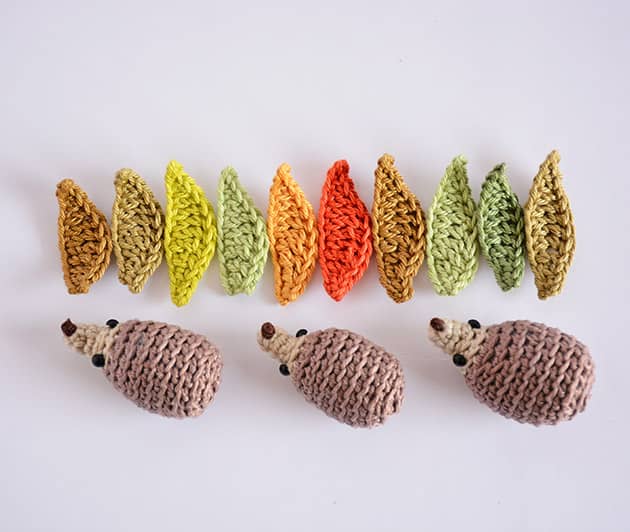 And I also added one leaf made of colour Brick.
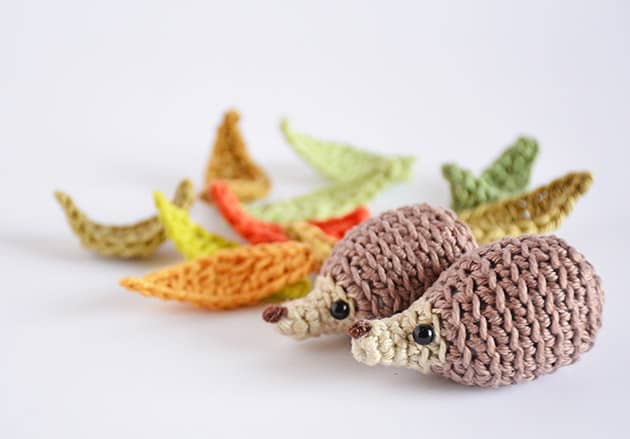 What think YOU? I am just in love, IN LOVE with these little creatures here.
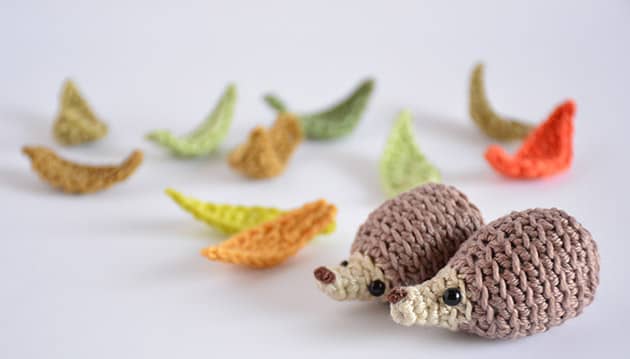
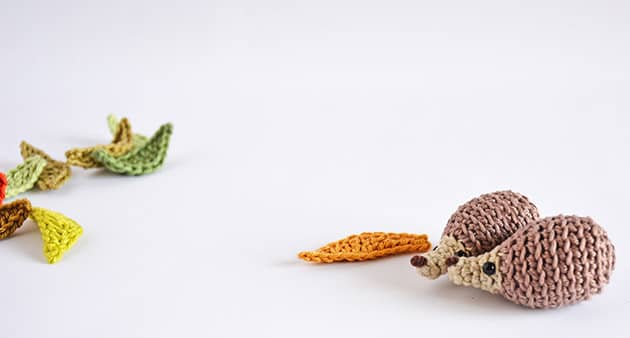 Are you making one? or more… Hope you enjoyed following my baby Hedgehog and leaves pattern. Hope you’ll give it a try, it is so simple and just cute. My kids were so happy to get one.
If you are on IG please share your Hedgehog with #CrochetObjet or #babyhedgehog. That was it for today, thank you so much for visiting me here, in my tiny little blog corner. xoxMo
Just words Pattern
To start With colour Hemp. Make a magic lp. Work in spiral, mark your first st on each rnd. If you don’t work with magic lp please ch 2 and work the first rnd into the first ch made, the closest one to the knot.
rnd 1. sc 4 in the yarn loop and tighten the loop.
rnd 2. sc in each st around. (4 sts)
rnd 3. * sc 2 in next st, sc in next * repeat between ** twice. (6 sts)
rnd 4. * sc 2 in next st, sc in next 2 sts * repeat between ** twice. (8 sts)
From now to end work in BLO – back lps only.
rnd 5. * sc 2 in next st, sc in next 3 sts * repeat between ** twice, ending the last part of the last sc with the next colour (Umber) on your hook. (10 sts) Fasten off the Hemp yarn.
rnd 6. In this rnd try to work on both yarn tails so you don’t have to weave them in later. * sc 2 in next st, sc in next * repeat between ** to the end of the rnd, which is 5 times. (15 sts)
rnd 7. * sc 2 in next st, sc in next 4 sts * repeat between ** 3 times to the end of the rnd. (18 sts)
rnd 8-10. Make 1 sc in each st around. (18 sts)
We will start making the last part of our tiny hedgehog by decreasing sts as follow: Continue working in back lps only.
rnd 11. * sc2tog, sc in next 7 sts * repeat between ** 2 times to the end of the rnd. (16 sts)
Make your sc2tog as follow: insert you hook to the next st BLO, yo and pull back (2 lps on hook), now insert your hook to next st BLO, yo and puul back (3 lps on hook). Now yo again and pull through all 3 lps.
rnd 12. * sc2tog, sc in next 2 sts * repeat between ** 4 times to the end of the rnd. (12 sts)
Fill in some stuffing material now.
rnd 13. * sc2tog * repeat between ** 6 times to the end of the rnd. (6 sts) Fill in some more stuffing material. Leave about 20 cm yarn tail, Fasten off, break the yarn and darn in the yarn tail.
Make a French Knot for the nose, with a double strand Sepia / dark Brown yarn.
7 comments on Crochet Baby Hedgehog & Leaves
Sandra
So cute!! I love the hedgehog’s turned up nose!
Mo Malron (author)
Thank you Sandra xxMo
Winifred Waite
That is gorgeous. Thank you for sharing this.
malki
love it sooo much thank you
malki
Mo Malron (author)
תודה מלכי יקרהשלי
Hope Brings
I made one with the colors of Mephiles the Dark from Sonic 06, now I have the cutest plush of Mephy in his shadow form, thank you so much for making this pattern.
Dolores
I know someone who has a hedgehog. We get a group together, in March and October, to make cards, scrapebooks, crochet, knit, etc. For the past two meetings, I’ve crocheted a hedgehog for her, but leave it at her desk so she doesn’t know who left it. I made your hedgehog for our Oct. meeting and can’t wait to leave it 🙂 It’s so adorable!!!