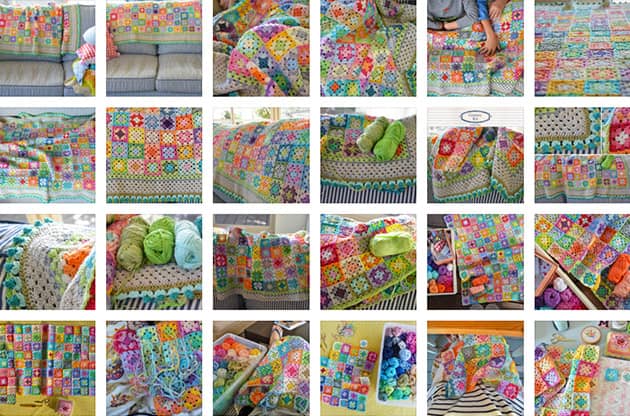
Today I will share with you many colourful pictures of my Cotton Bloom Blanket + 10 colouring tips + a list of all GrannyKit cotton colours crocheted in this colourful piece. I know some of you purchased the Bloom Blanket pattern and need some colour directions from me. The pictures and tips I’ll share here today are going to help you with colouring your blankets. Hope they will help you feel more comfortable mixing different colours into your blankets without any colour fear and with the joy that colour can bring into this Bloom Blanket making.
In case you like to create the exact same Bloom Blanket like mine here are some links you’ll need including the PDF for the squares colour layout:
The Bloom Blanket Pattern
The Bloom Blanket Kit – yarn pack
The Bloom Squares Colour Table – download here : BloomColorsTable
If you like to create your own colour work here are some guide lines: All the tips given here today are from my own colouring experience and are listed within the pictures of the making process. So, are you ready for some colour therapy session with me? Don’t say I haven’t warned you, this is going to be a full colour power post, it is really all about the power of colour. Come on, let’s get started with this colourful Bloom Blanket show-off.
 I will try to do it in chronological order, so to go to the very start of this journey, we have to go back to the summer of 2013, yes it was that long ago, when I’ve started this granny squares colourful project. At this time I just knew I wanted to crochet a 3 rounds colourful blanket that will be joined as I go. I had something in mind regarding the framing but wasn’t sure yet about the exact details. I just knew I wanted to have many colourful 3-round squares in the middle, framed with a wide colourful edging.
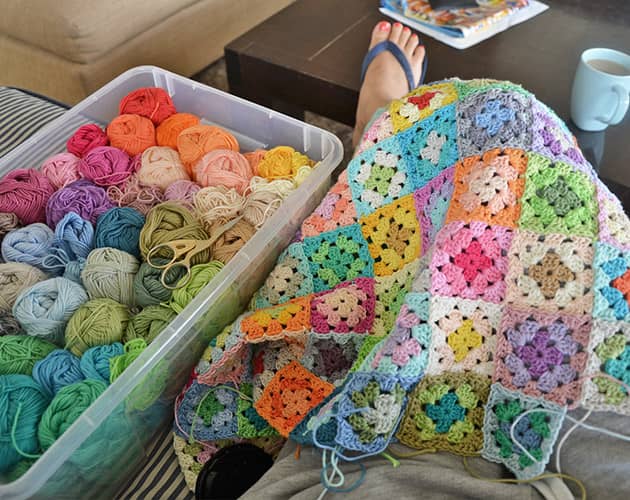
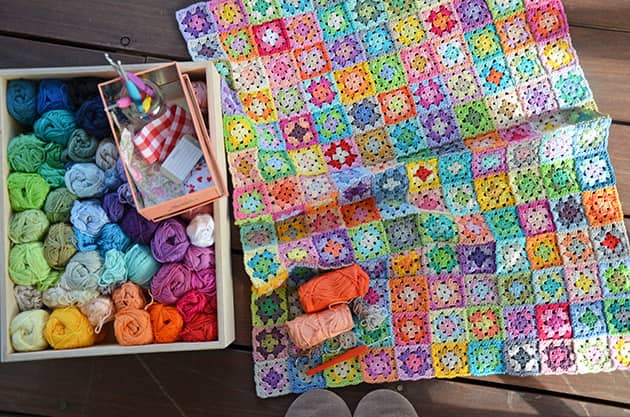
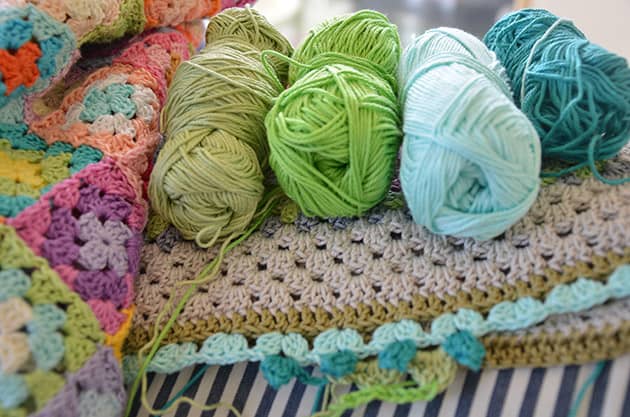
 I didn’t have any specific colour composition in mind, I just had a box with almost 50 colours of GrannyKit cottons next to me, colours that I like, which I used like a painter uses his oil colours box. Here comes my first tip for you:
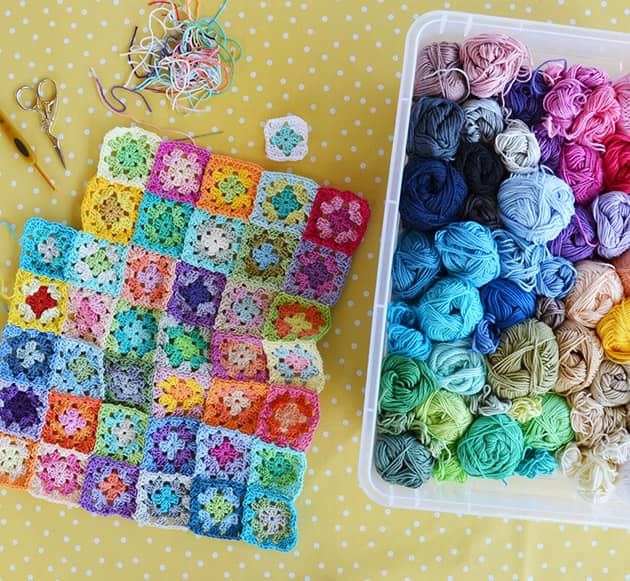
Tip #1. Find a nice yarn box that will make you happy each time you look at it and that you can easily take with you wherever you prefer to sit and work. It should fit for about 50 balls.
Tip #2. Make sure you have a nice colourful selection in your box, choose colours that you love. Add 3-5 shades from the same colour family, like 3 shades of pinks, 4 shades of greens, few cold colours, few greys, 2-3 dark colours etc. It will make your work richer and will help you create depth through colours. It will make your colour story bloom.
 I know, some of you may say: ‘I’m not good with colours, it’s hard for me to choose the right colours, how do you know which colour to put next’. I hear that so often in my workshops. Well, try not to say it. Just start from stop saying it and try to go with what you love, let your natural attraction follow you. Make it simple. choose colours you love. Put your hand on the colour you want to work with. Now when you choose the next colour, while crocheting your next round, take something similar, something from the same family. It will soften the general colour combination.
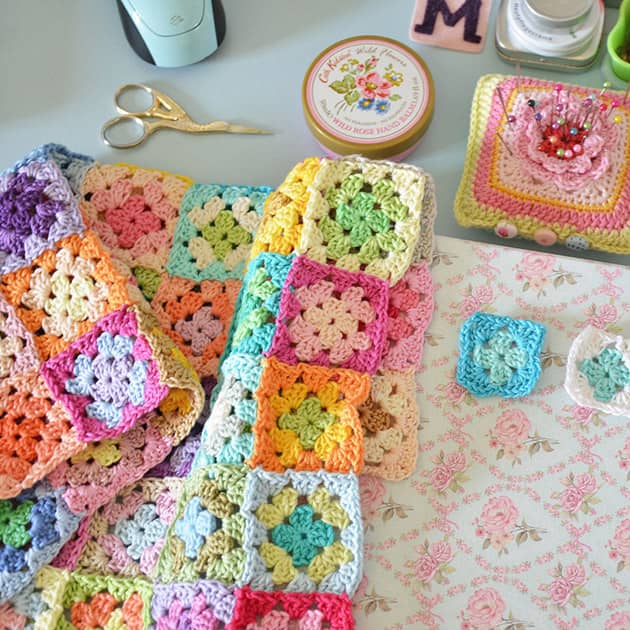
Tip #3. Use 2 or 3 colours from the same family, in the same square, one next to the other, like 2 or 3 hues of pink together. For example, make a square of : Framboise in rnd 1, Rose in rnd 2 and BabyPink in rnd 3. Does it make sense? Not all of the squares need to be worked that way, make few of these, in different colour families.
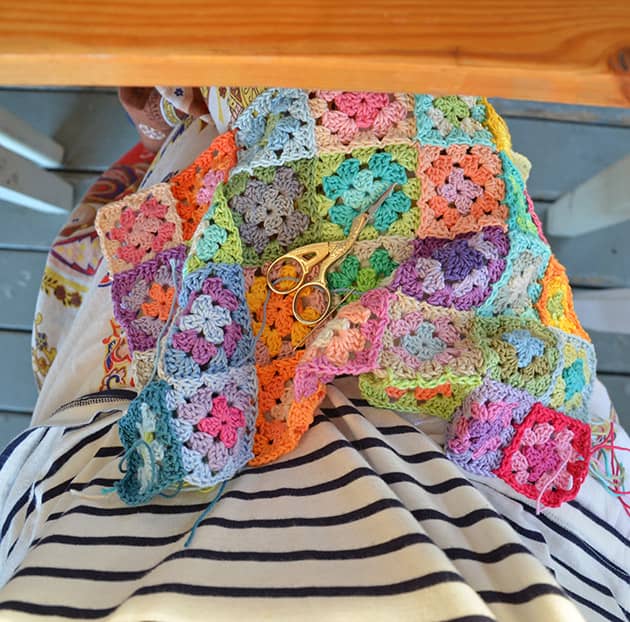
Tip #4. Make sure that the 3rd round will sit nicely next to the square you are going to attach it to. This is what I call: to start thinking from the end, when you start to work on a square, make sure rnd 3 will sit nicely next to the square you are going to join it to. 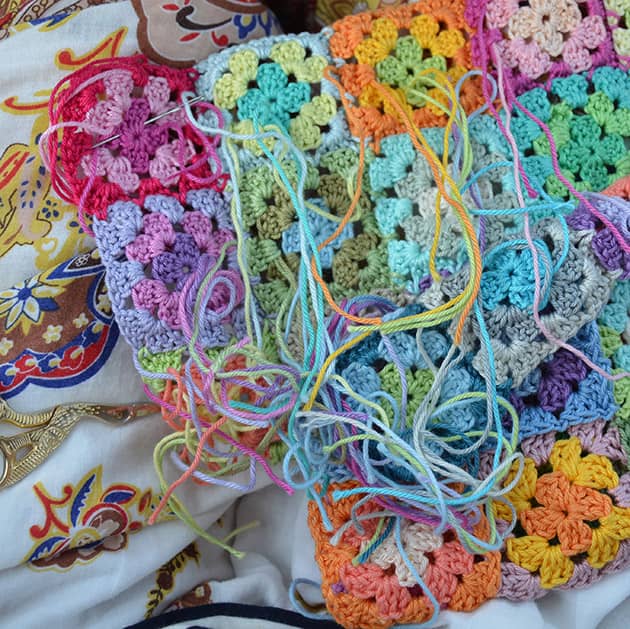 Tip #5. Keep this one close in mind as a very, very warm advice, stop every 3-5 squares and weave in tails. If you don’t do that you will hate it later and it will harm the joy of this colourful process. If you have more than 5 square tails to weave in, please take yourself to a nice location + add a cup of coffee or tea + music. If you can’t go out, sit next to a window. At the above picture you see me weaving in tails at the beach on a Saturday morning.
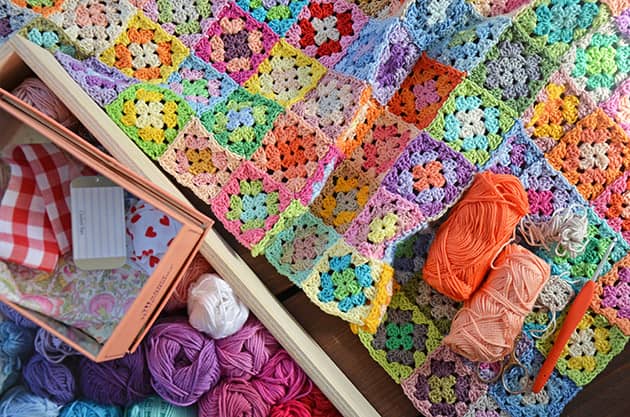
 Tip #6. Spread your colours evenly. Avoid creating colour areas. If you have 2 or 3 dark colours, spread them all over and make sure these colours appear evenly within your bloom squares. Make sure you are not creating colour areas. Make sure not to create darker or lighter areas, which leads me to the next tip
Tip #7. Try to soften dark colours by crocheting them next to other colours from the same family and keep in mind: dark colours can easily create a ‘hole look’ on the surface.
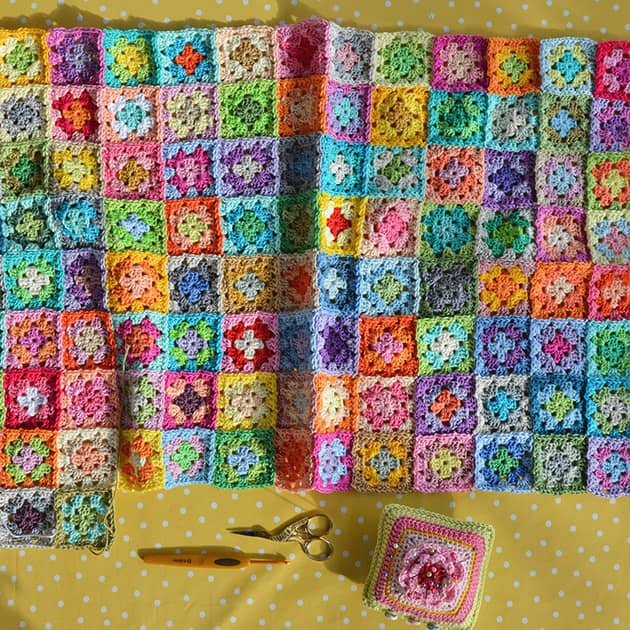
Tip #8. Take a distant look at your work from time to time. It will help you see which are the colours you used a lot, and which ones need more of your attention. Take your head out of your work. Take 3 steps back and look at it from a distance. Blink and try to see if there is a yellowish area or a blueish area etc…
Look at your bloom work through a mirror, it’ll help you get a fresh look at your own work. It will help you look at your work like it’s not yours, objectively. It will help you balance your colour diversification.
 Yes, you can always find another, nicer box for your cotton colours :). Actually It’s a very important part of this happy bloom work. THE nice nesting part of this crochet process.
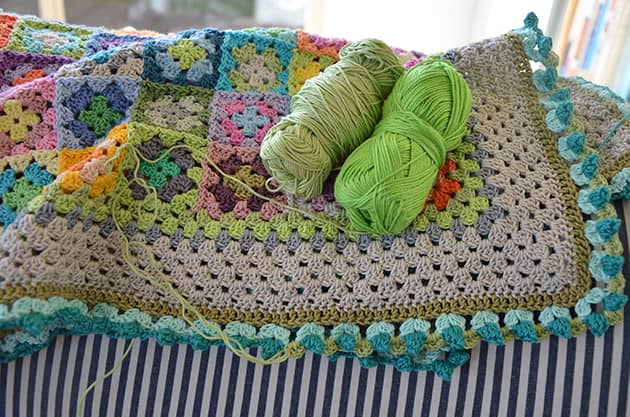
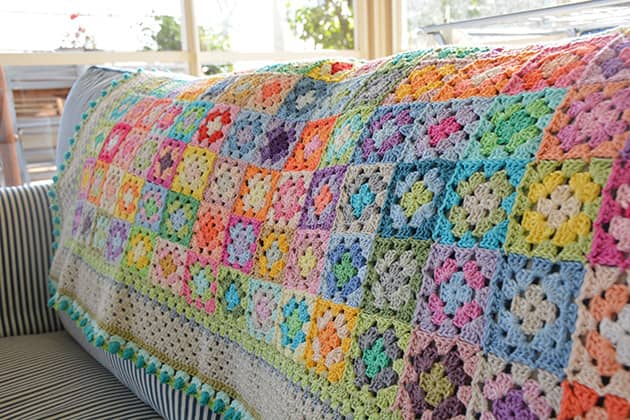
 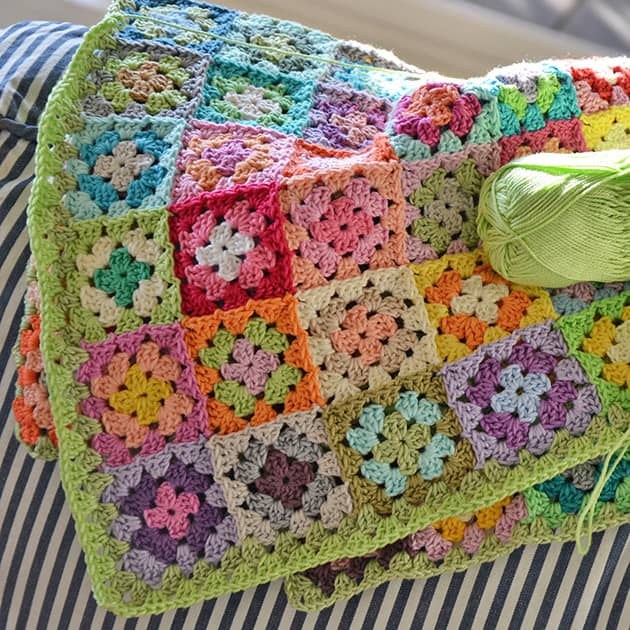 Framing: After joining 11×15 colourful bloom squares together, means 165 different 3 rounds squares, I came to the point where it looks right and beautiful to me. It was colourful as I wanted it to be and had this bloom effect and I was very happy at this point. I didn’t have any specific size in mind I just thought it is as beautiful as is and it was the right time to start framing it. I had no idea how its going to look. I just knew I want to crochet a wide framing to this bloom centre. I began to frame it with colours I liked, with granny cluster rounds, as simple as that.
I made the first round with Pistachio and the second round with LimeGreen. This is a very easy breezy work, the kind of work where you are so thankful for being a crocheter. You have your hook in hand and with a colour you like you just crochet clusters all the way around and this is so therapeutic, Meditative. So, why have I chosen these greens for my first 2 framing rounds?
Tip #9. Choose the colours you want to pop up, from your square work, crochet them into your framing. If you like the Turquoise within your squares to pop up, then give it a round or 2 rounds on your framing work. It will be even nicer if you crochet 2 different shades of Turquoise one after the other.
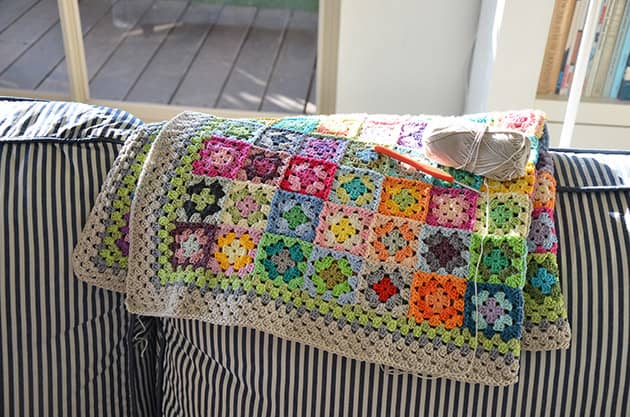
 After 2 rounds of different Greens I made 1 round of clusters with the colour Platinum, which created a soft preparation to the next 5 rounds crocheted with colour ShaleGrey. Now let me tell you something about this ShaleGrey colour. This colour acts exactly like tofu. Yes the tofu used in Asian food. I wanted to create a colour block that will widely frame my bloom blanket but will not take any of the bloom squares show. I knew I wanted it as the wider part of the framing but didn’t want it to look heavy. This ShaleGrey was the perfect choice as it is influenced by it’s surroundings, like if you put it next to cold colours it will act it’s cold Grey way. If you put it next to neutrals beige and creams it will show it’s warm natural Grey side. Choosing this ShaleGrey as the main dominant colour block on the framing, will not harm any of the bloom colourful square work but will let it bloom in it’s multi colour sense. This ShaleGrey colour block in the framing intensifies the colour composition of this bloom blanket while on the other hand is acting like a super perfect background for the next colour and texture story to come next. At this point I knew that this bloom blanket needs some bloom edging and the next rounds just flew out of my hands, intuitively.
 The next round I did is just dc’s crocheted around with colour Olive. This is the first round of the bloom edge. The olive softly frames the ShaleGrey and is there to create the base for the next bloom rounds. After this Olive dc’s around my blanket, I’ve crocheted the SeaFoam leaves, bubble clusters, they create this kind of nest, where the next round will grow up from. My next round was these flower buds that came out from the SeaFoam nest/leaves. The flower buds are crocheted with colour Matisse.
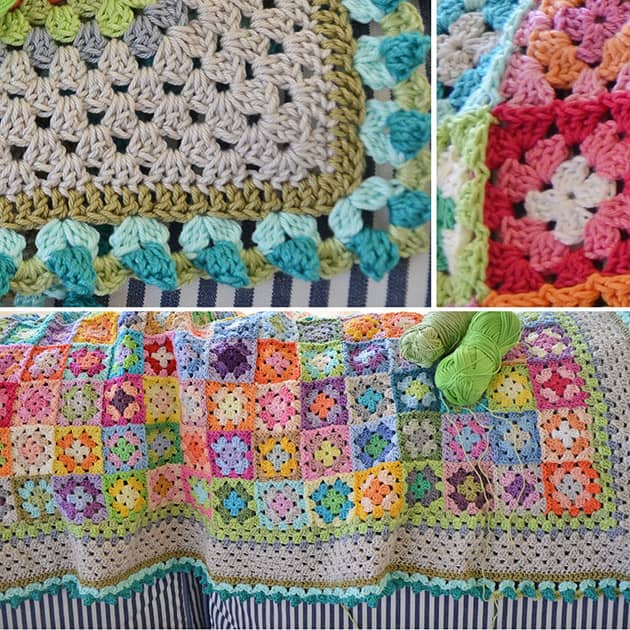
 Two last rounds for the bloom edging are made of 2 different Greens. This is going to make a nice connection to the 2 first Greens crocheted at the 2 first rounds of the framing.
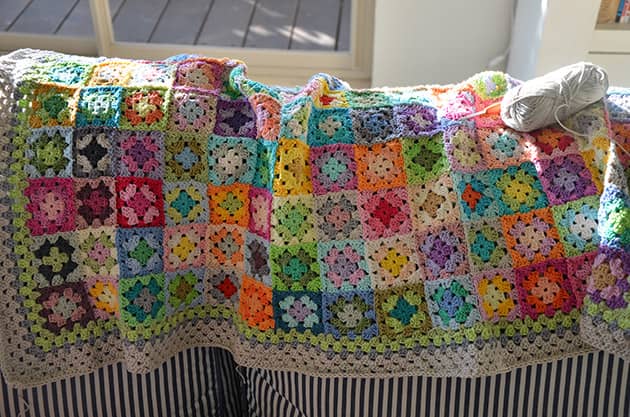
Tip #10. Try to work 1 or 2 of the framing colours more than once. I thought that for this bloom effect I would like to make the Greens pop up. I ended up with one round of Pistachio (same colour I used in first framing round). The last round of this bloom blanket project is crocheted with Apple which is a rich, bright, vibrant Green and at the same time makes the LimeGreen pop up brightly.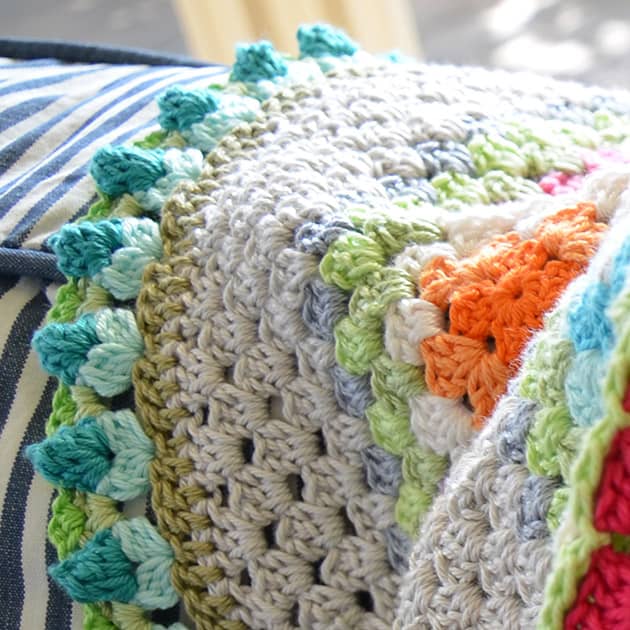 These 2 last rows of Greens make a nice detailed finishing on which the flower buds are laid nicely. The Apple is just showed as a small detail at the over all look of the blanket. It makes a nice background to the Matisse flower buds, while at the same time frame the blanket and hold it all together. The Apple is just the small last detail made to empower this Bloom edging. This is a total of 4 different Greens at the frame work + Matisse which is a Greenish Blue.
 A very popular question I’ve been asked a lot is: “what are the colours you have used in your Bloom Blanket, can you give me a list of them?”
So I made this list of GrannyKit cotton colours for you. The Bloom Blanket Kit is at the shop now. All the colours that are crocheted in my Bloom Blanket are there. Just note that few of them are working in a small amount within the bloom squares.
PINKS & REDS: Red, Fuchsia, Framboise, Rose, BabyPink, Cameo.
PURPLES : Aubergine, Amethyst, Lavender, Lilac, Violet, Mauve, Plum.
CORAL & ORANGES : Festive, Reef, Coral, Peach, Tangerine.
YELLOWS & NUTURALS : Spicy, Yellow, Corn, Lily, OffWhite, Caramel, Gold, Lace.
GREENS : Olive, Apple, LimeGreen, Pistachio, Moss, Mint, Sari, Grass, PineForest, Sage.
GREYS : Loft, Jasper, Platinum, ShaleGrey.
BLUES & TURQOISES : Turquoise, PaleBlue, Denim, SeaFoam, Foggy, Matisse, Teal.
This is the list of 47 different cotton colours used in my bloom blanket. Now, please take into consideration that few of them are in a very small use here, like the red, Aubergine, Teal and Lace.
For the bloom edging please add to this list: 3 more balls of ShaleGrey, 1 more ball of Pistachio,1 more ball of Olive, 1 more ball of SeaFoam, 1 more ball of Matisse (for the flower buds).
This comes to a total of 54 cotton balls.
For those of you who like to crochet their blankets, using the exact same 54 colours as in my bloom blanket – I’ve just listed This Bloom Blanket kit into my Etsy shop.  The Bloom Blanket pattern is a step by step pattern, with a close up picture for each step. Easy to follow, written in US term. Please read all the first section of the instructions, make sure you read carefully how to make each of the stitches. I wrote it very clear and detailed. You can find the pattern here.
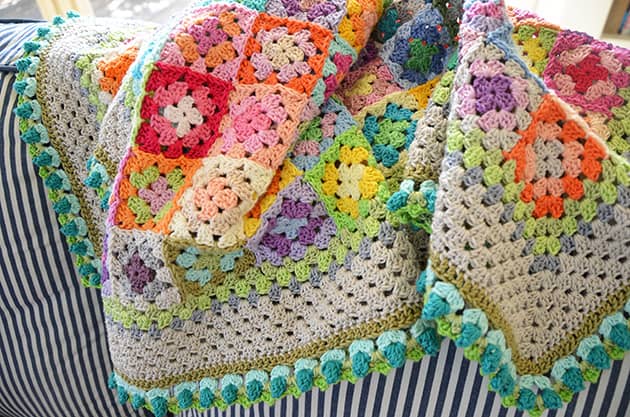
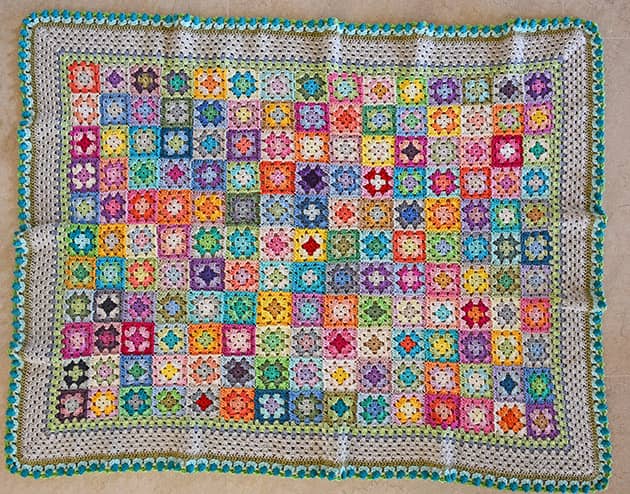 The final size of my cotton Bloom Blanket is about 80 x 104 cm. There are 165, 3 rounds square, at the middle, framed with this bloom edging.
 One more little something for you before you go. Lets talk time frame. I’ve started working this cotton Bloom Blanket back on the summer of 2013, but I can tell you that I only managed to finish it somewhere around mid of 2014. So, keep in mind – this is not a fast project!!! It is a long term project and you have to keep that in mind. It is a huge opportunity for you to enjoy a nice box or basket or bag of a Bloom Blanket project that will join you for the next months or even more. Personally, I’m a process person, never in a rush for the results. I have tons of patience and I really enjoy working on long term projects. This cotton Bloom Blanket was one of them. Yes it is a time consuming project but on the other hand your hands are filled with bloom colourful cotton squares that bring a lot of happiness to your life, more than you can imagine.
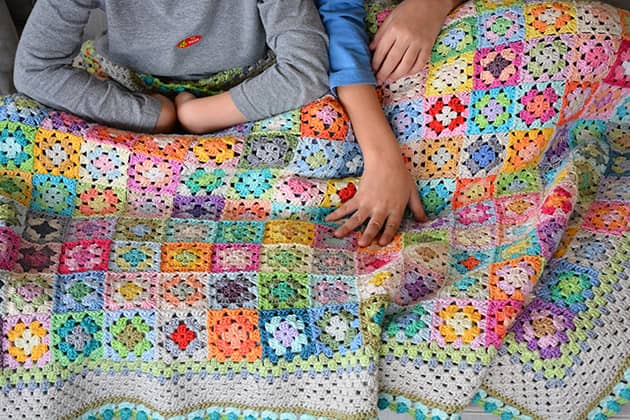
 Now look at this sweet little guy (Minion3) This little love of mine is so proud that his mommy made this blanket and he loves to fall asleep on the couch covered by this colourful cotton blanket. I am so sure you will not just enjoy the making process but will be very proud with the final result and so will your beloved ones.
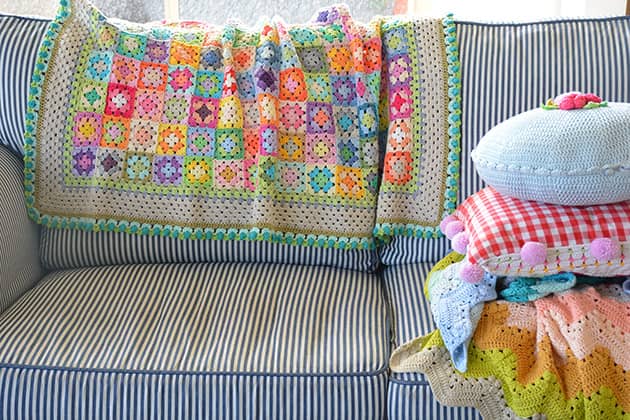 I really hope I answered all your questions. My aim was to make sure you see many pictures that might help you while crocheting your Bloom Blankets. I tried to put close up pictures together with full size ones. The tips I shared here are from my own colour work experience and I hope they will be your general guides. On the bottom line, you have to follow your natural taste of colours and crochet with colours you love. Trust your colour instincts, and along with these tips your Bloom Blanket will rock. I have many girls here at my workshops that are crocheting a Bloom Blanket or a Bloom Cushion. Each one of them with her own colour direction. Each one of them is beautiful and vibrant, you can see few on my Instagram if you like. It surprised me how beautifully this granny structure can show with so many different colour combinations.
If you happen to crochet your own Bloom Blanket please do share your work using #bloomblanket on Instagram.
Thank you so much for joining me to hear my Bloom Blanket story. I really love to have you here with me, xoxMo
20 comments on 10 colouring tips to make your Bloom blanket rock
Sandra
What a wonderful and colourful and harmonious blanket! I really like the edging. Thank you for sharing your tips on choosing colours.
Mo Malron (author)
Thank you Sandra
Leena
You are amazing Mo. Ever since I found your blog and shop it is the first site I visit everyday! Your colors and patterns are better than any I have ever seen. Thank you for sharing all your talents with us!
Mo Malron (author)
Leena, how can I reply to this great comment you left here? THANK YOU sounds silly. You made me very happy.
Gail Simpson
Your Bloom blanket is simply stunning, so beautiful
Mo Malron (author)
Thank you Gail.
Chele H
Mo thank you for this wonderful tutorial. I am a colour fanatic too, so your website feels like home in crochet to me! I am going to make a Bloom Blanket this year for sure. I can’t get the variety here in Australia in cotton so I will be buying your kit! Thanks again for your tutorial.
Mo Malron (author)
So great to hear you feel at home here <3, Chele H
Please come back to this post when you start you Bloom Blanket.
Kim
Thank you for this post! I just started making the bloom blanket and I refer to your blanket colors for inspiration. Your color combinations are beautiful. I’m having so much fun making this blanket with your granny cotton yarn which is the best cotton yarn ever! Thank you for sharing your talents! 😄
Mo Malron (author)
Thank you Kim, for this super nice comment, I’m having so much fun of this Bloom Blanket.
Enjoy!
Cherie
Thank you so much for these tips! I often give up on big projects because I can never decide on colors!
Is there a big difference between cotton and acrylic yarn?
Gail Glassey
Wow, thank you so much for such a beautifully written and informative post, I just come across by pinning beautiful blankets ideas for my own little ones and my Grand Children… Now I have a new place to purchase beautiful yarns and also to learn. I’m always dreaming up what I want to make or colours I’d love to put together only to become very disheartened when I’m not able to find the yarns in my local area. I’m over the moon with happiness at the moment, thank you so very, very much.
Lucia
Thank you very much Mo for such a beautiful work! All these colors…just wonderful. May I ask which cotton color have you used to join the squares? Have you used a crochet or a needle? Thanks a lot again 🌻
Sarah
This is so cheery! I love it! Thank you for all the good photos and explanations, I’m going to give it a try.
Eleonora
Gooooooorgeous! A true labour of love. Congratulations!
Alisa Douer
I am so overwhelmed by the pattern and color’s,
you make me happy by just looking at it. you have magic powers and you enchanted me
Mo Malron (author)
Thank you Alisa
Michelle
Okay, my wonderfully creative friend, I am excited to receive my Bloom Blanket Kit and get my hook ready for some Granny Kit cotton. I enjoyed reading your post and am ready for whenever it arrives. What a happy day that will be! XO
Mo Malron (author)
Hello my far away friend, The Bloom Blanket kit will be sent to you during the upcoming week with lots of love al the way from my little studio to your door!
Judy Houston
I’mnew to crocheting and have been knotting on the back. I wish i knew more about weaving the tails.