Hello bunny lovers, want to get your Angie bunny beautifully made for Easter? I have a new bunny dress pattern for you today. I called it ‘Pretty in Pink’ and it is not just a beautiful bunny dress but also comfy and removable. It has a tiny little fabric button at the back so it is easy to take out. Pretty in pink is an easy pattern to make and Angie looks so cute wearing it. It makes her feel pretty but not too dressed. She likes to wear it when she goes out but also when she’s at home. In this dress she feels pretty enough to go to the front door if someone’s surprisingly comes to visit her. It happens a lot with bunnies. She likes to have friends for tea & cookies, she grows some tea herbs in her garden. I can tell you she is very happy when the sage blooms, at spring time. 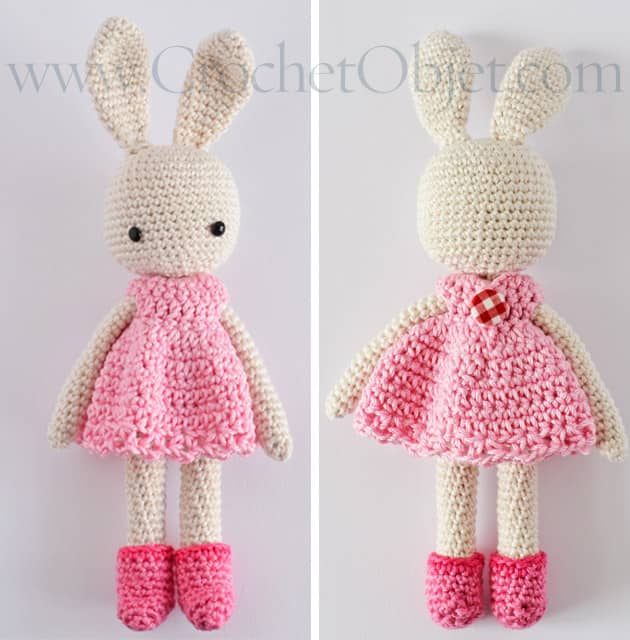 The pretty in pink is a perfect spring – summer bunny clothing and a super cute tea time dress. Yes we will also make shoes today, to add some pretty to this pink bunny story, I can’t stand this gorgeous bunny styling, I’m telling you. So are you ready now for a step by step pattern with me? would you like to join a virtual workshop here with me today? come on lets get started.
 WHAT DO YOU NEED
Yarn: GrannyKit cotton colour BabyPink, Rose & Berry.
Crochet hook: 2.75 mm
A pair of crafty scissors
Tapestry needle & stitch markers
Tiny fabric button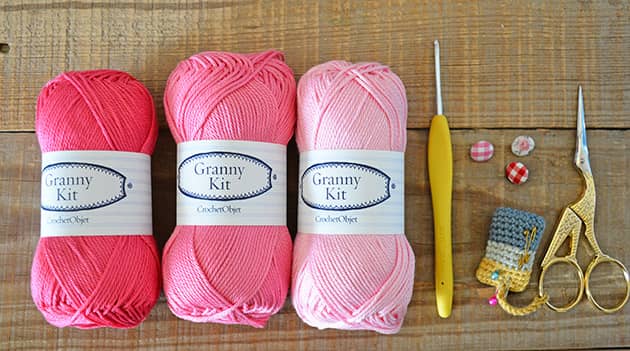 ABREVIATIONS AND STITCHES (US crochet terms)
ch = chain stitch
st(s) = stitch(s)
rnd(s) = round(s)
yo = yarn over
lp(s) = loop(s)
*…* = repeat instructions between ** x times
sc = single crochet = insert hook, yo, pull the lp back through the st (2 lps on hook), yo and pull through both lps on hook.
hdc = half double crochet = yo, insert hook, yo, pull the lp back through the st (3 lps on hook), yo and pull through all 3 lps on hook.
To Start: ch 13 with colour BabyPink – leave about 15 cm yarn tail, we’ll need it later to sew the fabric button.
row 1: Hdc into the 3rd ch from hook, where I show on left below pic – counts as 2 hdc in first st. Make 2 hdc’s in each st across. (22 sts)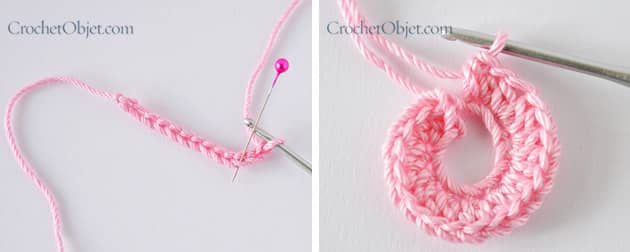 row 2: ch 1 and turn, sc in first st, where I show on left below pic, sc in each st across. (22 sts)
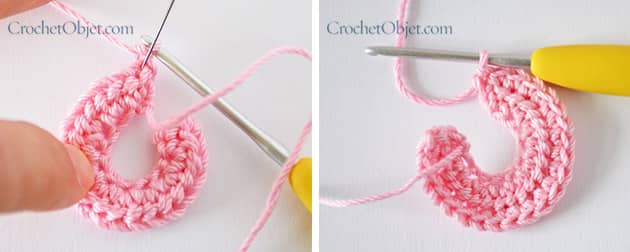 row 3: ch 3 and turn, you’ve just made the button loop in the first st, now hdc in next 3 sts, make the first hdc at the point where I show with my sewing pin, in below left pic, ch 2, sk 3 sts, hdc in next 8 sts, ch 2, sk 3 sts, hdc in last 4 sts. (16 hdc’s + 2 times ch2). We’ve just made the sleeves openings, as seen in right pic.
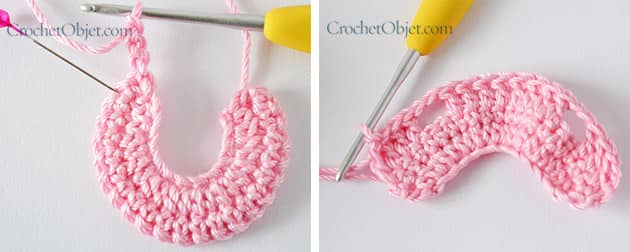 row 4: ch 1 and turn, sc in first 4 sts, the 4 sts I show on left below pic with my sewing pins, sc 2 in ch 2, sc in next 8 sts, sc 2 in ch 2, sc in last 4 sts. (20 sts)
 row 5: ch 2 and turn (counts as first hdc), hdc in same st, at the base of ch2 – see left pic, hdc 2 in each st across. (40 sts)
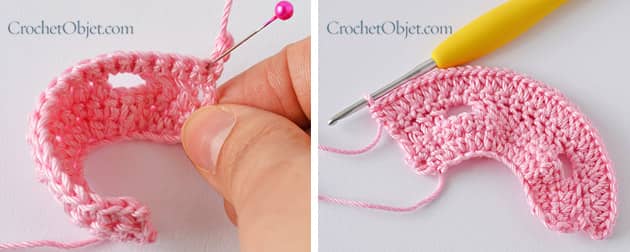 We will start working in rnds now.
rnd 1: Fold your work and sl st into the 2nd ch of your initial ch2, from last row – make it a circle (see left below pic). Ch 1 (counts as first sc), sc in each st around. To close the rnd, sl st to first ch made. It will look like the right below pic at the end of this rnd. (40 sts)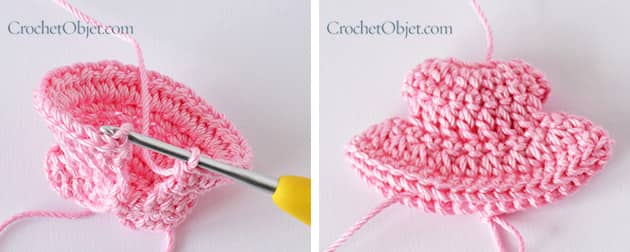 rnd 2: ch 2 (counts as first hdc), hdc in same st, where I show on left below pic, hdc in next 4 sts, *hdc 2 in next st, hdc in next 4 sts* repeat between ** to end, sl st to the 2nd ch of you initial ch2. (48 sts). It’ll look like the right pic at the end of this rnd.
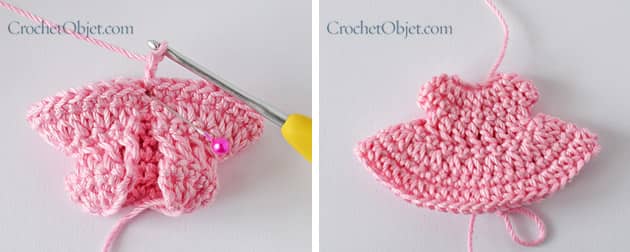 rnd 3: ch 1 (counts as first sc), sc in each st around, sl st in first ch made. (48 sts)
rnd 4: ch 2 (counts as first hdc in first st), hdc in each st around. Sl st in 2nd ch of your initial ch2. (48 sts)
rnd 5: ch 1 (counts as first sc), sc in each st around, sl st in first ch made. (48 sts)
rnd 6: ch 2 (counts as first hdc), hdc in each st around, sl st to 2nd ch of your initial ch2. (48 sts)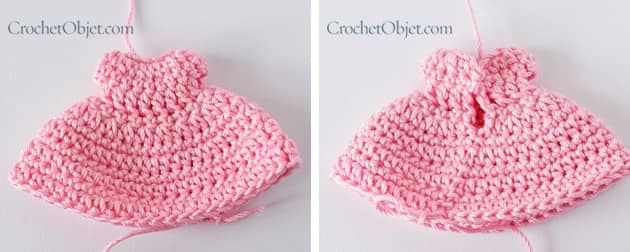 We will make the last rnd now, which is the pretty in pink edging.
rnd 7: ch 4 (counts as first hdc + ch2), hdc in same point (left pic), *sk 2 sts, into the next st make: hdc + ch2 + hdc – all into the same st* repeat between ** to end, sl st to 2nd ch of your initial ch4. Fasten off and weave in the tail.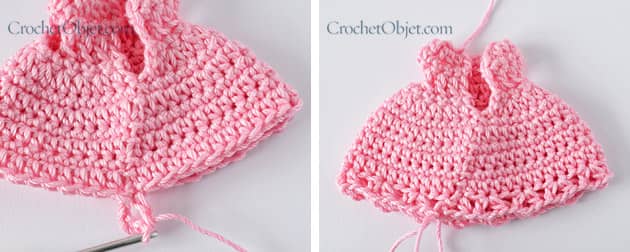 It should look as cute as this now. Put it on your bunny and see how cute she is wearing the pretty in pink dress. ohh waht a joy, bunny joy! You’re almost done, just one little button to add. Take your tiny fabric button and follow me.
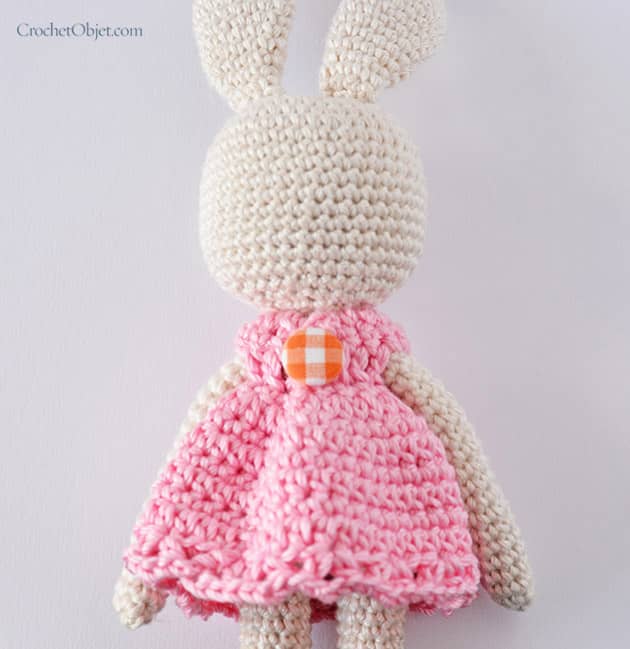
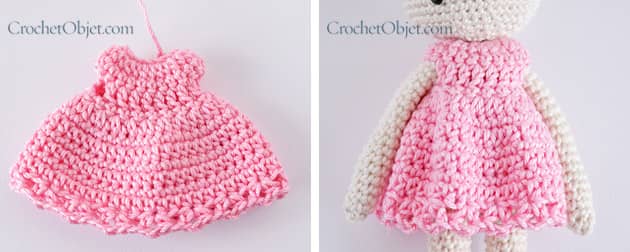 Thread a needle onto the yarn tail left from the beginning of the work. Place the tiny little fabric button opposite the button loop (left pic). Sew the button in place, using the plastic leg at the back of the button (right pic).
 Put the dress on your Angie bunny, from the legs up to the body, pull the hands through the sleeves openings and button it up.
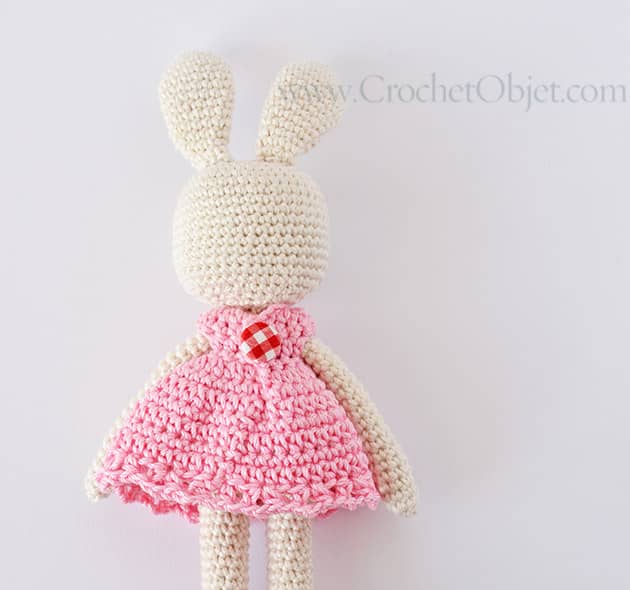
 Make more ‘pretty in pink’ dresses for your Angie Bunny. You can change colour on the last rnd, as I did here on the Berry dress, the top one in the below pic. I think we need to go on making pretty in pink shoes now.
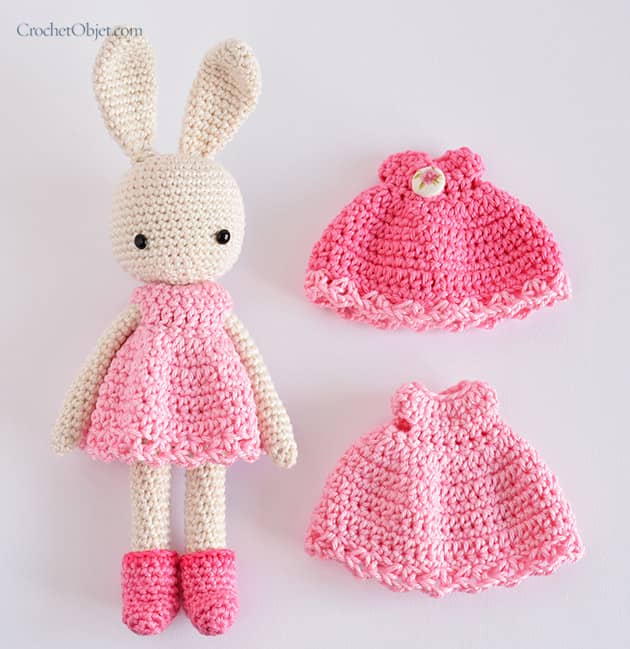
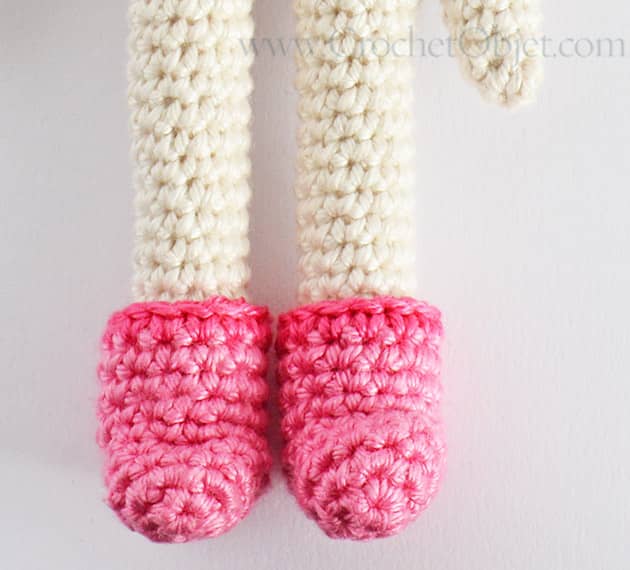 For the ‘Pretty in Pink’ shoes: make the Nordic boots pattern, using colour Rose. Repeat rnds 1-12. On rnd 13 change to colour Berry and sc in each st around. Fasten off and weave in tails. Weave in tail as I taught you on Angie bunny first leg.
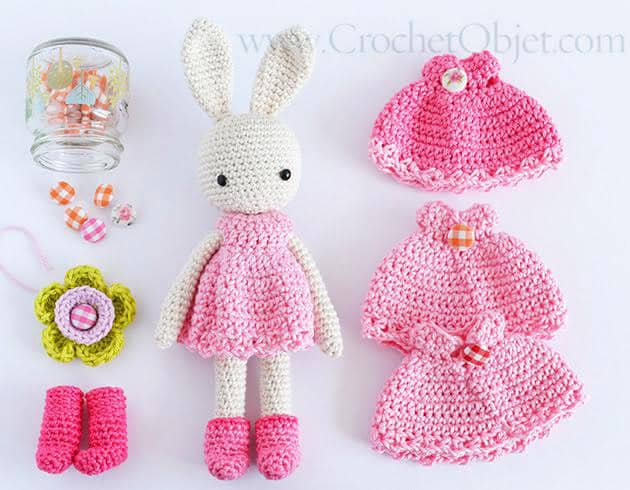 That is all for today, bunny lovers, if you followed my tutorial with hook and yarn, your Angie bunny is a pretty in pink now. You made it!! I hope you enjoyed following my bunny dress tutorial. I think you might want to try making this dress in few more colours and with different shoes combination – make it awesome. Play with this bunny joyful work.
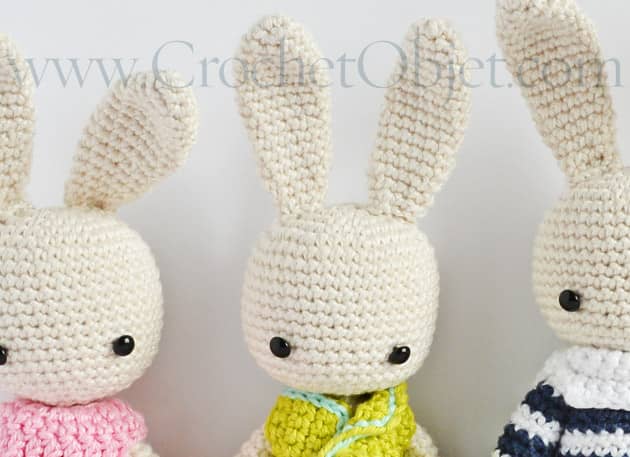
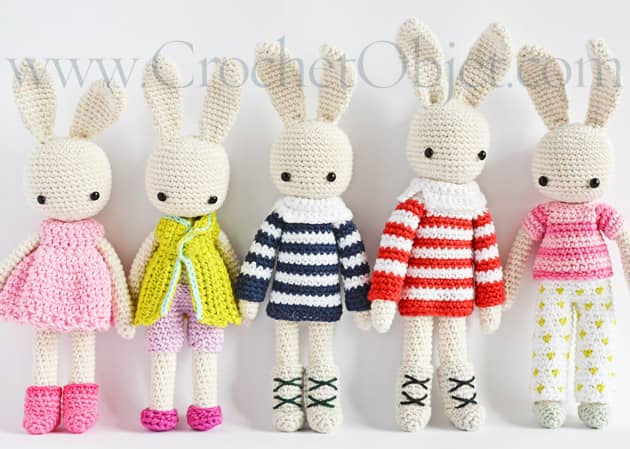 So till next time you have some busy hands here, making Easter bunnies. These are my Angie bunny clothes patterns – all these are written patterns by now, I’m so so SO proud. From left to right: Pretty in pink dress, the Spring Gardener, the Stripped turtleneck dress & the Cosy Easter outfit. All these step by step patterns are available now, If you had the chance to make one of them or more and you’re on Instagram, please share your bunny creations using #angiebunny. THANK YOU! I’ld love to see your Angies.
 psssssssss…. are you still there? here is a little something for you, if you’re waiting for the Baby Bunny pattern, It’ll be the next step by step pattern on my shop, VERY SOON…. because well, I love writing down patterns. I enjoy spreading a little magic through my pattern making and I really enjoy so so much to see your work…. Stay tuned, xoxMo.
22 comments on Angie Bunny Dress – Pretty In Pink
Sandra
Your girl bunny is absolutely adorable in her little pink dress!
Mo Malron (author)
you’re so right Sandra, Thank you
Charlene Brown
As usual beautiful colors and easy to read instructions!
Mo Malron (author)
Great Charlene, thank you
Anne Attard
Brilliant, Beautiful!!! I am loving these removable clothes, because my hands are only up to making 2 bunnies (arthritis at 45, with small children isn’t fun), and being able to change the clothes is perfect for me, because I can’t manage to make a whole bunny family. Thank you so much for all these variations. Little secret, I think I am way more thrilled with Angie, than my children. They think she’s great, but I am in raptures every time you release new patterns. Like you, I can’t stand this bunny gorgeousness!!! 😀😀 Thank you, Mo.
Mo Malron (author)
O Anne, thank you so much for crocheting my Angie bunny pattern!
I’m so happy you made 2 of them and that you love them. They will make you happy whenever you look at them. kisses&hugs to you… keep up!
Trista Tyler
Mo I want to thank you again for such a cute #angiebunny pattern. I just got done with the dress. I love it 😍 Next I’m going to try the free Nordic boots.😉 Then different colors with my bonbon yarns.😁👍👌❤ Much love from G.Villa, Utah USA.
Mo Malron (author)
Much of love back from me and all my Angie bunnies
Sue Stone
Hello Mo,
I just love your Angie bunny pattern which I intend to buy, I think people drool when they look at your site and the beautiful work you do. I have been trying to print the free dress pattern for the bunny (several times) but nothing happens, was wondering if I am not doing it properly, my printer is not working or you have taken it off. I don’t know if it should have a PDF but there is nothing there to say open one. I am not very computer literate. I have even asked my husband to try and do it to no avail. We are from Sydney, Australia but were in Israel in April on a tour our 3rd trip there as lovers of the bible and the Holy Land. Hoping to hear from you soon.
Thanks Sue
Mo Malron (author)
Hi Sue,
Thank you for your nice words, this means so much to me. The Pretty in pink bunny dress is not a PDF and maybe this is the reason why you’re having problems printing it? I really don’t know…. In any case, you can enjoy it on my blog. Next time you come visiting Israel please come over and visit me 🙂
Hope I helped you,
Mo
Sue Stone
Hello Mo,
Thanks for getting back to me so quickly. Will just have to work off the blog. Would have loved to have visited this time but on a bus tour. Only a bit of free time
in Jerusalem.
Regards Sue
Amber
Love your adorable pattern. It was so easy to read and follow. Thank you!
Susan
Thank you so much for sharing your patterns.. I made the baby bunny and used mint green. I added a headband with a bow! You do such beautiful work!
Hanne
How cute is this rabbit!! 😍😍
Can you tell me how tall this one is? Thank you 😘
Mia
Hi, Your work is beautiful. I would love to get your bunny pattern. Do you sell it or give it on your blog for free? Either way, I like it and would like to have it to make for my girls.
Thank you!
Mo Malron (author)
Hi Mia, thank you for your comment.
Please find Angie pattern here: https://www.etsy.com/shop/CrochetObjet?ref=l2-shopheader-name
Susanne Hayward
Hi, I am now following quite a few of your boards (and they are gorgeous) I particularly adore Angie (oh, but quite a lot of everything else too) it is so difficult to decide. I am moving from the UK to Spain and I am really looking for something new to keep me occupied. I am so looking forward to making these. Do you have a pattern for the Bunny?
Mo Malron (author)
Thank you Susanne, Here is a link to Angie bunny pattern:
https://www.etsy.com/listing/263276112/crochet-pattern-angie-bunny-step-by-step?ref=shop_home_feat_2
green instagram followers app
I’d like to thank you for the efforts you’ve put in penning this blog.
I am hoping to view the same high-grade blog posts from you later on as well.
In fact, your creative writing abilities has motivated
me to get my very own website now 😉
Rose Blaszak
Thank you for the patterns. I’ve made two adorable bunnies so far and my 7 year old loves them and the clothes are perfect (Her daddy past away two years ago and this new bunny family is helping her continue to heal the loss in such a cheerful way). The patterns are very detailed, easy to read and follow, and beautiful pictures.
sara otero
Gracias por tanto, sencillos de compresiòn los patrones…bella combinaciòn de colores, belleza y delicadeza. Gracias
Charlie Davies
Hi there
Thank you for sharing this lovely pattern, I can’t wait to get started. I wanted to ask you though, I quite often see in your pictures that you have some sort of pin cushion thing attached to your scissors… I don’t suppose you have a pattern to make one of those?
Kind regards