Are you ready for a little bunny ear tutorial today? Hope you had the chance to crochet your own baby bunny by now. We are going to make an open ear version for this cute little one. I really hope you enjoy the pattern and I am very grateful for your great feedbacks on my new amigurumi pattern. So, lets get started then, go get yourself a cup of coffee or tea, put some nice music on youtube and follow me. We are going to have a little crochet happiness here.
WHAT DO YOU NEED
Yarn: GrannyKit cotton colour Sand
Crochet hook: 1.75 mm.
If you feel it’s too hard for you to work with the 1.75mm, change to 2mm or MAX 2.25mm
A pair of crafty scissors
Sewing pins, Tapestry needle & stitch marker
One little baby bunny crocheted with no ears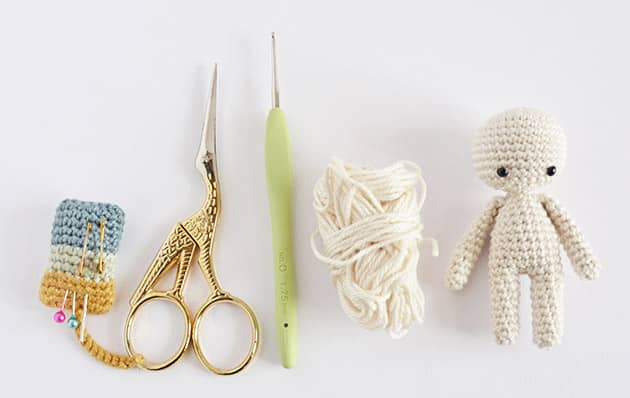 ABREVIATIONS AND STITCHES (US crochet terms
ch = chain stitch
st(s) = stitch(s)
rnd(s) = round(s)
yo = yarn over
lp(s) = loop(s)
sc = single crochet = insert hook, yo, pull the lp back through the st (2 lps on hook), yo and pull through both lps on hook.
hdc = half double crochet = yo, insert hook, yo, pull the lp back through the st (3 lps on hook), yo and pull through all 3 lps on hook.
dc = double crochet = yo, insert hook, yo, pull the lp back through the st (3 lps on hook), yo and pull through 2 lps (2 lps on hook), you and pull through 2 remaining lps on hook.
TO START: Ch 9
rnd 1. sc in 2nd ch from hook, sc in next 6 sts, sc 3 in last st – tighten to close the hole. It should look like right bellow pic now. Now work from the other side of the foundation ch, using the other side of each st – as I show on left bellow pic. Work on your yarn tail as follow: sc in next 6 sts, sc in first st, at the point where I show on right bellow pic. (17 sts)
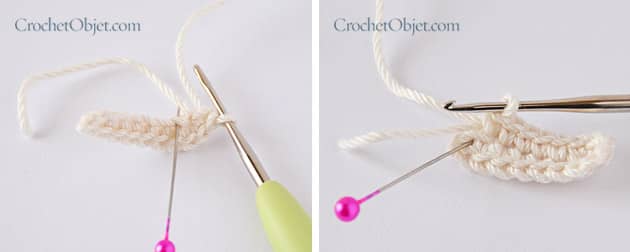 rnd 2. sc in first sc made in previous rnd and mark this st, sc in next st, hdc in next 2 sts, dc in next st, dc2 in next 2 sts, dc in next 2 sts, ch1 (this will make the tip top)
 Continue working rnd 2 as follow: dc in next st, dc2 in next 2 sts, dc in next st, hdc in next 2 sts, sc in last 2 sts. It should look like the left bellow pic when you finish rnd 2. (21 sts + ch1)
rnd 3. sl st in next 2 sts (left pic). Fasten off leaving about 20 c”m yarn tail to sew the ear to the head later.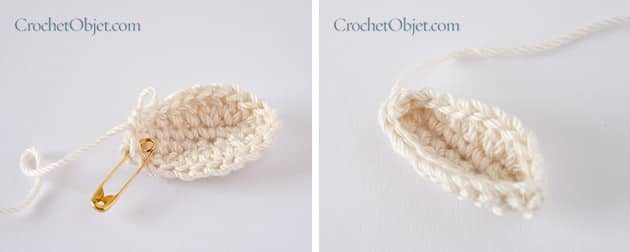 Make another identical ear, same as we just made the first one. Leave about 20 c”m yarn tail to sew the ear to the head. Now, when you have both ears made, shape each ear top centre with your fingers, to help it get it’s bunny shape.
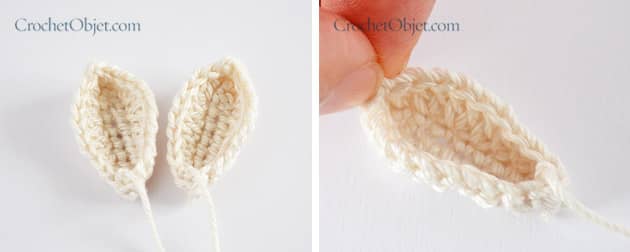 Locate the ears in their right place on your baby bunny head. Put them so they are almost “kissing” your centred magic lp, use 2 sewing pins to locate them.
 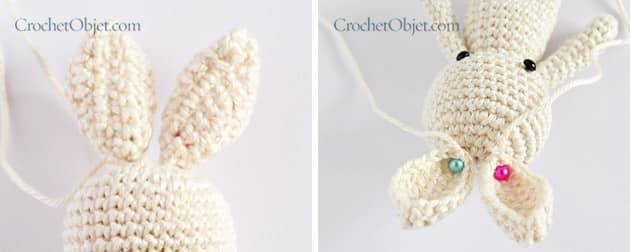 Sew them to the head, using the yarn left on each ear. Make 2-3 sts to place each ear, make sure they sit nicely in place and don’t let them move from their right place while you’re sewing. This is the part I like less in all this delicious bunny make, there’s no easy way to do it, it’s not fun work I know, but placing the ears right is where our bunny gets it’s bunn character.
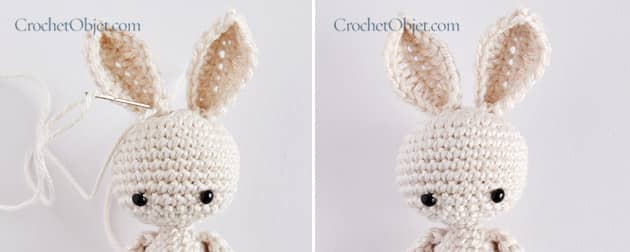 Your baby bunny has it’s bunn ears on now, …. I just love this baby open ear version, really really love it. It’s cute and soft and very much like bunny. Huggable bunny.
Now, for those of you who like to have just a written pattern with no pictures, here is the “just words” pattern for you:
TO START: Ch 9
rnd 1. sc in 2nd ch from hook, sc in next 6 sts, sc 3 in last st – tighten to close the hole.
Now work from the other side of the foundation ch, using the other side of each st. Work as follow: sc in next 6 sts, sc in first st. (17 sts)
rnd 2. sc in first sc made in previous rnd and mark this st, sc in next st, hdc in next 2 sts, dc in next st, dc2 in next 2 sts, dc in next 2 sts, ch1 (-this will make the tip top), dc in next st, dc2 in next 2 sts, dc in next st, hdc in next 2 sts, sc in last 2 sts. (21 sts+ch1)
rnd 3. sl st in next 2 sts. Fasten off leaving about 20 c”m yarn tail to sew the ear to the head later.
Locate the ears in their right place on your baby bunny head. Put them so they are almost “kissing” your centred magic lp. Sew them to the head, using the yarn left on each ear.
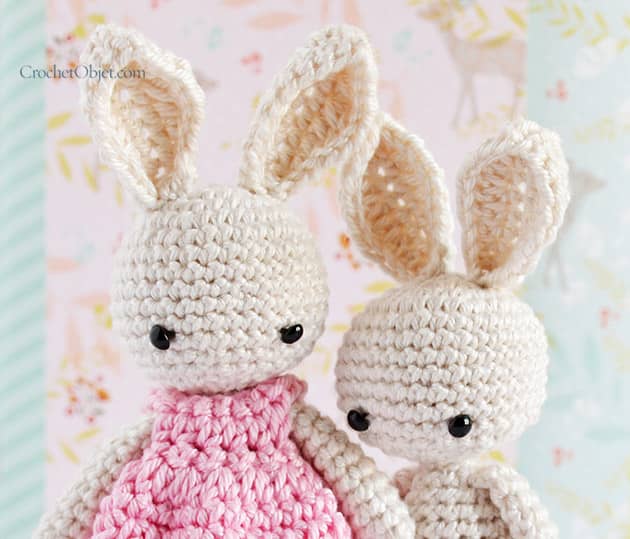
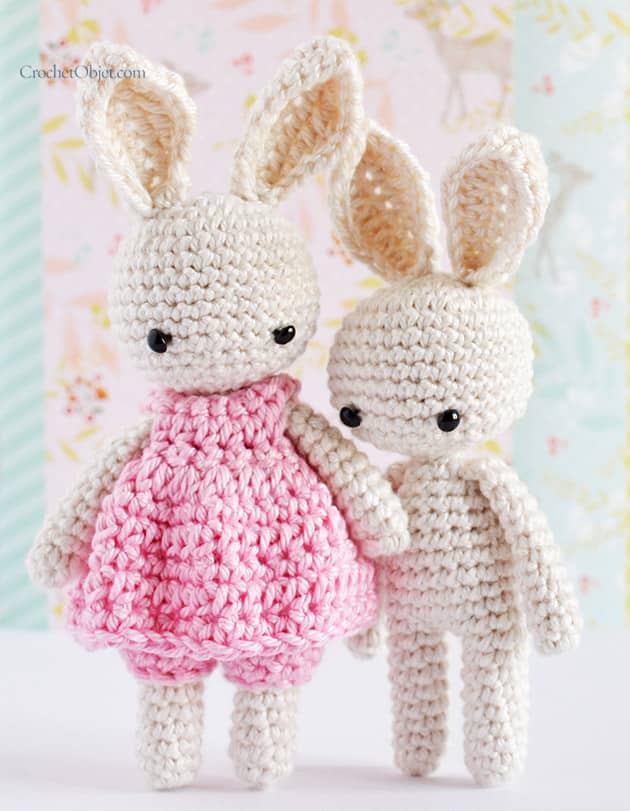 Look at them, these brother and sister bunnies are absolutely heart melting. I’m so sure you’ll enjoy making your own bunnies family. We will learn this mini pretty in pink dress here soon and more baby clothing will be available on my shop, in the neer future.
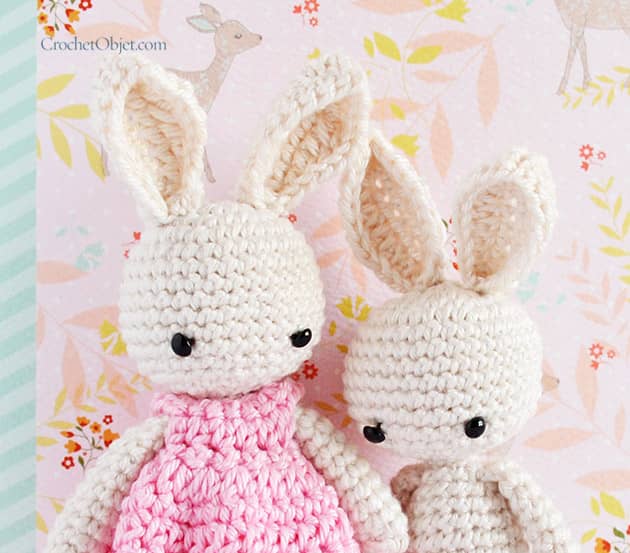 That’s it for today… bunny lovers. I hope you liked making the open ear version here with me, see you soon with some more pretty hooky treats…. xoxMo
P.S. The beautiful background on the bunnies pictures is made by my friend –Tamar Nahir Yanai – a talented illustrator.
11 comments on Baby Bunny Ears
Winifred
Ah bless! They are gorgeous.
Mo Malron (author)
Enjoy!
jésica
Muchas Gracias POR COMPARTIR ESTO!!!! Tu trabajo es excelente e inspirador. Desde Bolivia
Mo Malron (author)
Muchas gracias
Lucy
Can you possibly post a video on how to do the bunny ears? I can do chains, sc, hdc, dc, tr, dtr, etc… but when I follow the pattern my ears don’t look like the ones in pictures. Mine has gaps.. I’m desperate for help.
Staci Morelock
Just adorable ty for sharing
Keitha
Thank you so much for sharing this pattern. I used it for ears on a crochet armadillo. They look perfect!
Kerry Creel
Well explained and well photographed! Thank you for making it easy!
Mo Malron (author)
Thank you!
Syeon Kim
Could you write down the measurements of the ears? I’ve made a bunny head but i’m not sure if it fits the size of it 🙂 Thank you!
Rosie Milford
I wanted to make a bunny so I did the body myself and used these ears!It looks great tysm❤️